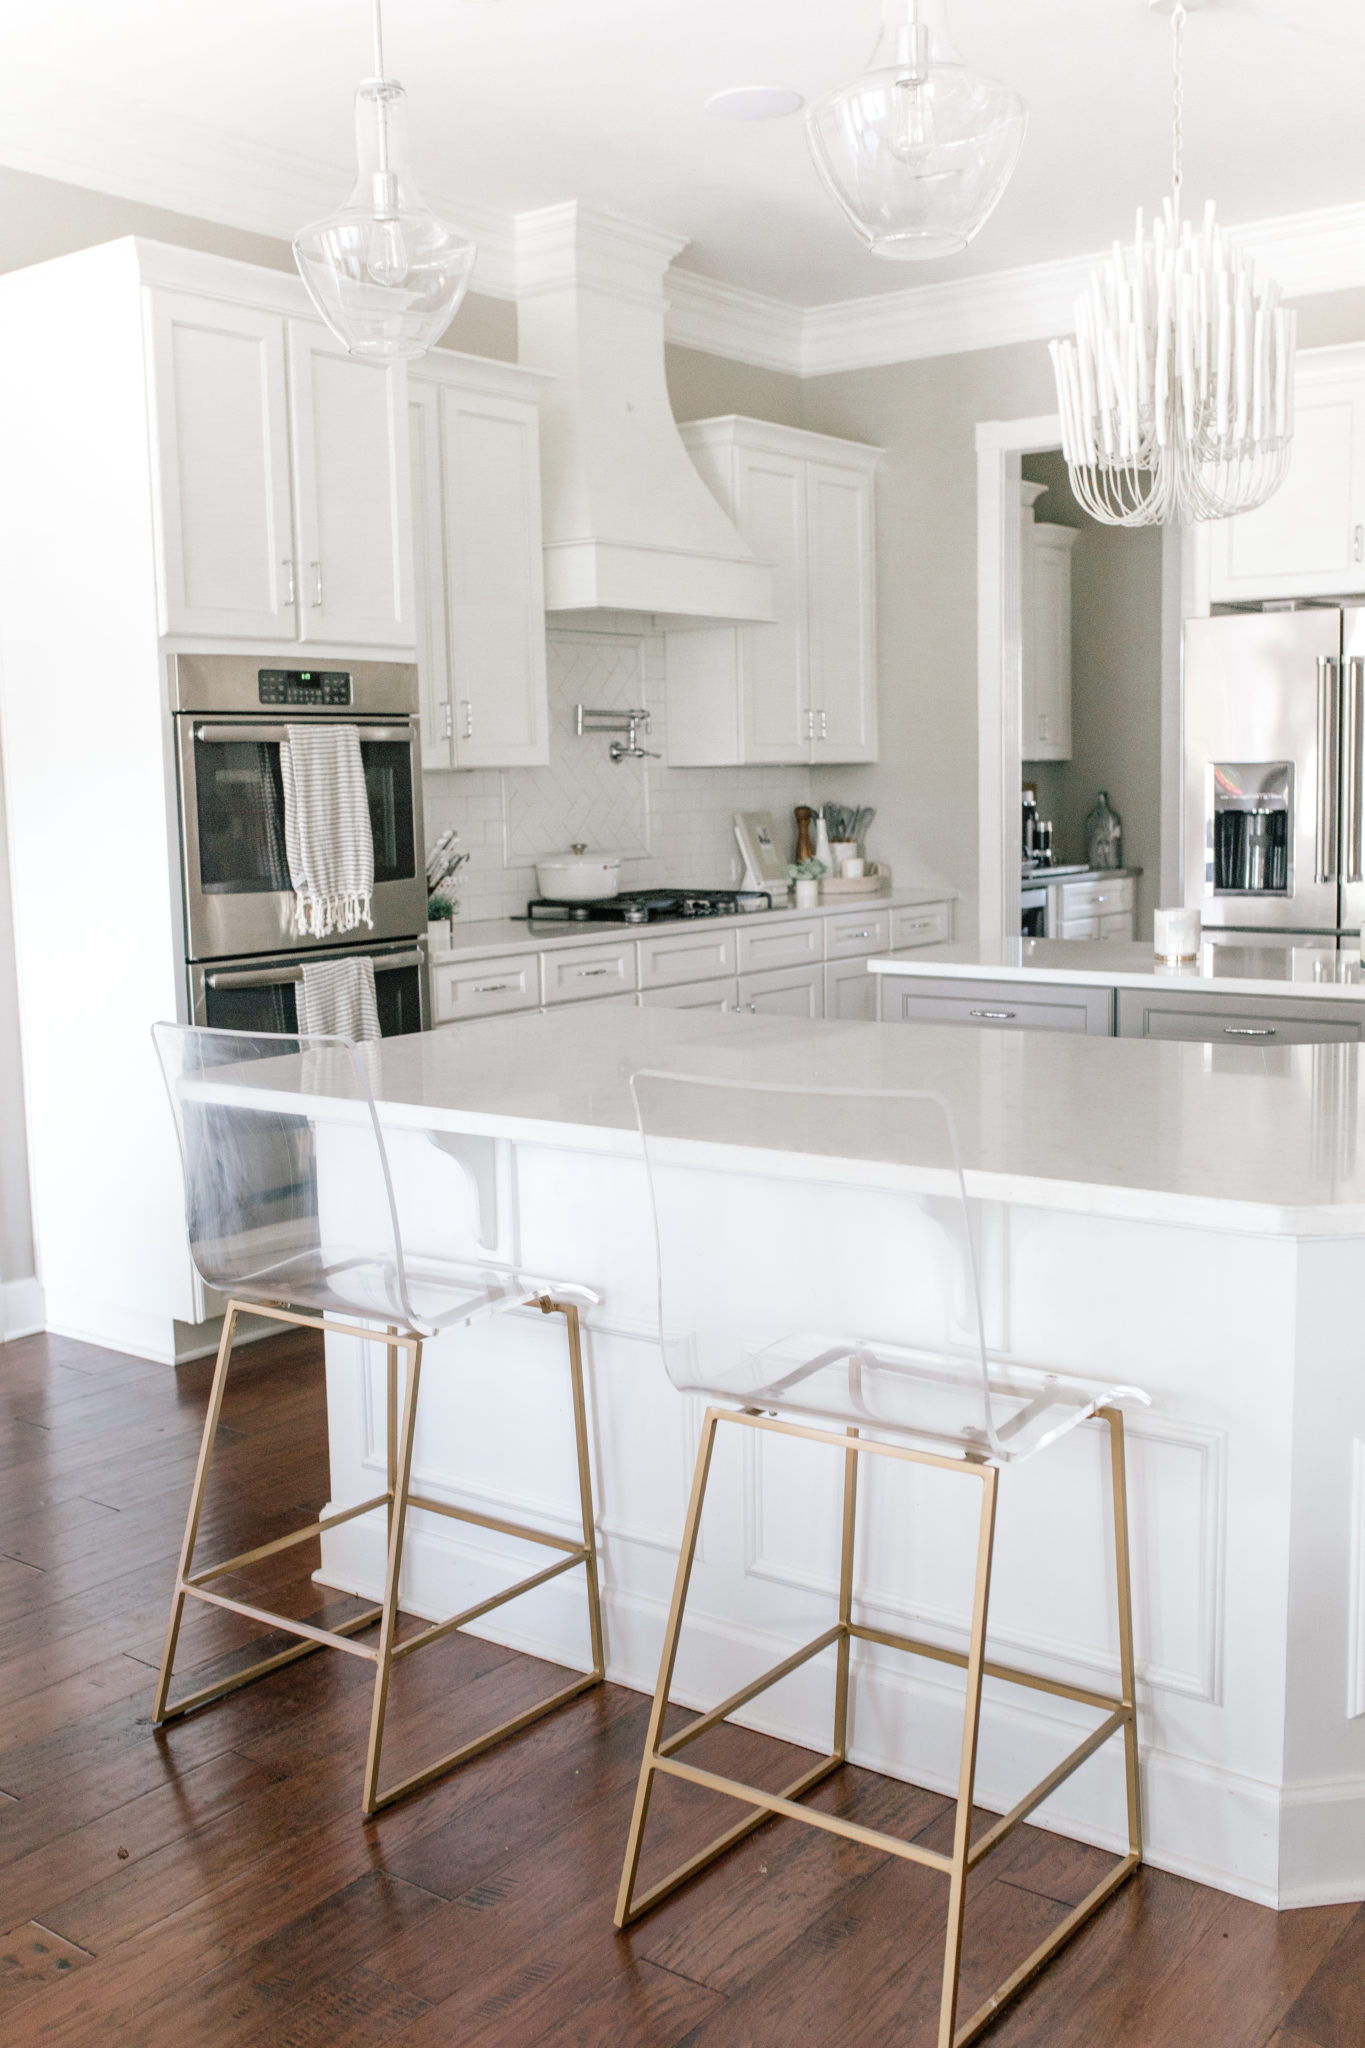
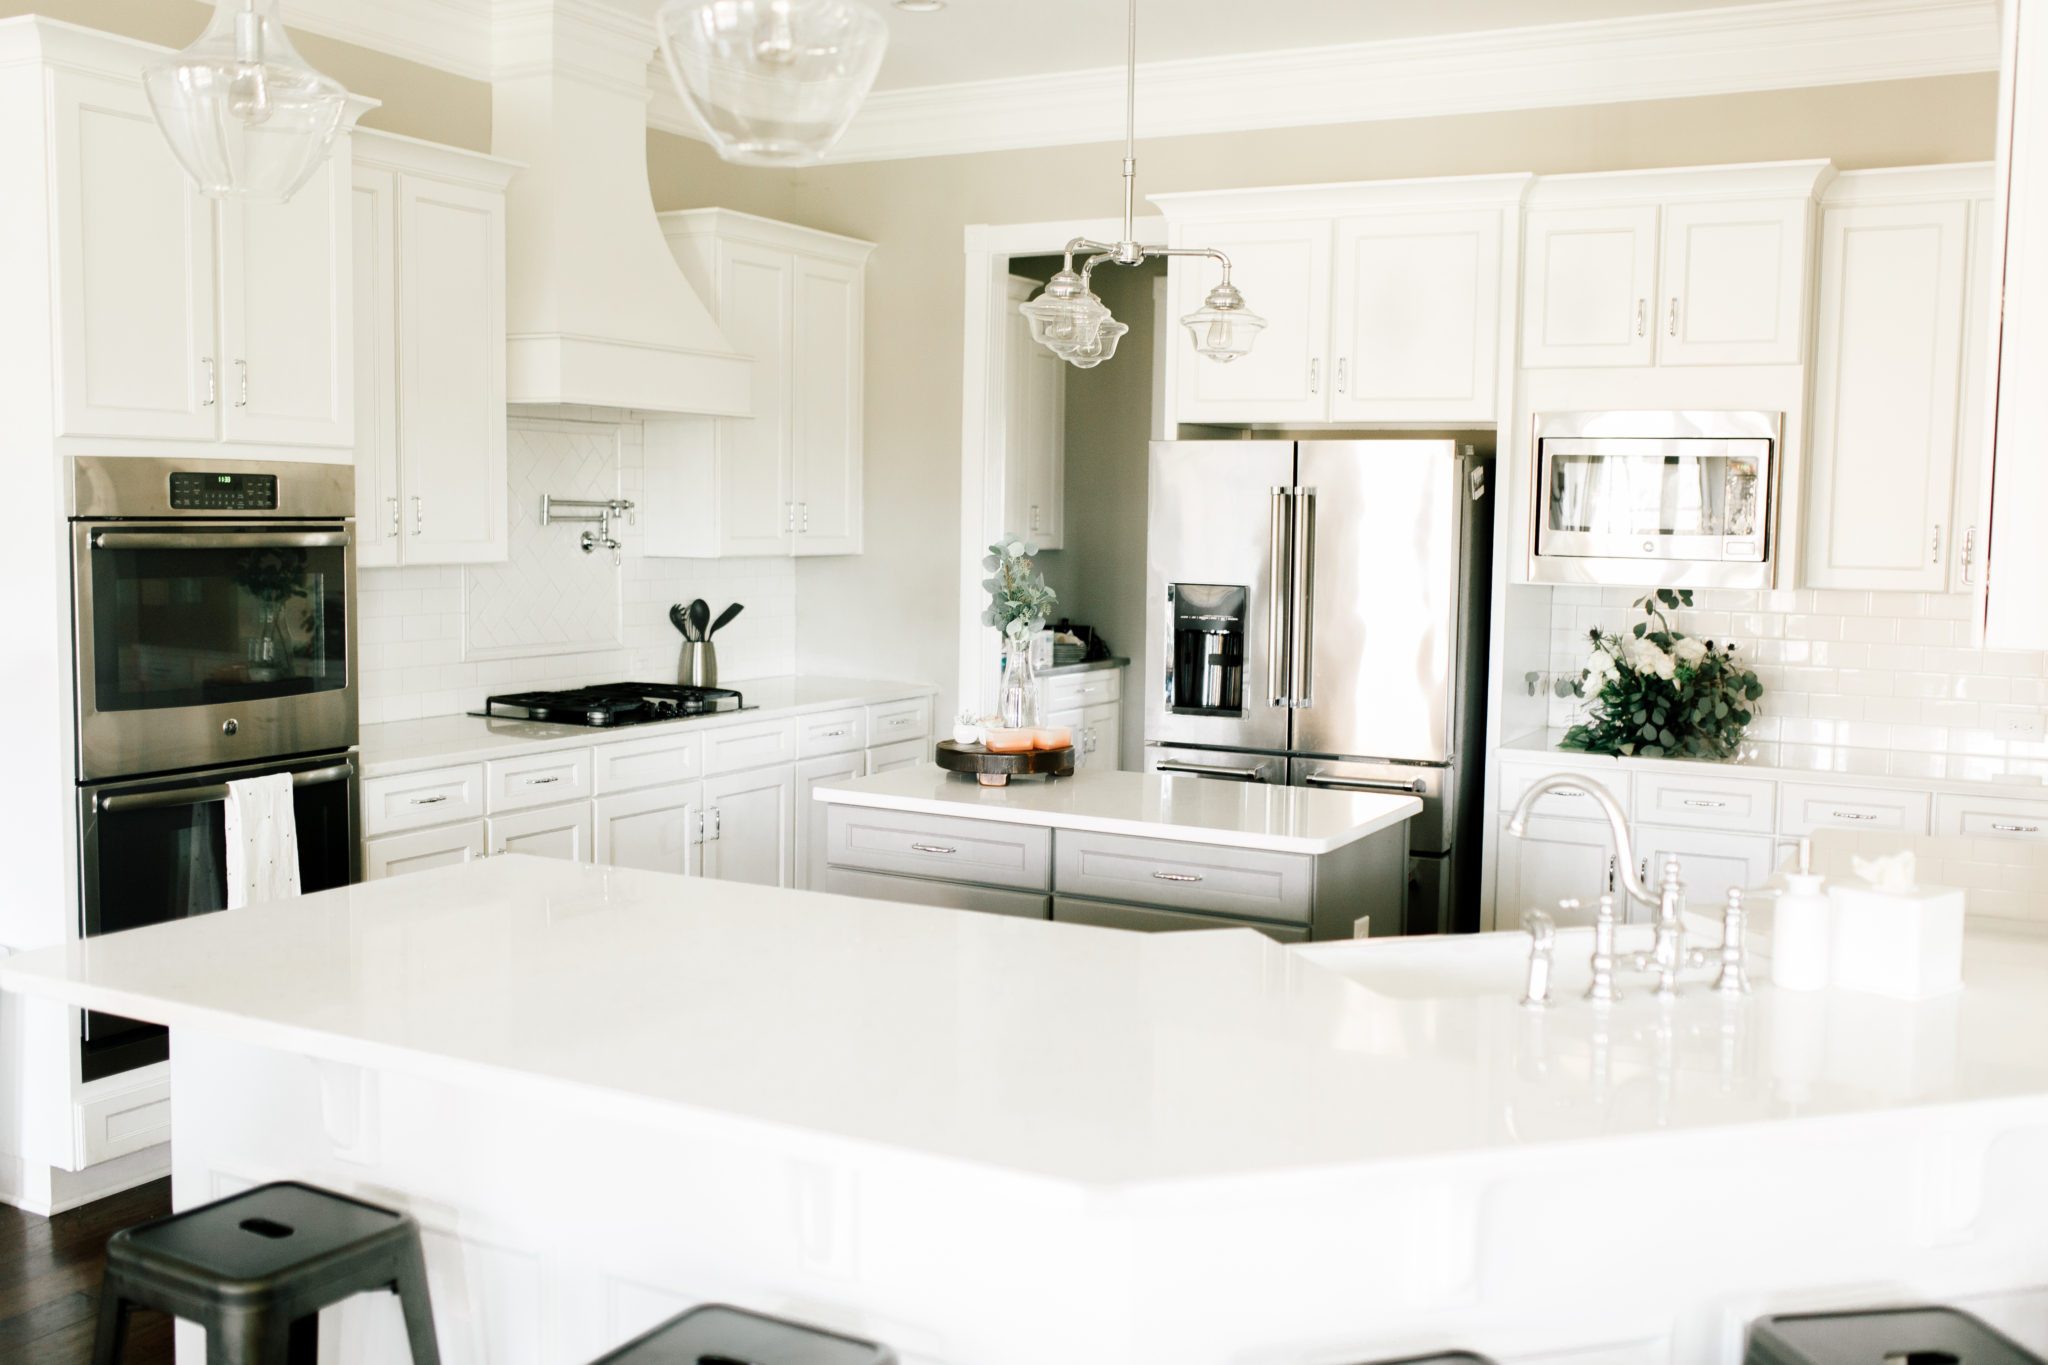
When it comes to kitchen decor, keep an eye out for pieces that are both design driven and functional. With an all white kitchen, it’s great to add in lots of variations of texture and materials.
I’ve rounded up all of our favorite pieces that help to keep the kitchen bright and airy, but also add some interest.
One of my favorite pieces in our home is our kitchen light fixture. You can find it HERE and HERE. Another one of our “big ticket” items were the barstools. We went with these because they are super easy to wipe down with kids. No worrying about stains. You can find them HERE.
The rest of the decor items are extremely affordable.
Here are also some of the best kitchen gadgets and appliance that are too pretty to even put away.
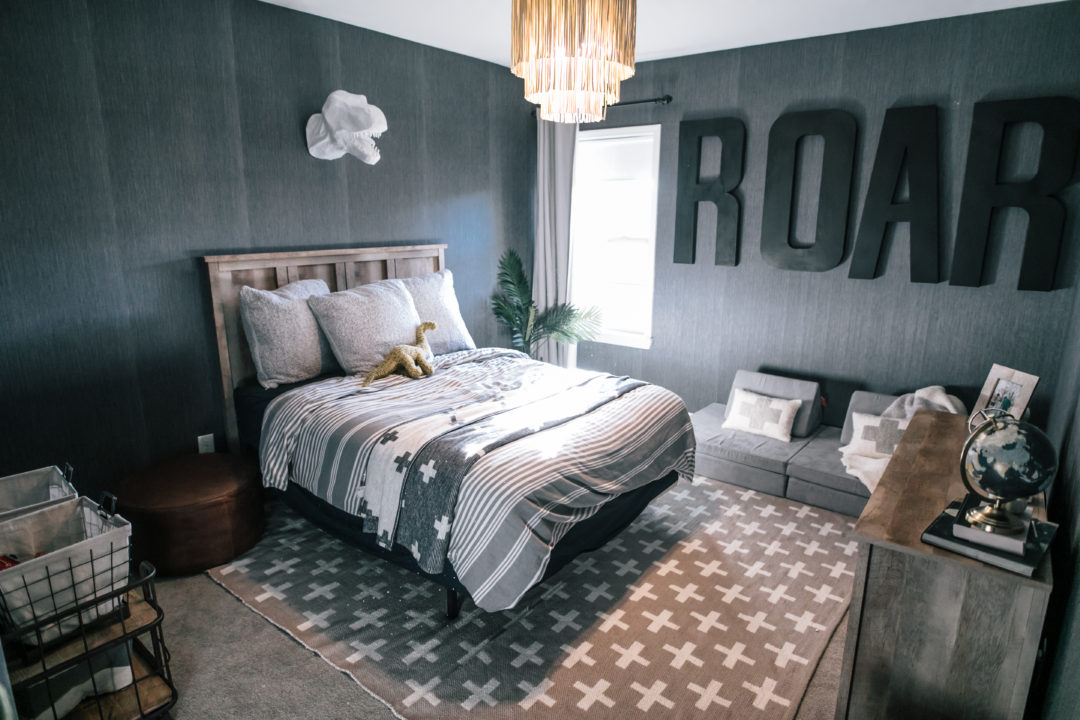
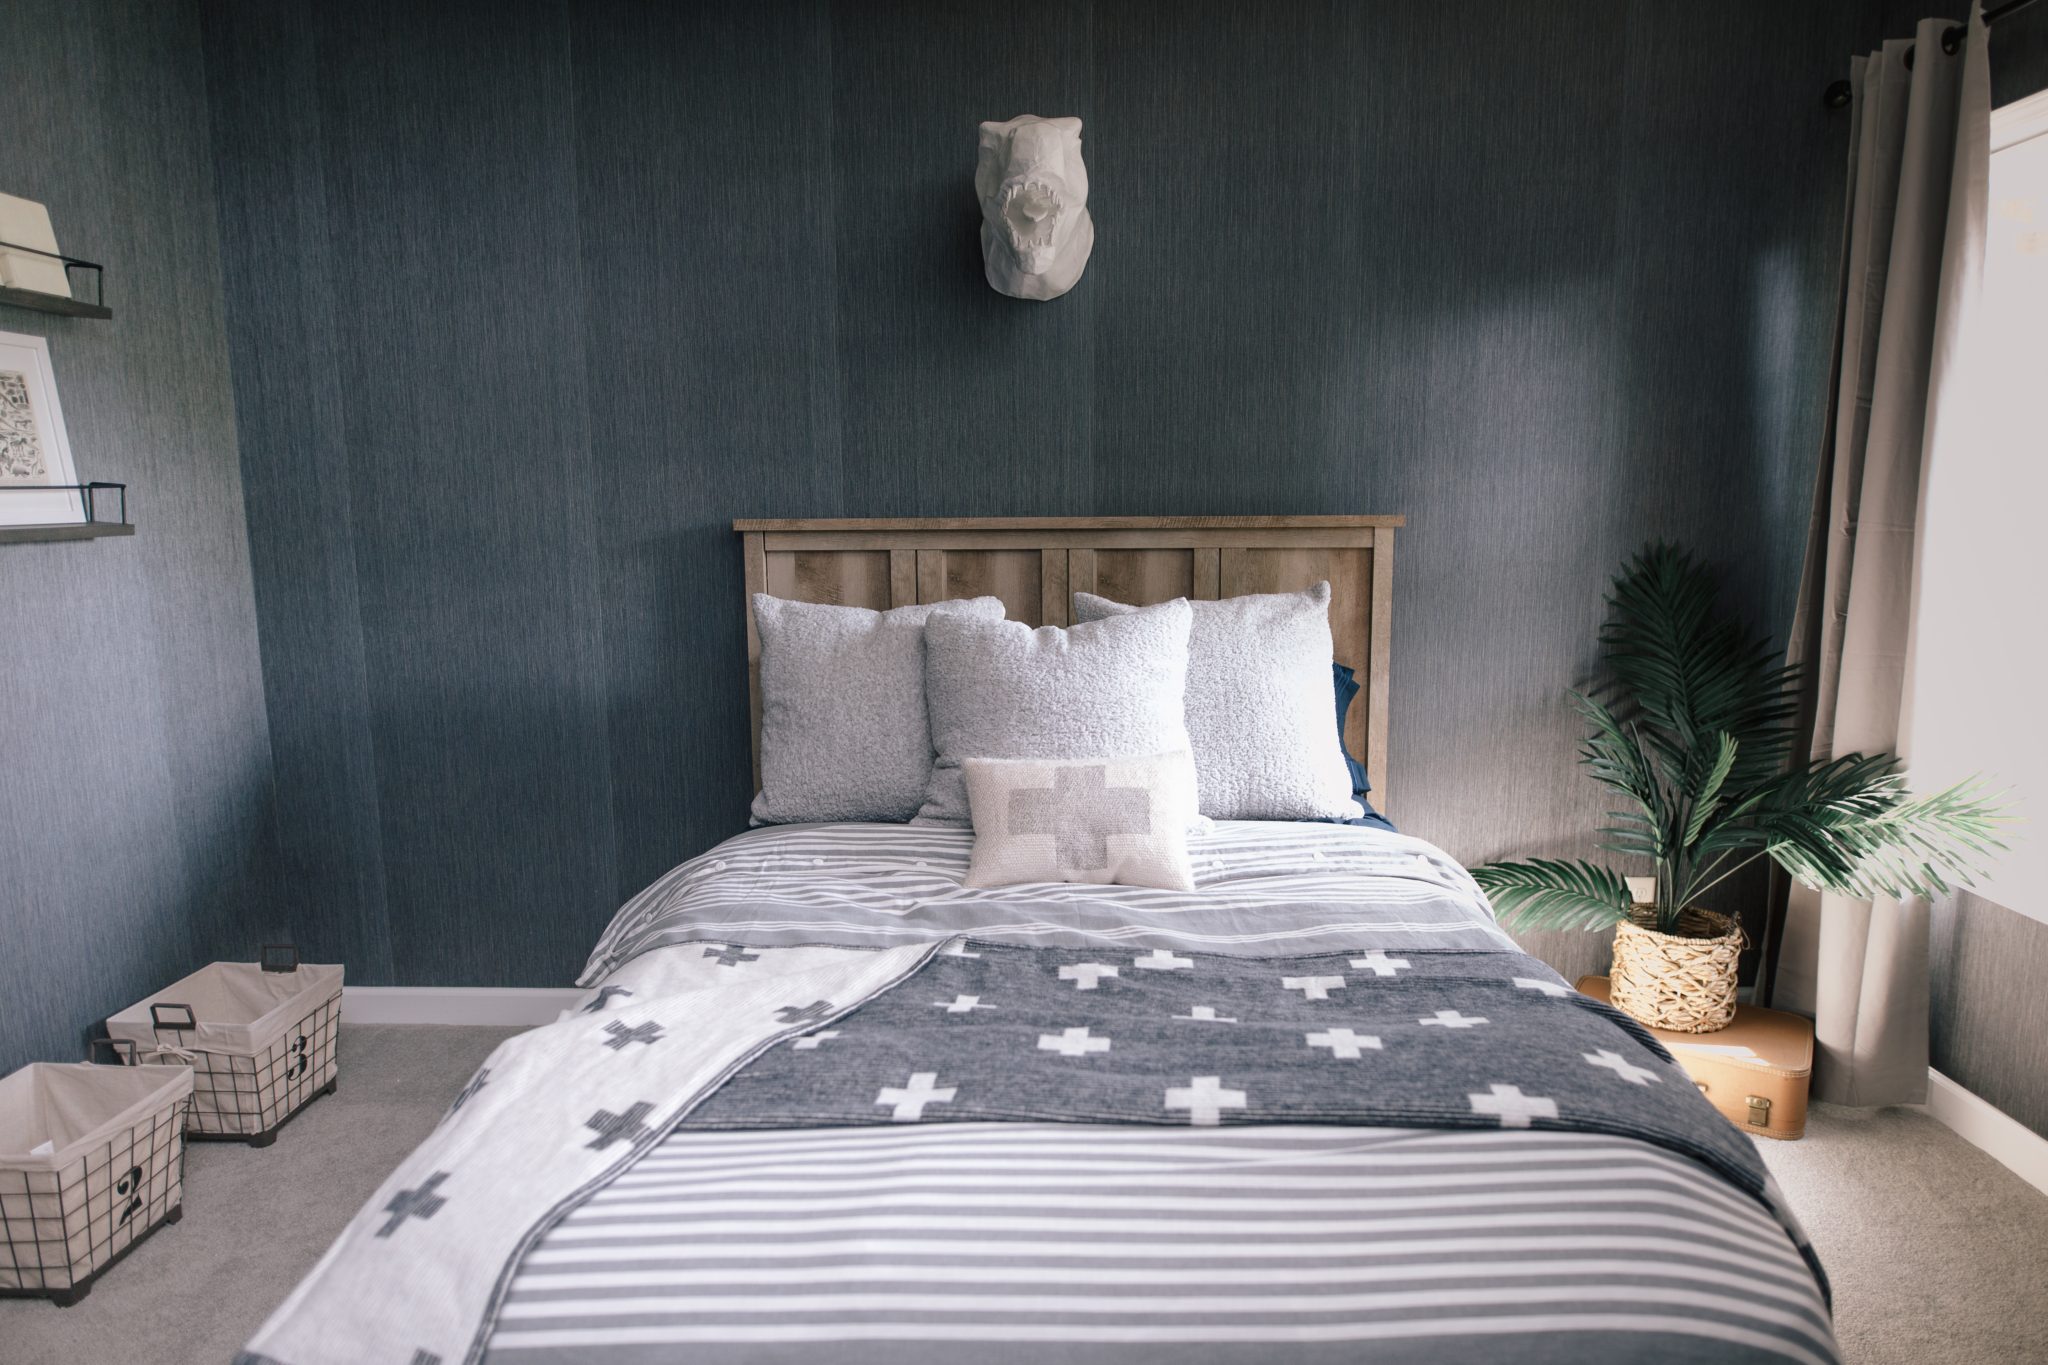
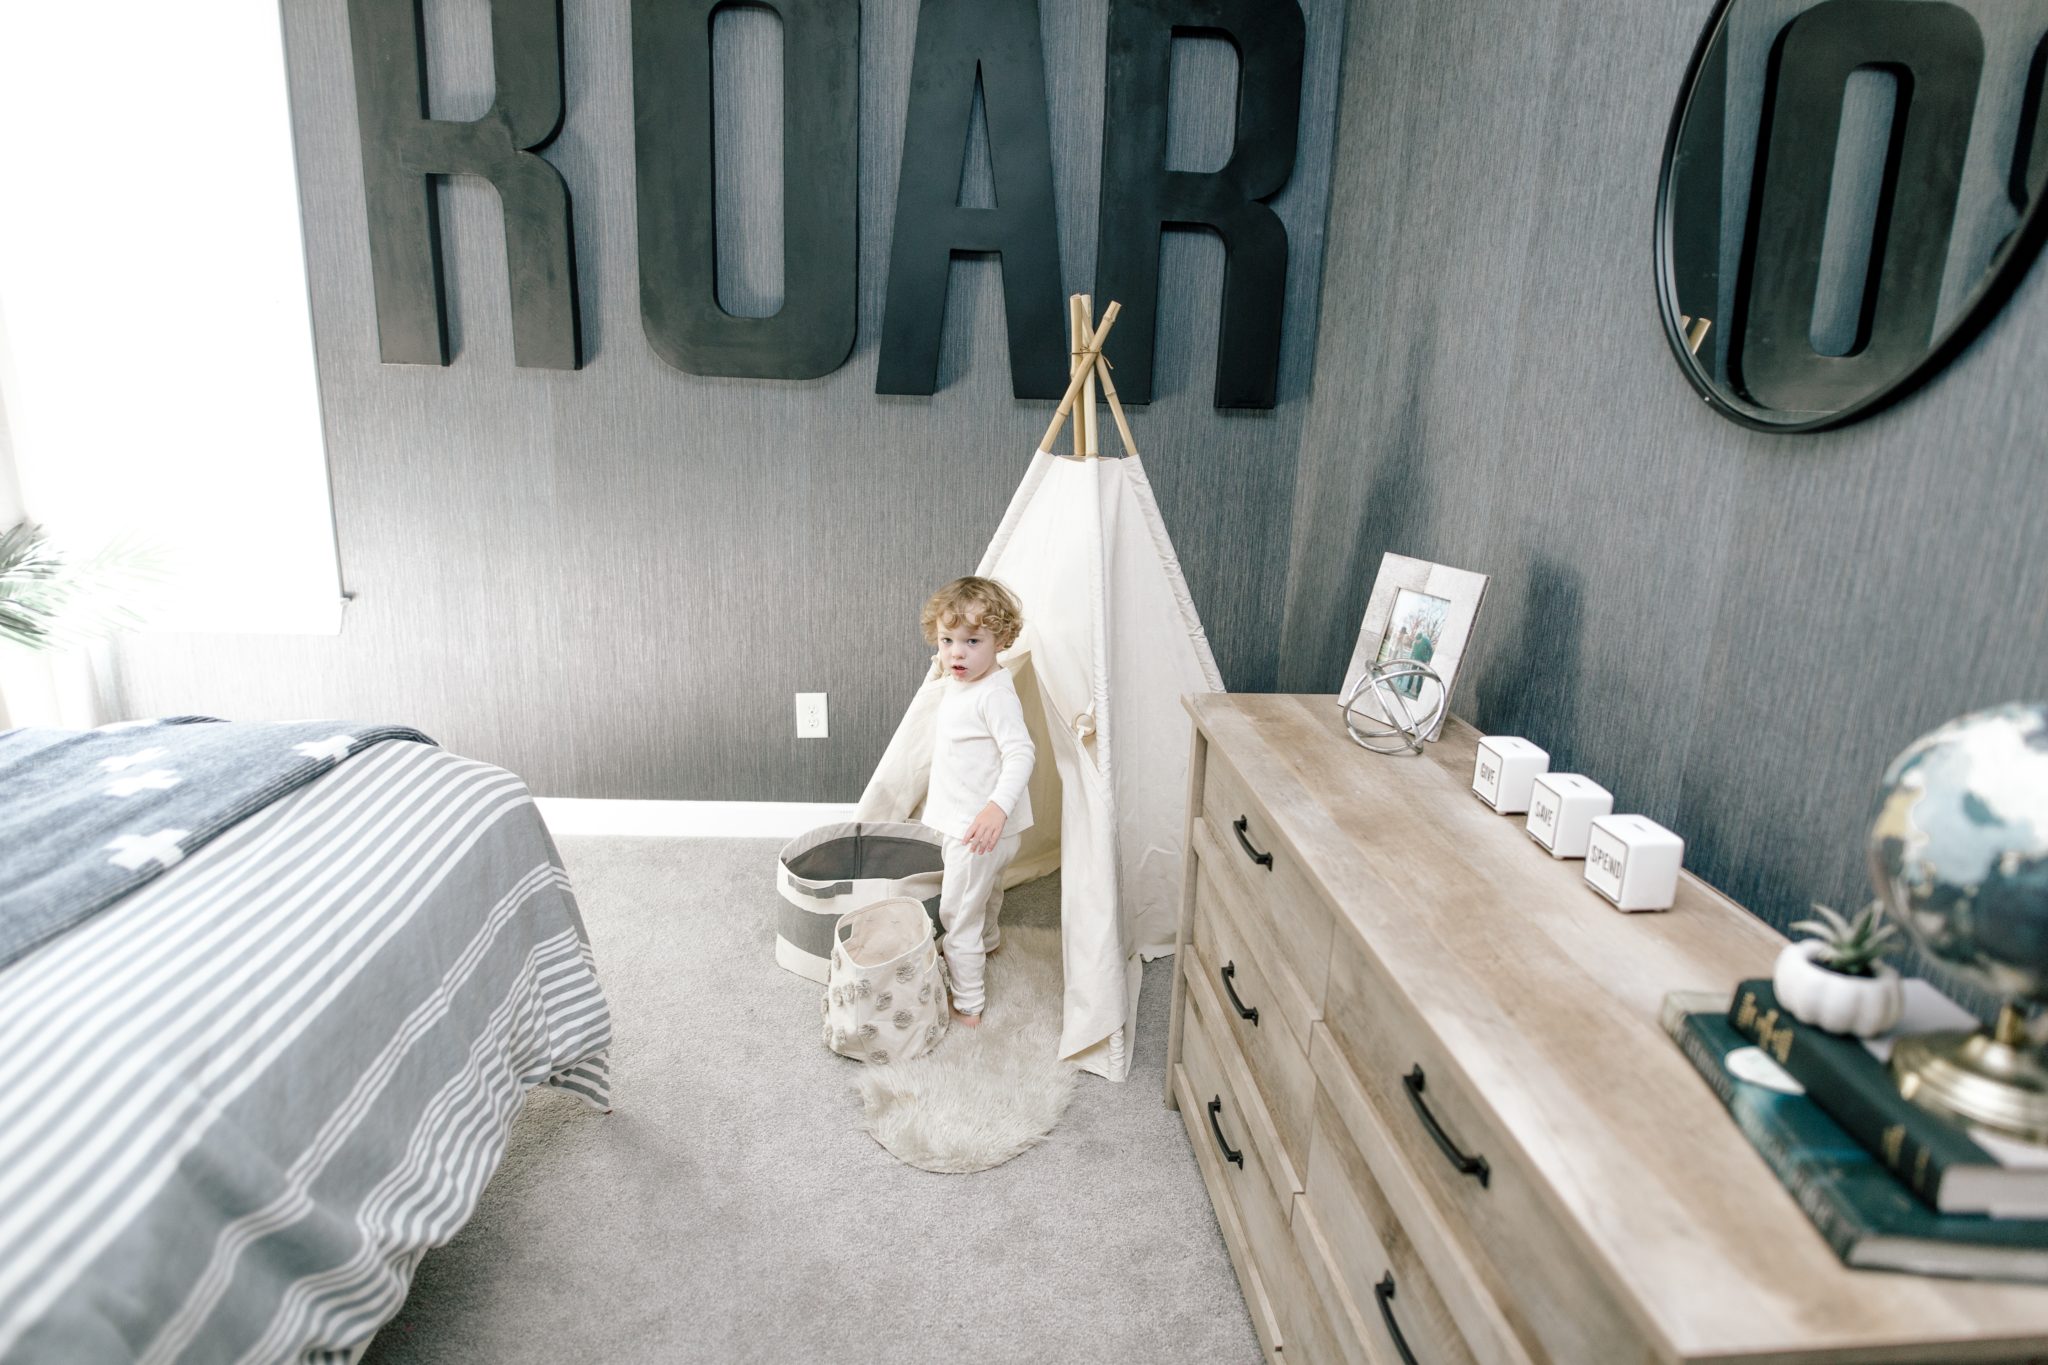
Georgie had a lot of his own ideas when it came to his “big boy” room renovation. He requested a “dinosaur theme” and blue walls. I am not a fan of anything “charecter-ish” and prefer a neutral color scheme. However, I wanted G to LOVE his new room and be proud of it.
It’s not quite finished, but I just couldn’t wait to share! We are waiting for this grey swiss cross rug to come in yet. It’s an indoor/outdoor rug which seems to hold up better for kids rooms.
I saw a similar picture in a Restoration Hardware catalog and ran with it. I knew it wouldn’t be possible to buy the entire room from RH because it would be super pricey. I purchased a few of the items from RH and then found lots of dupes!
When going with a theme room I suggest keeping the majority of the big items in a neutral palette. Then add “touches” of decor that have that theme. Kids outgrow what they are into very quickly, and this way you can keep the majority of the room and swap out detail decor items with whatever their new favorite thing is.
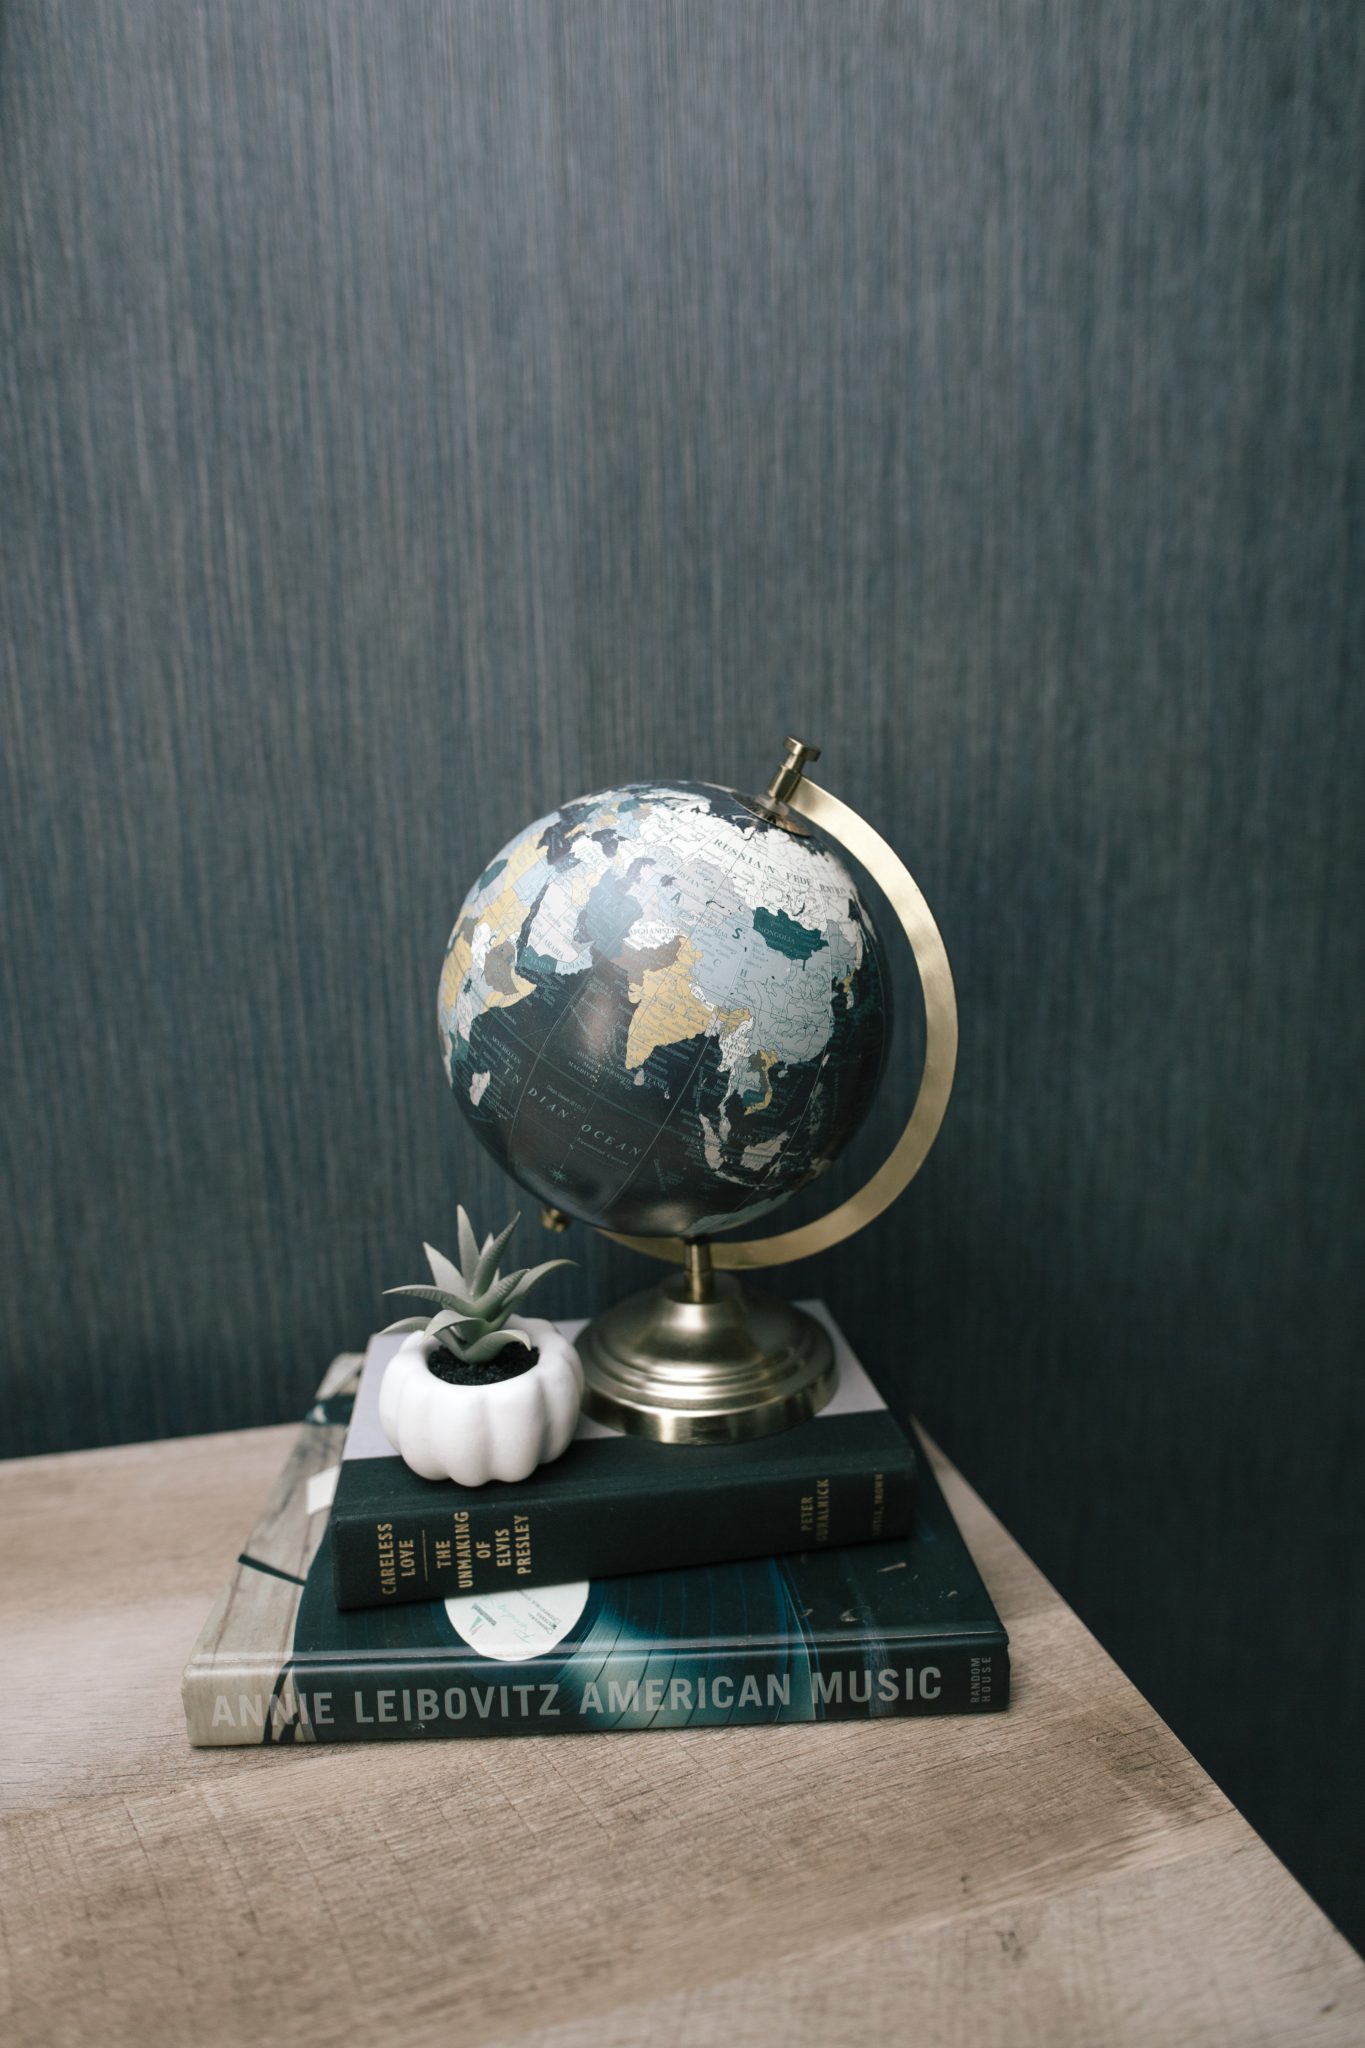
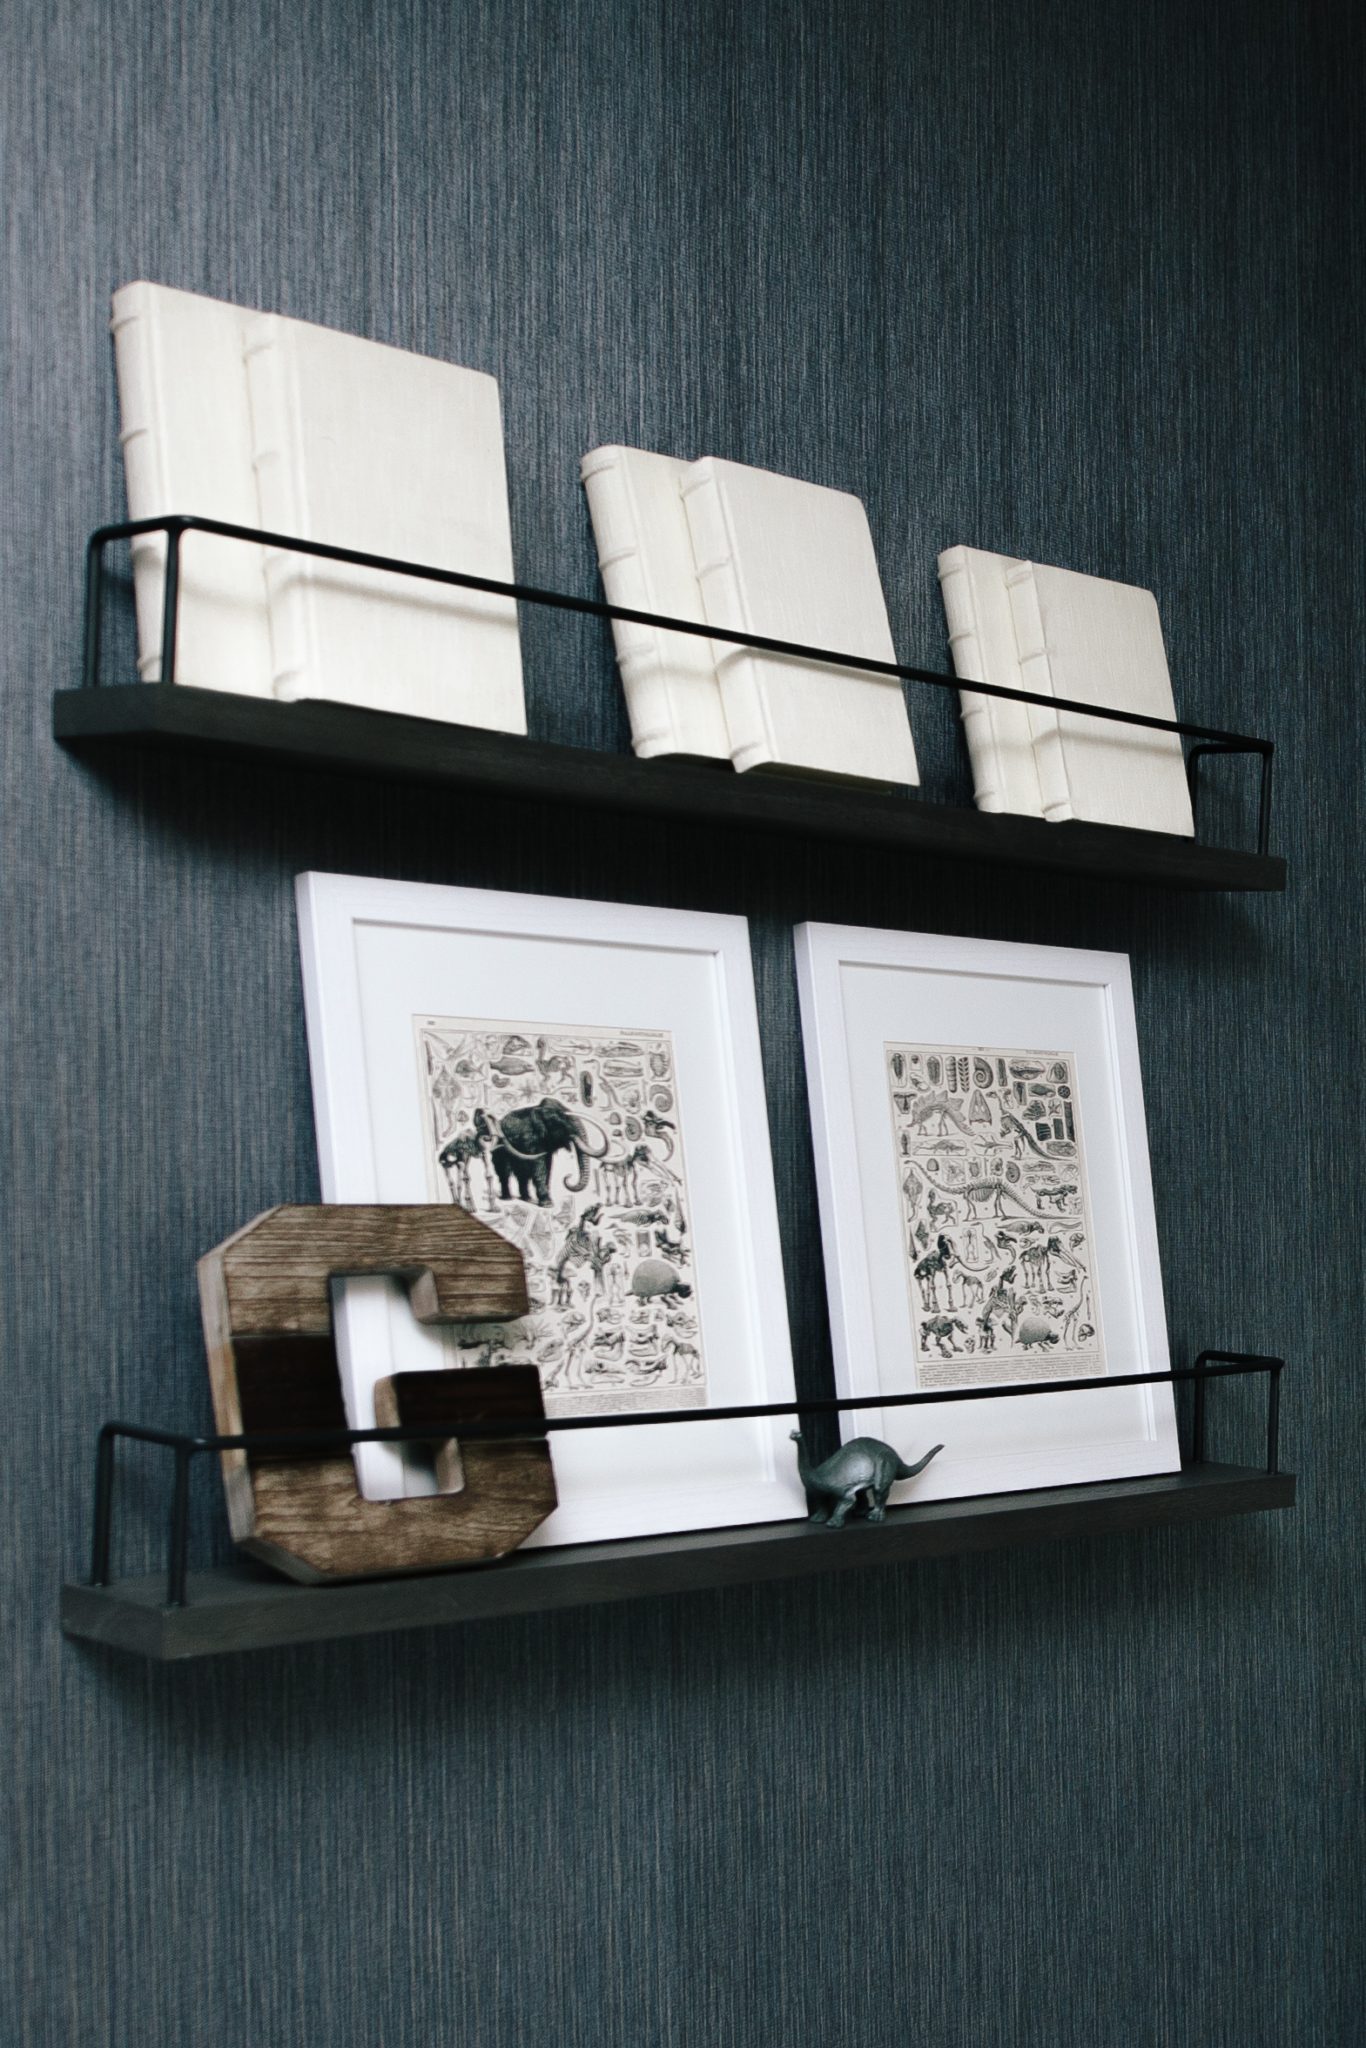
The bedding, dinosaur head, display book shelves and giant letters are all from RH Baby & Child. I was sure to link tons of dupes for these items as well that are at a much lower price point.
This dresser and headboard look nearly identical to the RH version. They are at an amazing price point!! I was super impressed. Note, you do have to build the dresser. (AKA Trey had to build the dresser..)
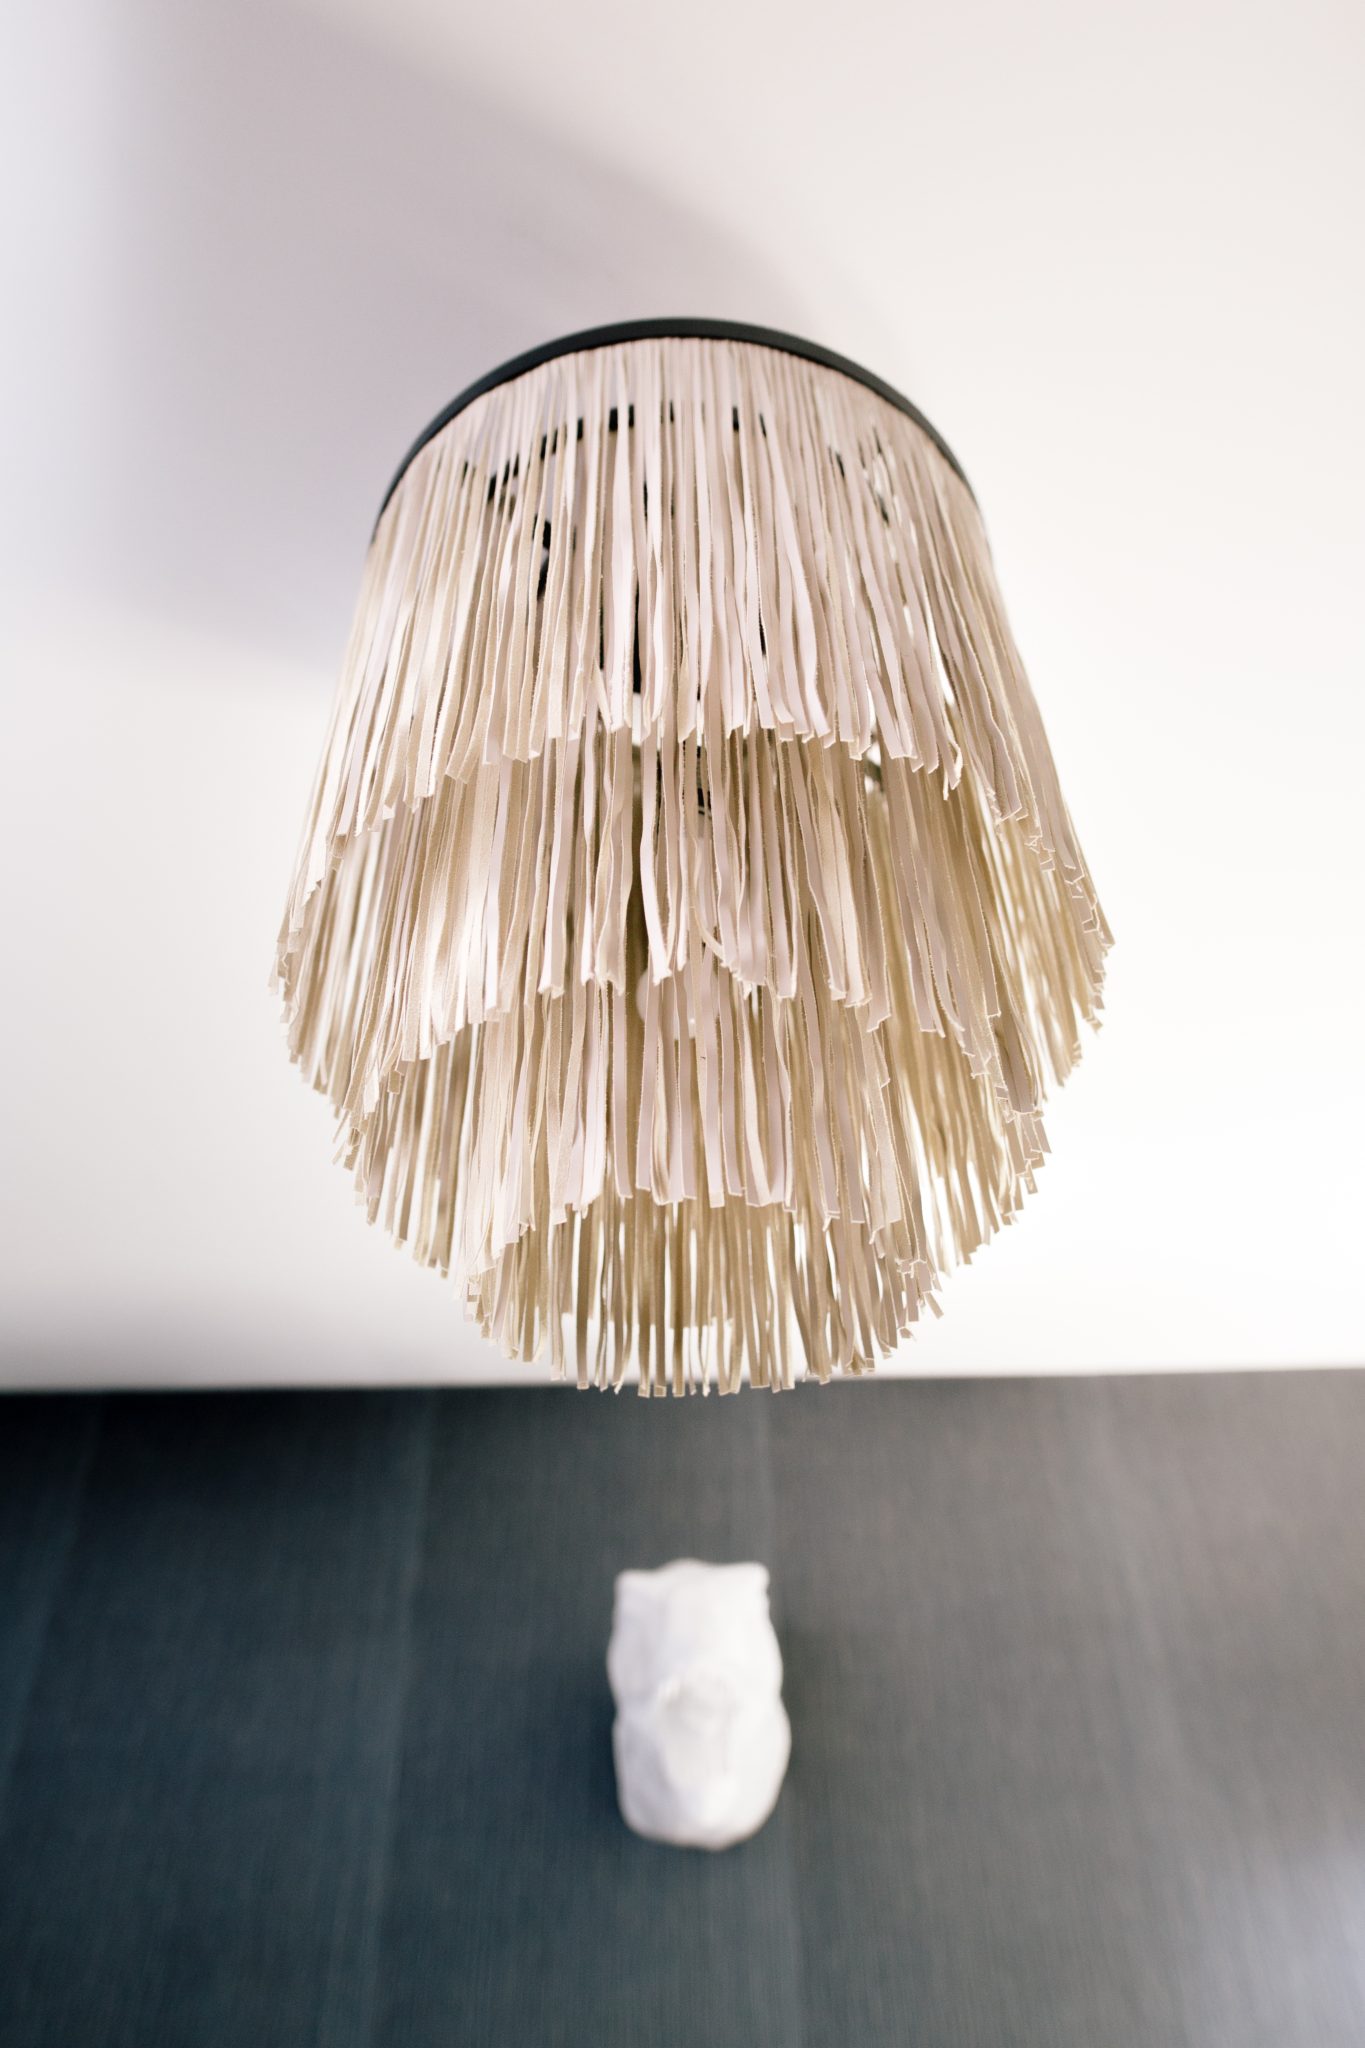
The fringe chandelier makes such a statement and is a really cool piece! It looks much more high end than it is. (It was under $300.)
Instead of using a typical nightstand we replaced it with a faux leather poof. This is a great option for kids that are switching to a “big bed” for the first time. If they happen to fall off it is a much safer option. This one works great because it has a flat top. You can easily put a tray on top to hold a cup of water or anything needed by the bed. (These are still on backorder as well, but I will update with new pics when these and the rug come in!)
Using mixed textures and mixed prints in a similar color scheme is my favorite way to decorate. The wallpaper was the perfect way to add a really interesting texture throughout the entire space. It almost looks like denim on the walls. I couldn’t be any happier with the way it turned out! It’s fairly affordable as far as wallpaper goes.
The line “it’s all in the details” is really true. The small little touches are what makes a space exciting and visually appeasing as well. One of my favorites were these tiny dinosaur footprints crawling up the wall. Georgie just thinks they are the greatest thing! (That’s what it’s really all about, right?!)
We are so happy with the way G’s dinosaur themed bedroom came out! He loves it, and I was able to keep it looking neutral. All is happy!
Thanks to the following for helping make my Friendsgiving dreams come true! Nashville people… make sure to check them out! I can’t possibly talk them up enough!
Friendsgiving has officially become “a thing” and I couldn’t be happier about it! I’ve teamed up with the TOP local vendors in Nashville to make all my boho Friendsgiving dreams come true!
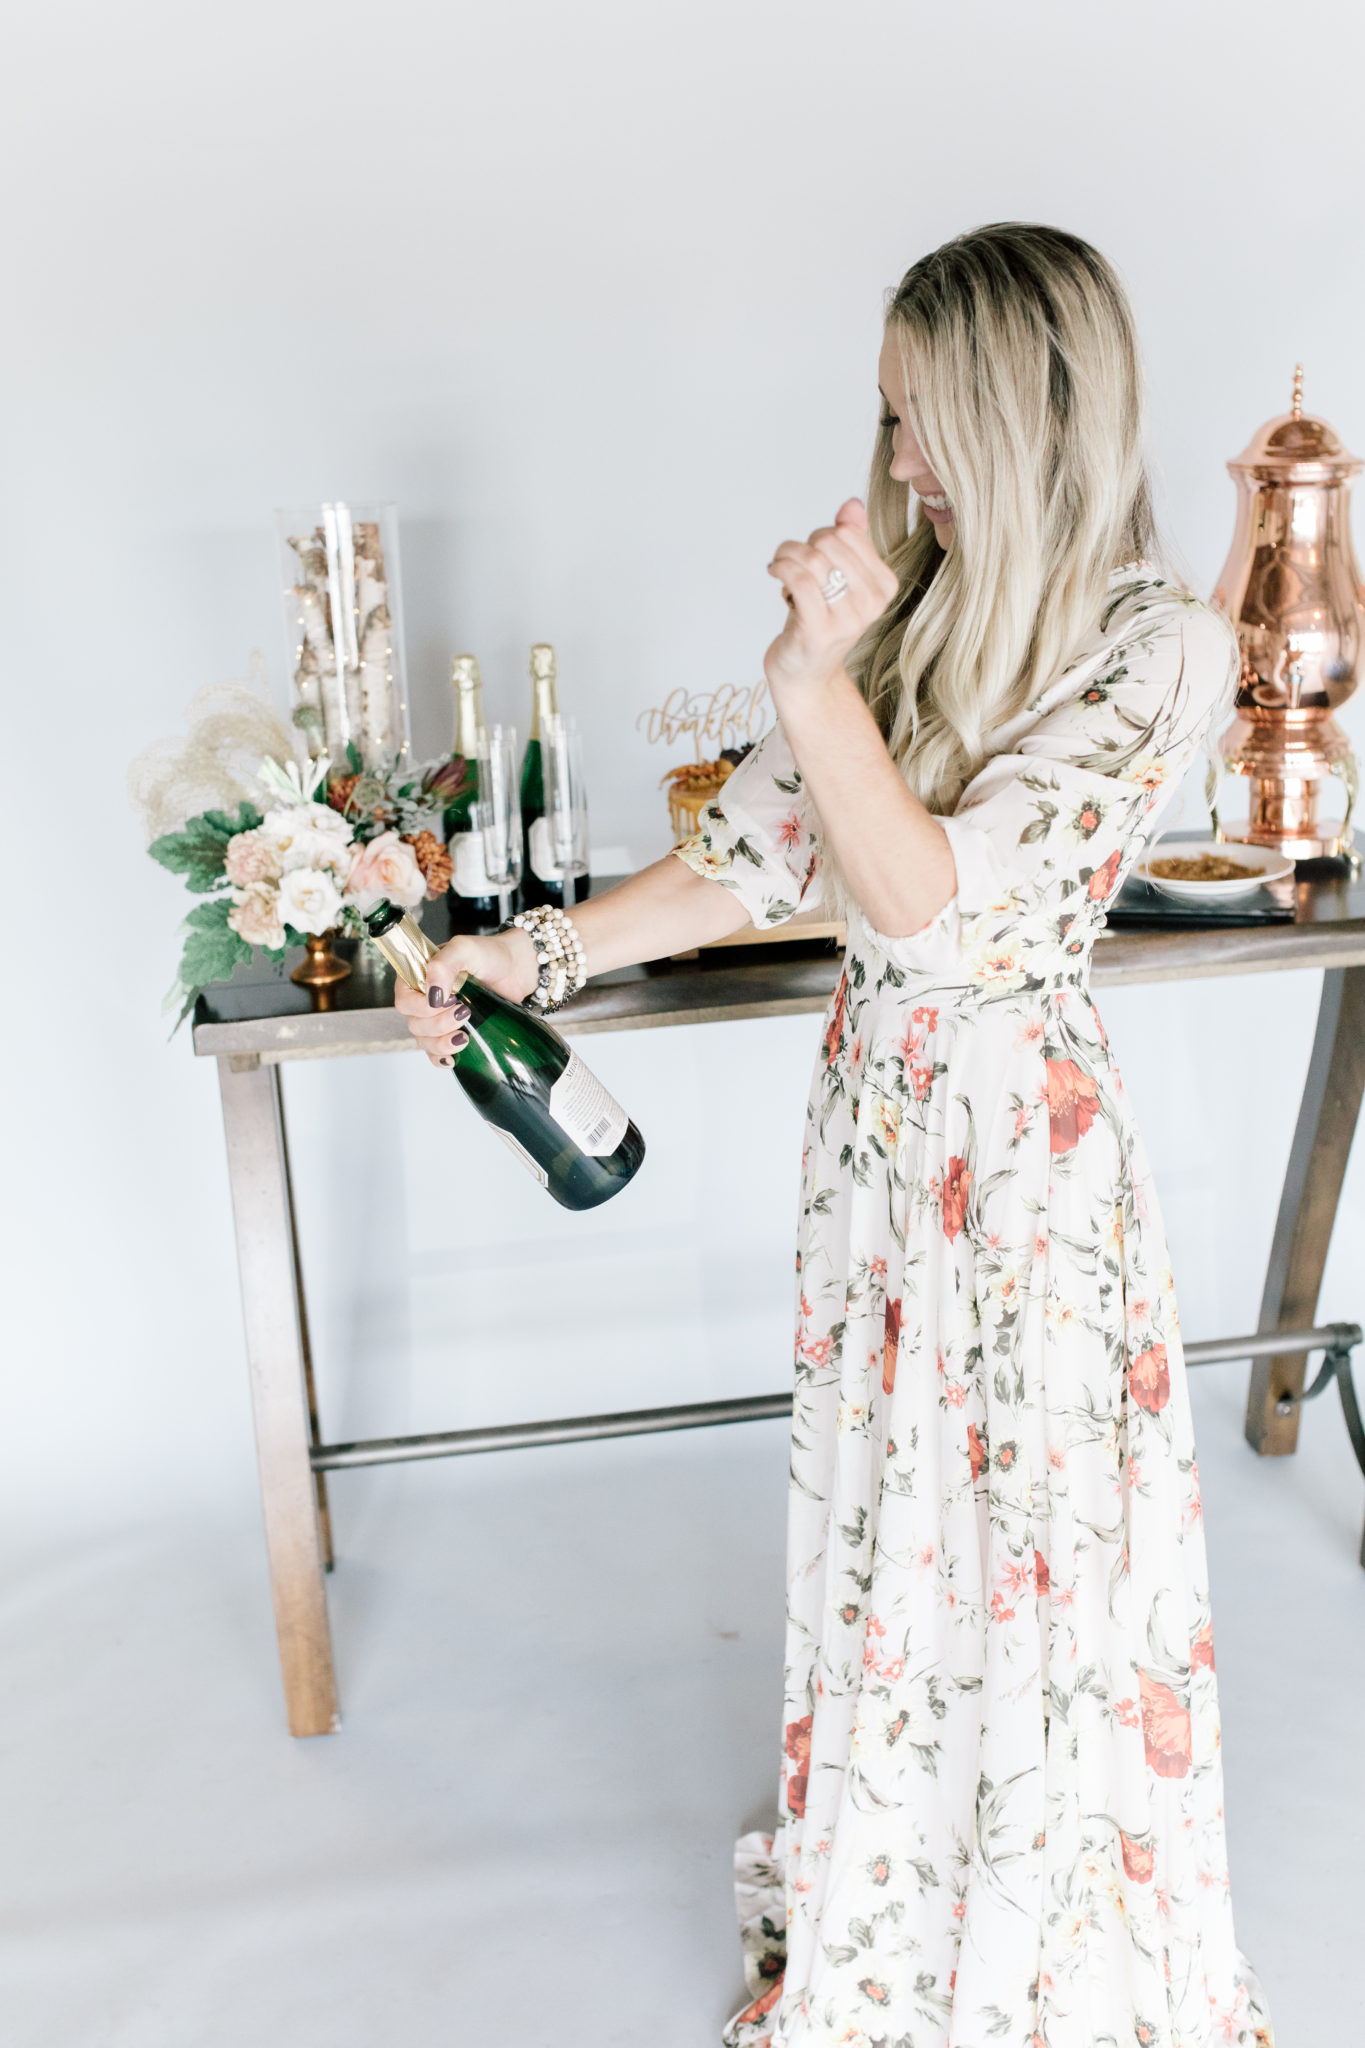
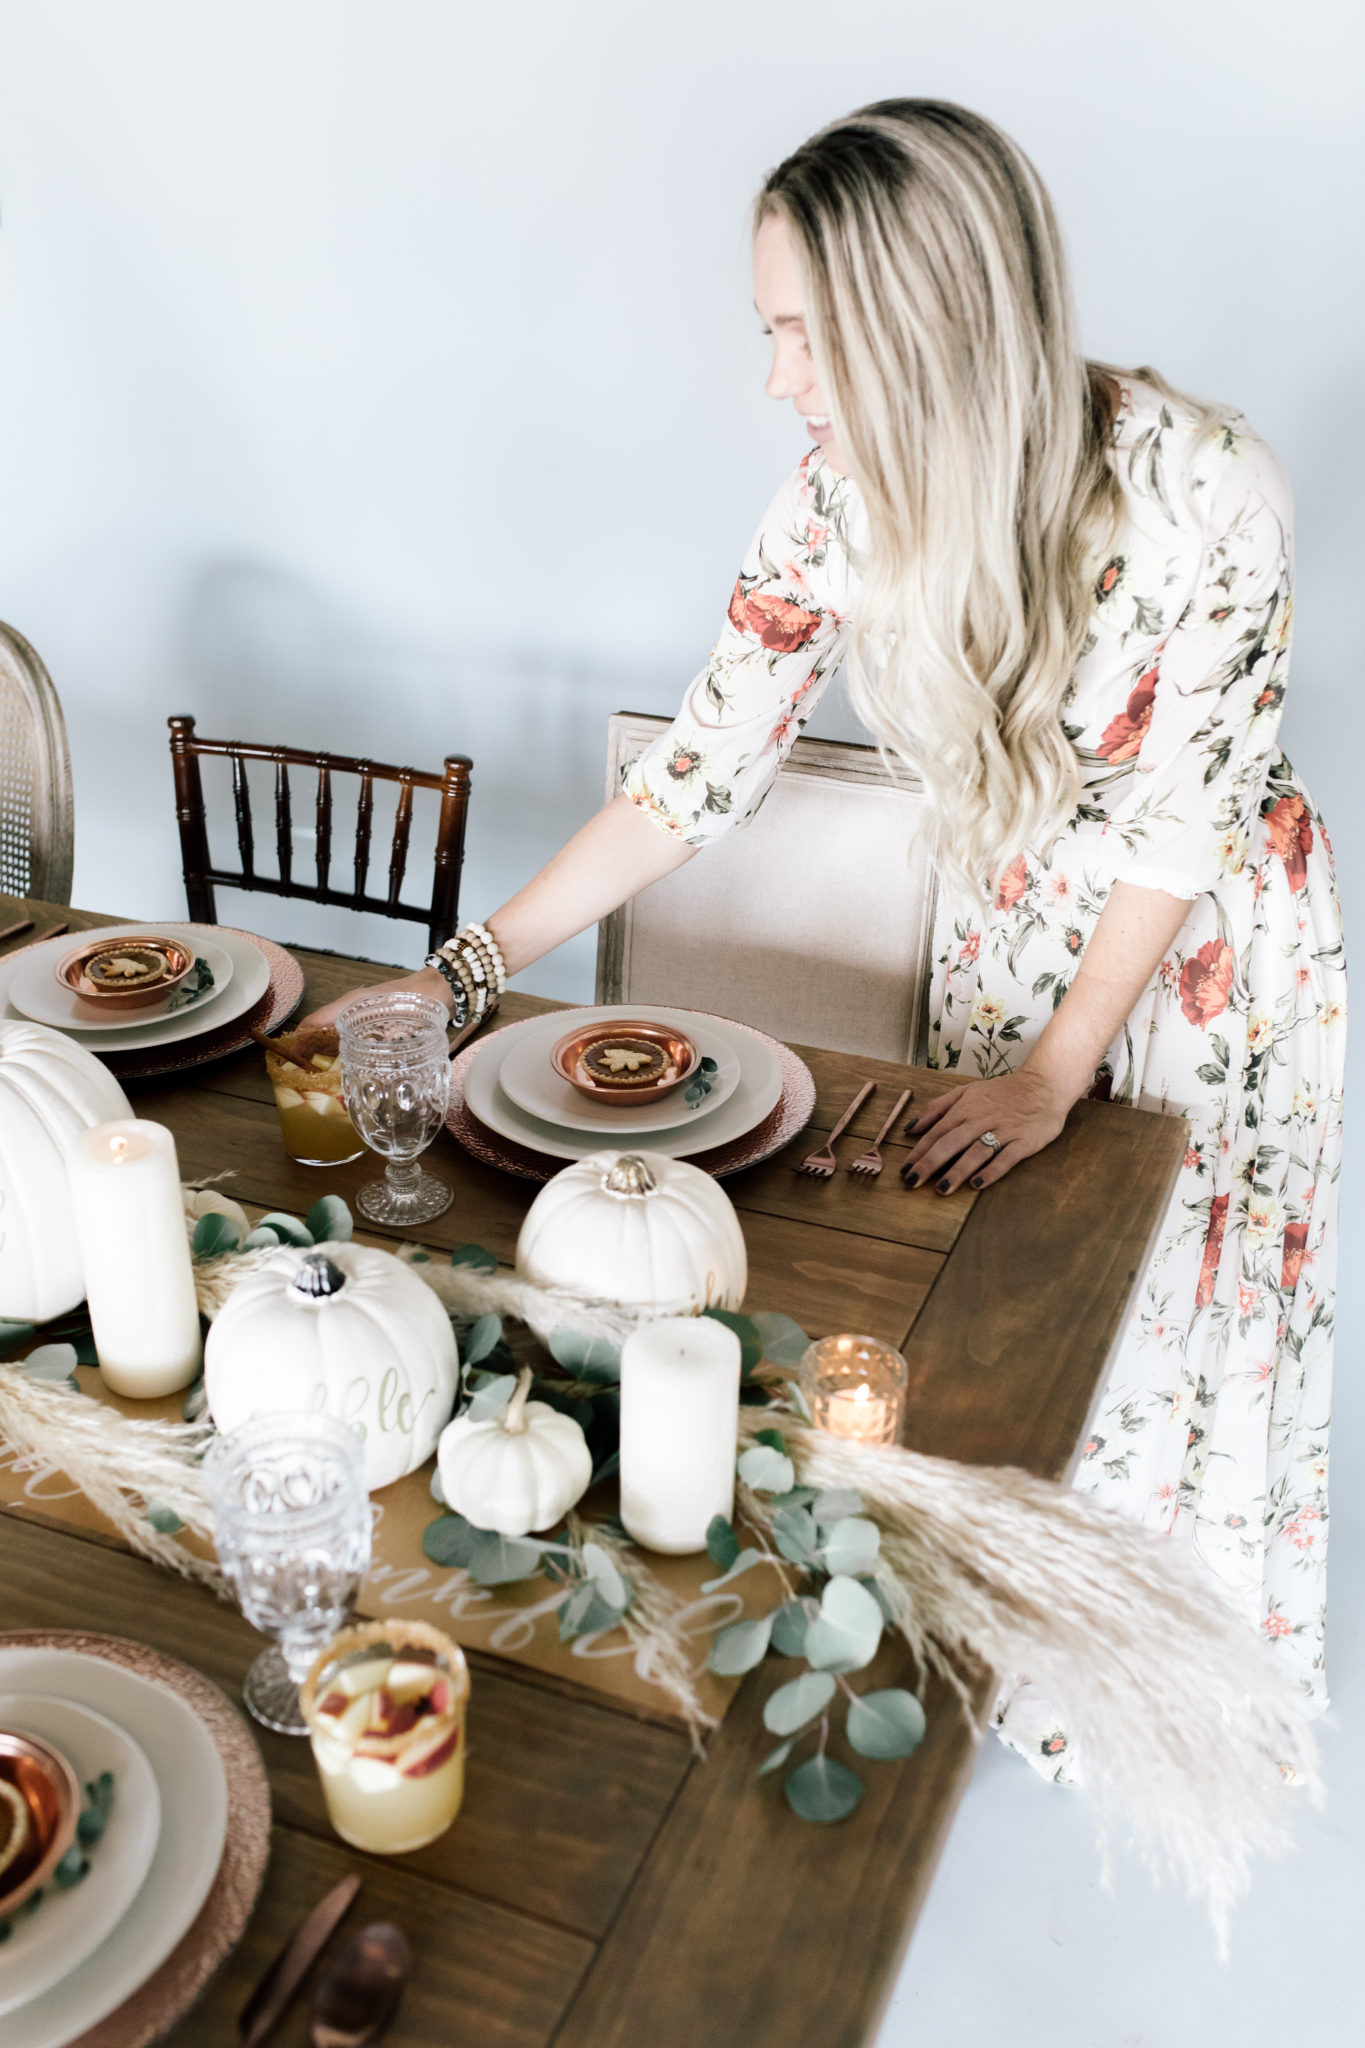
Also, this dress is surprisingly comfortable and makes for the prettiest holiday attire!
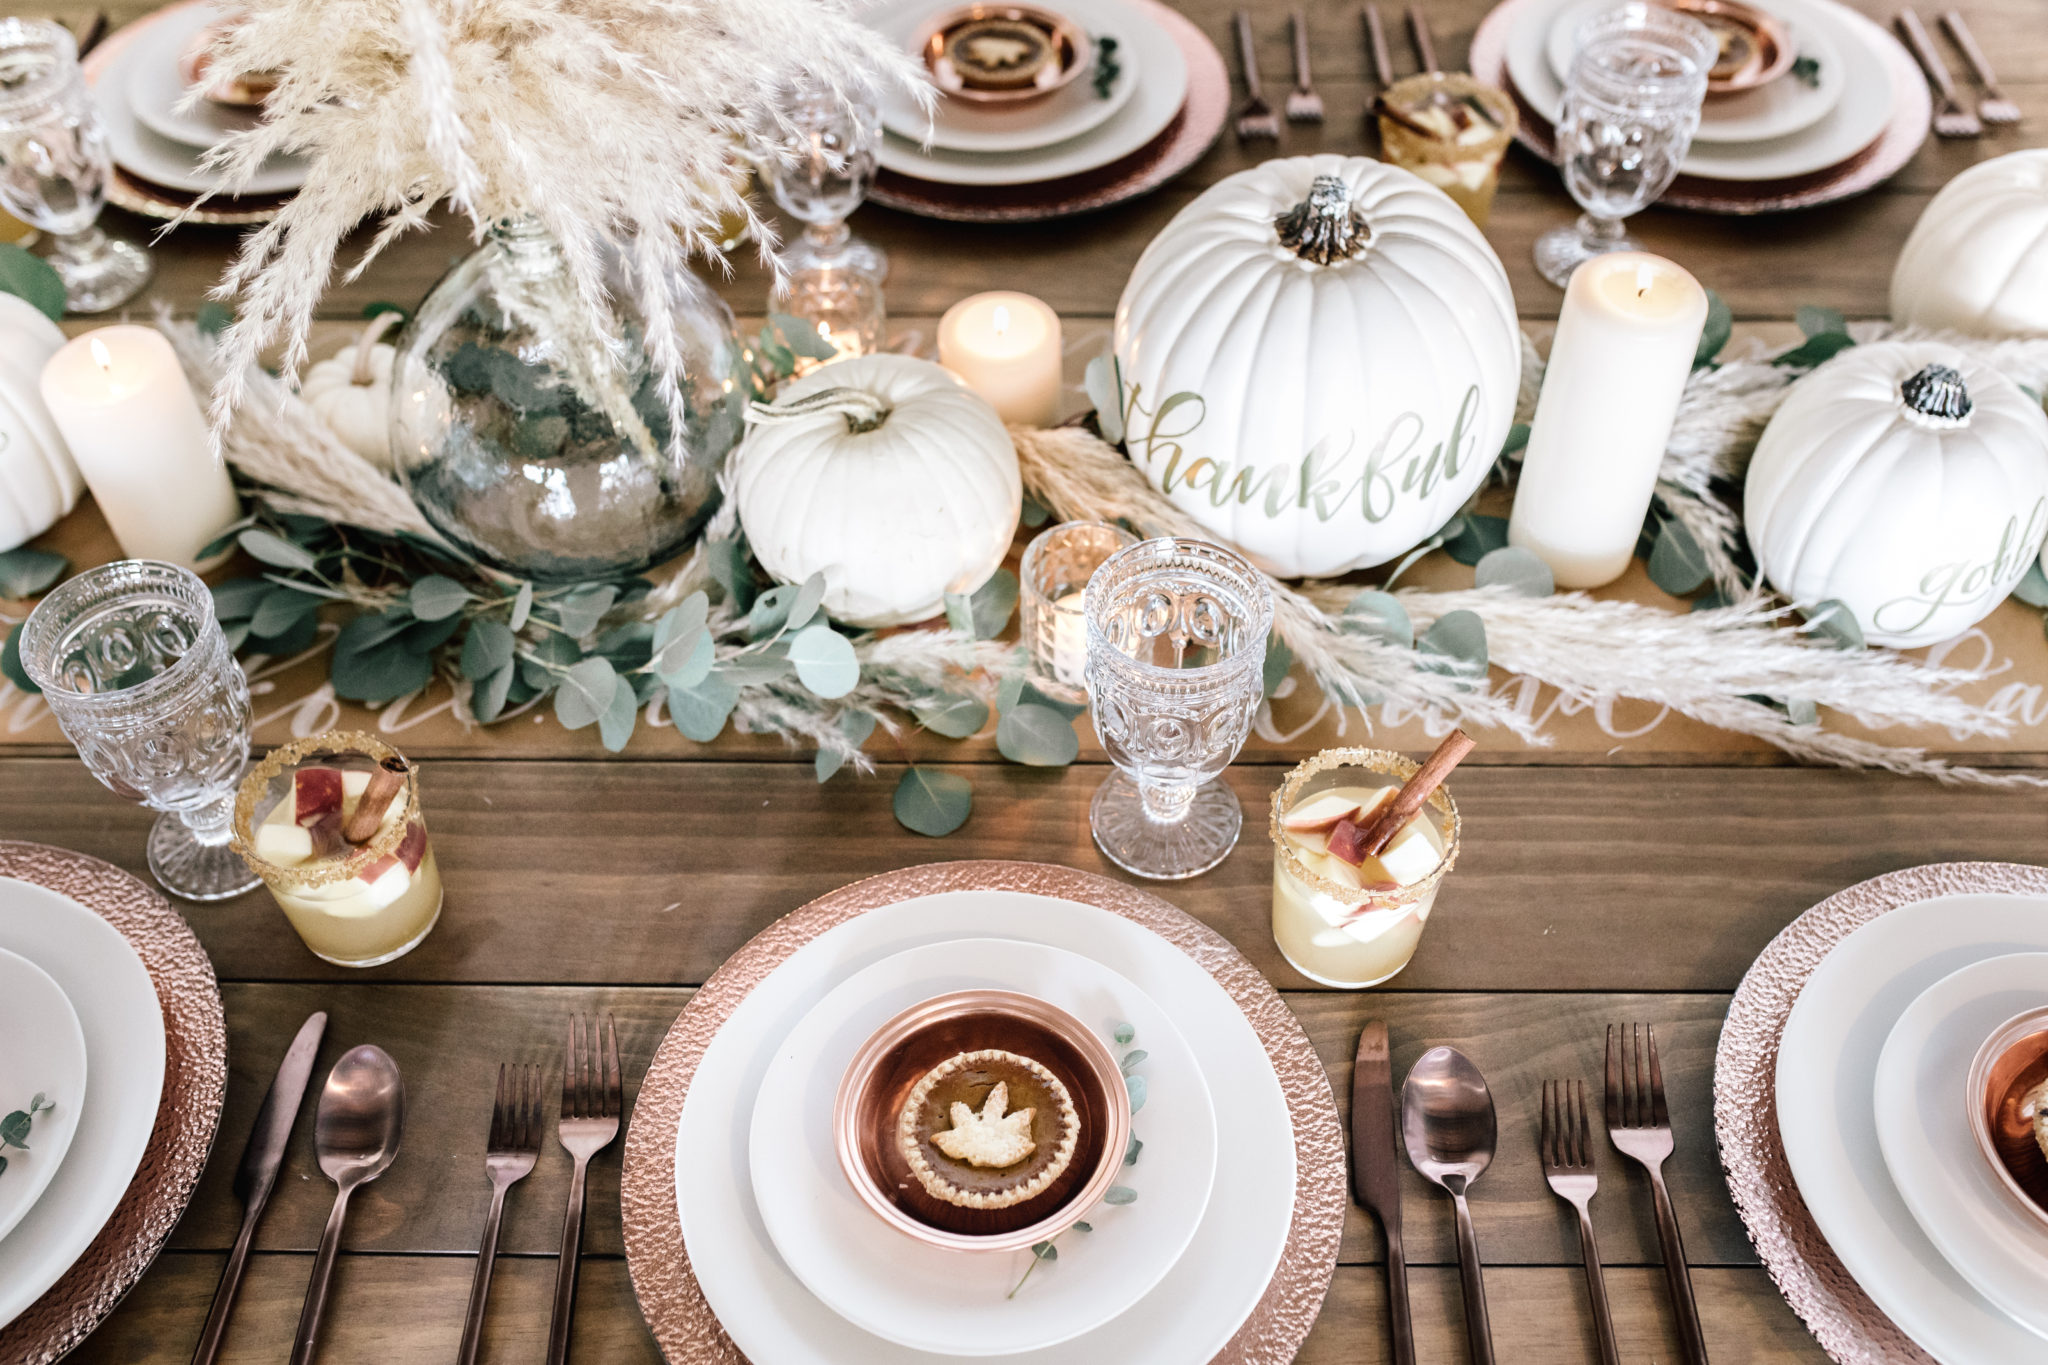
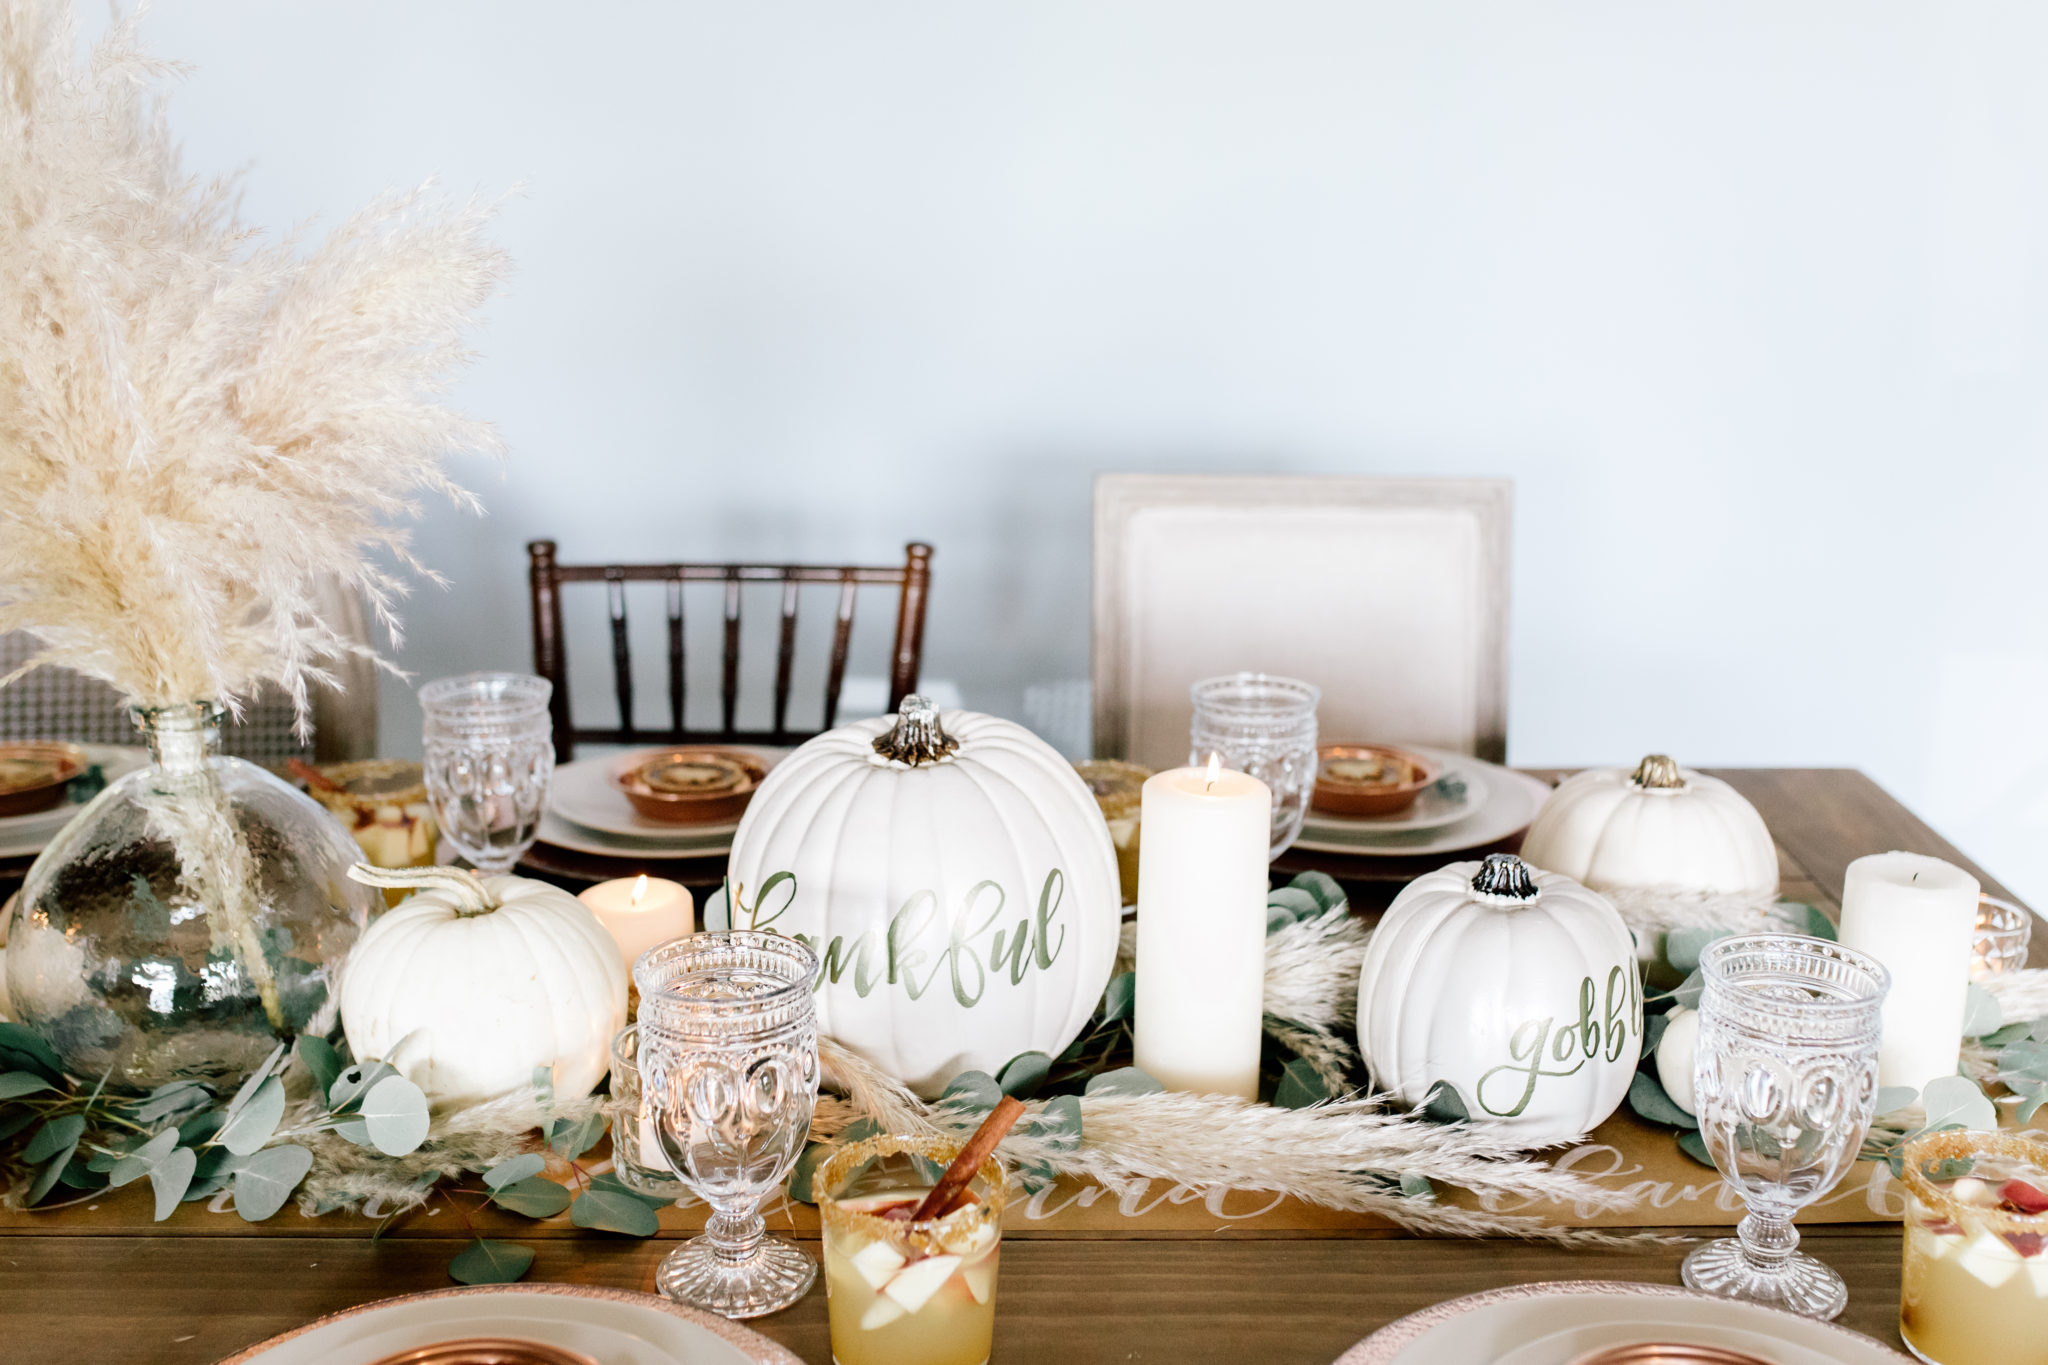
HOW TO THROW THE PERFECT FRIENDSGIVING
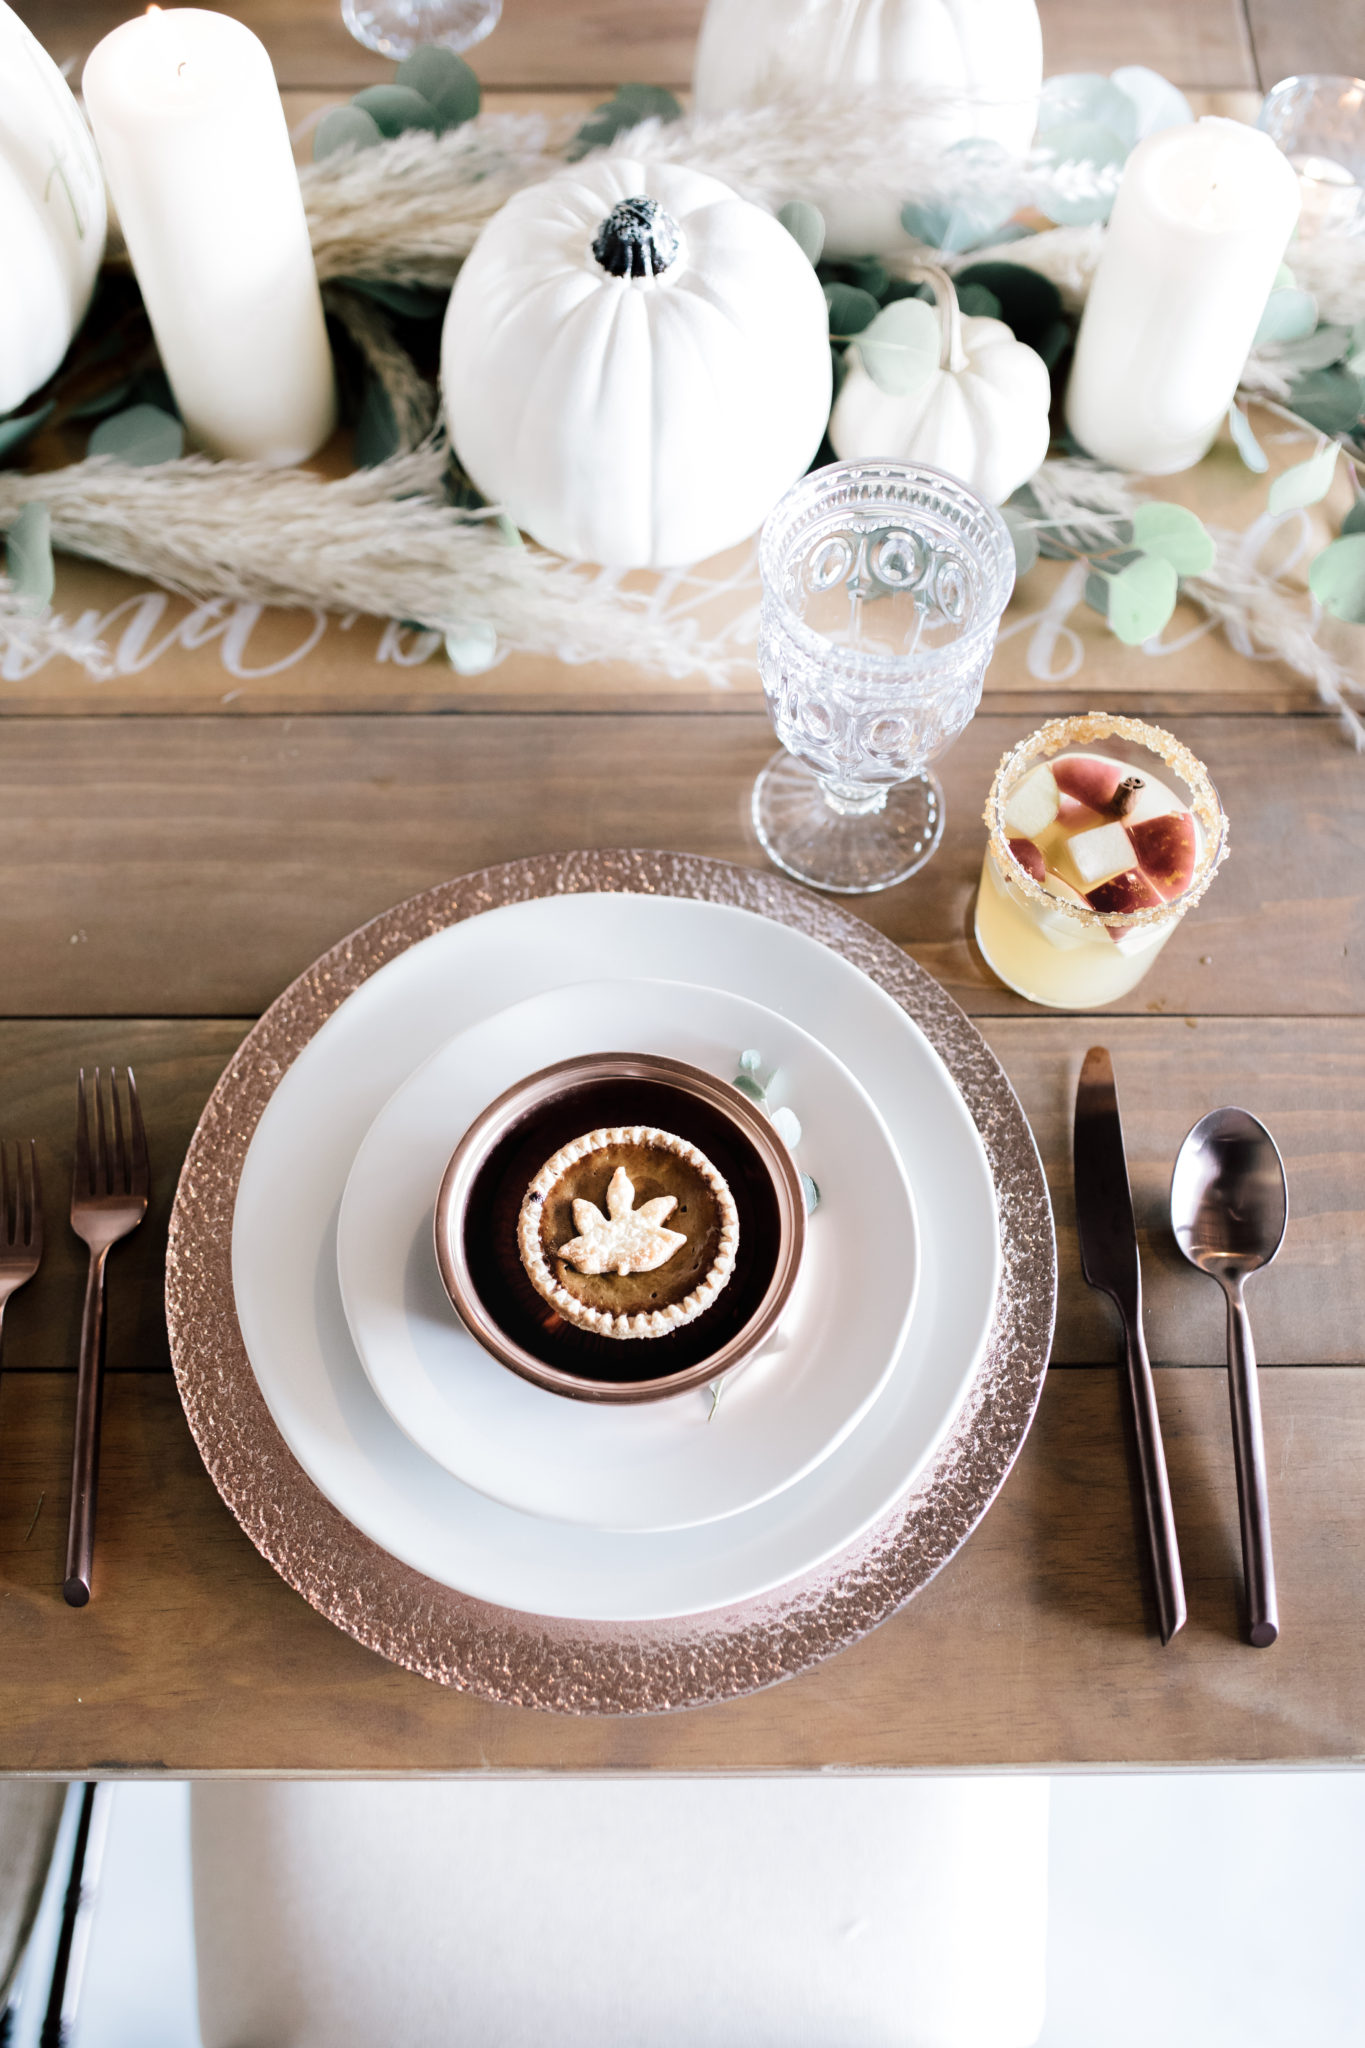
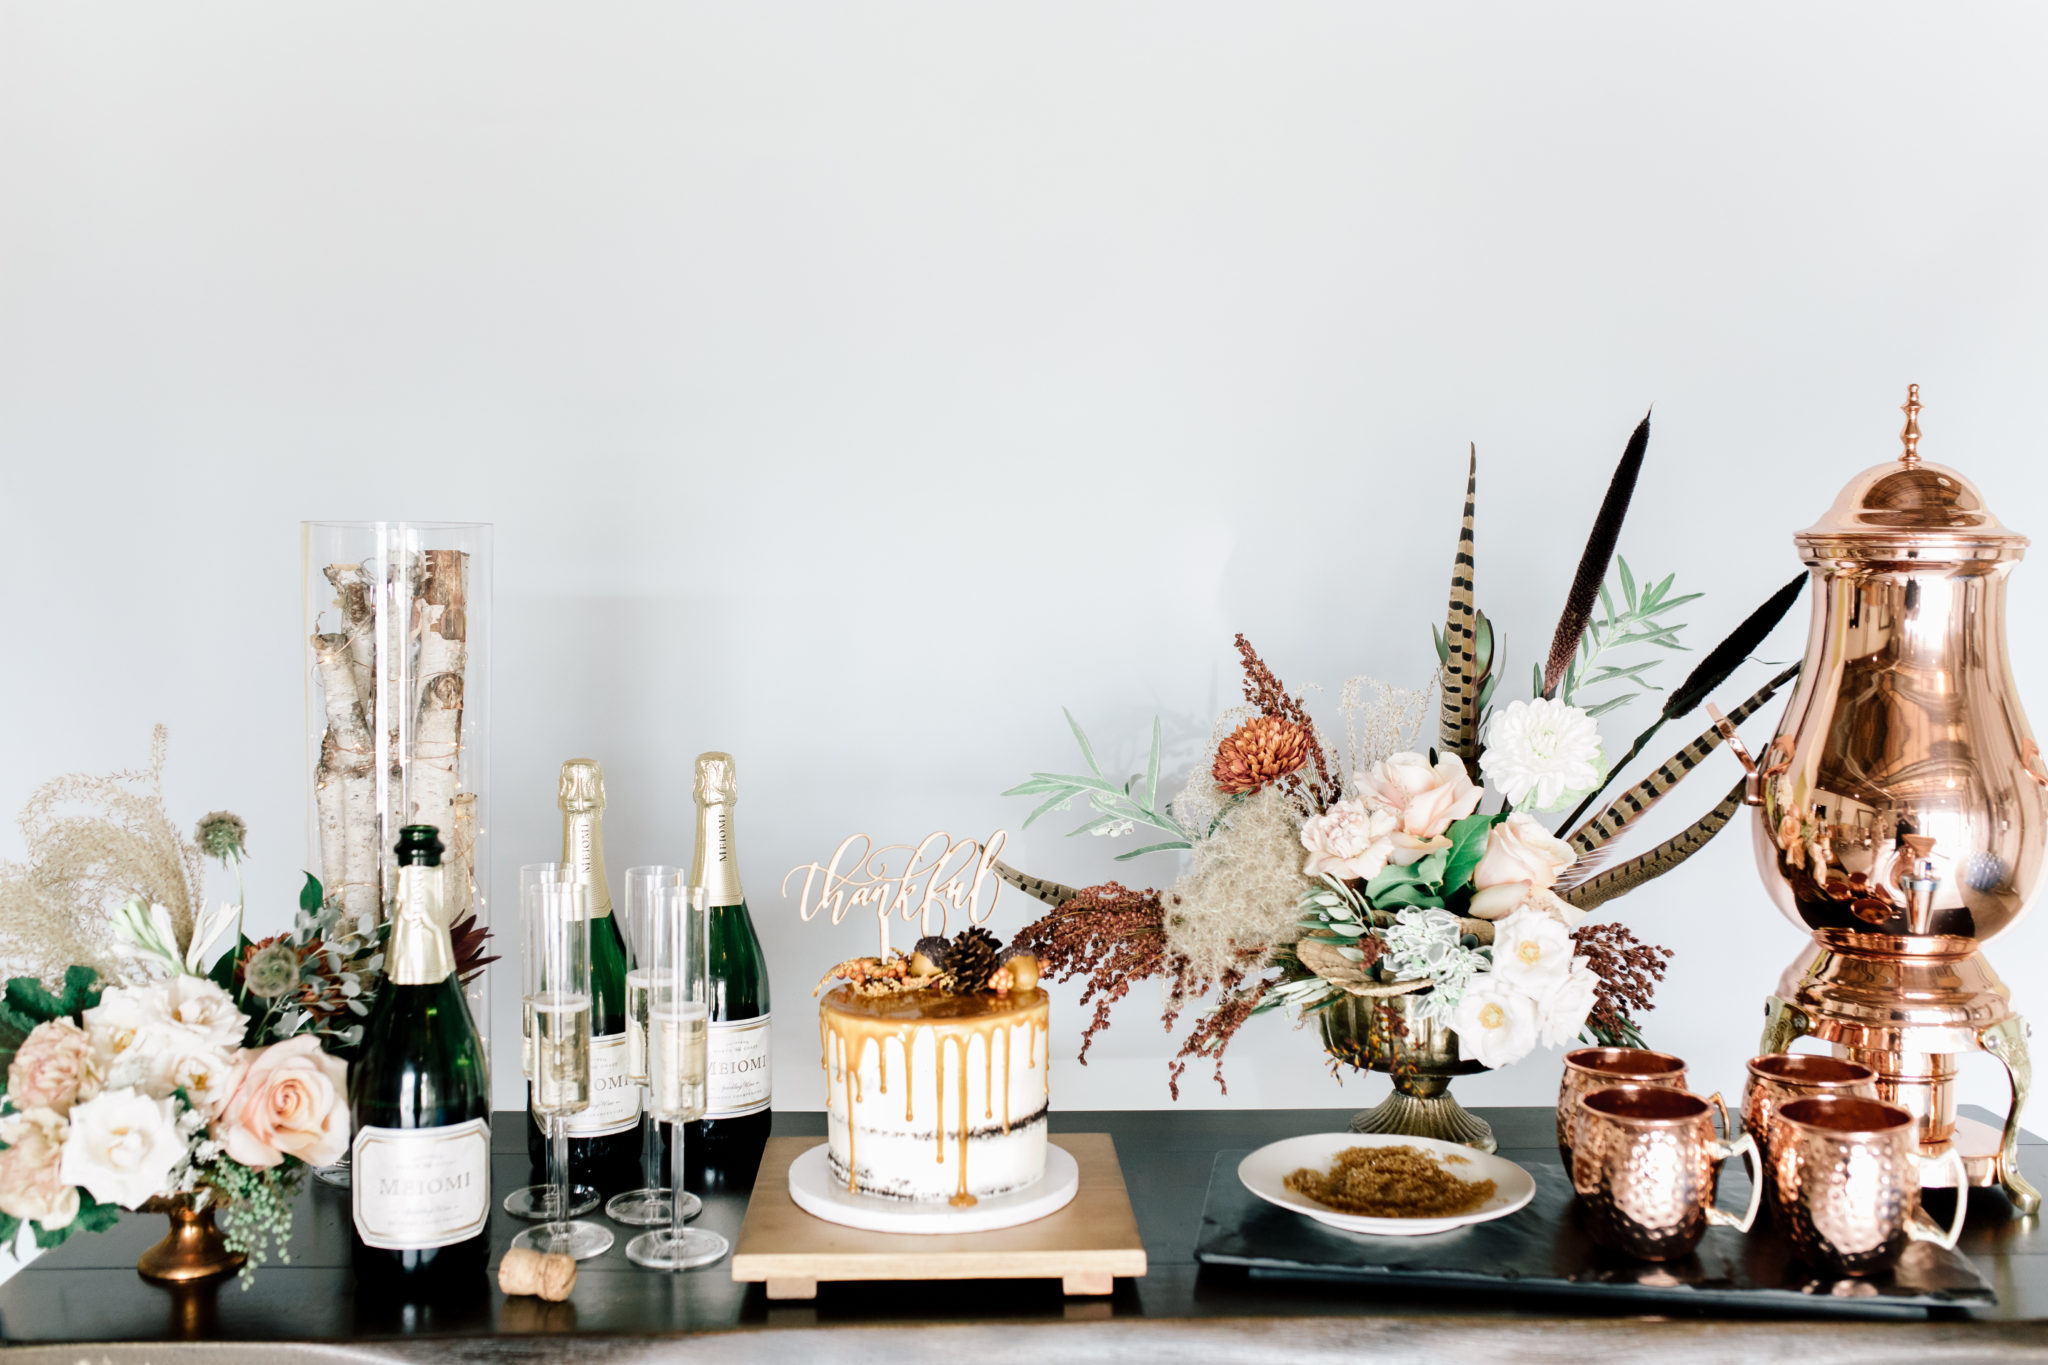
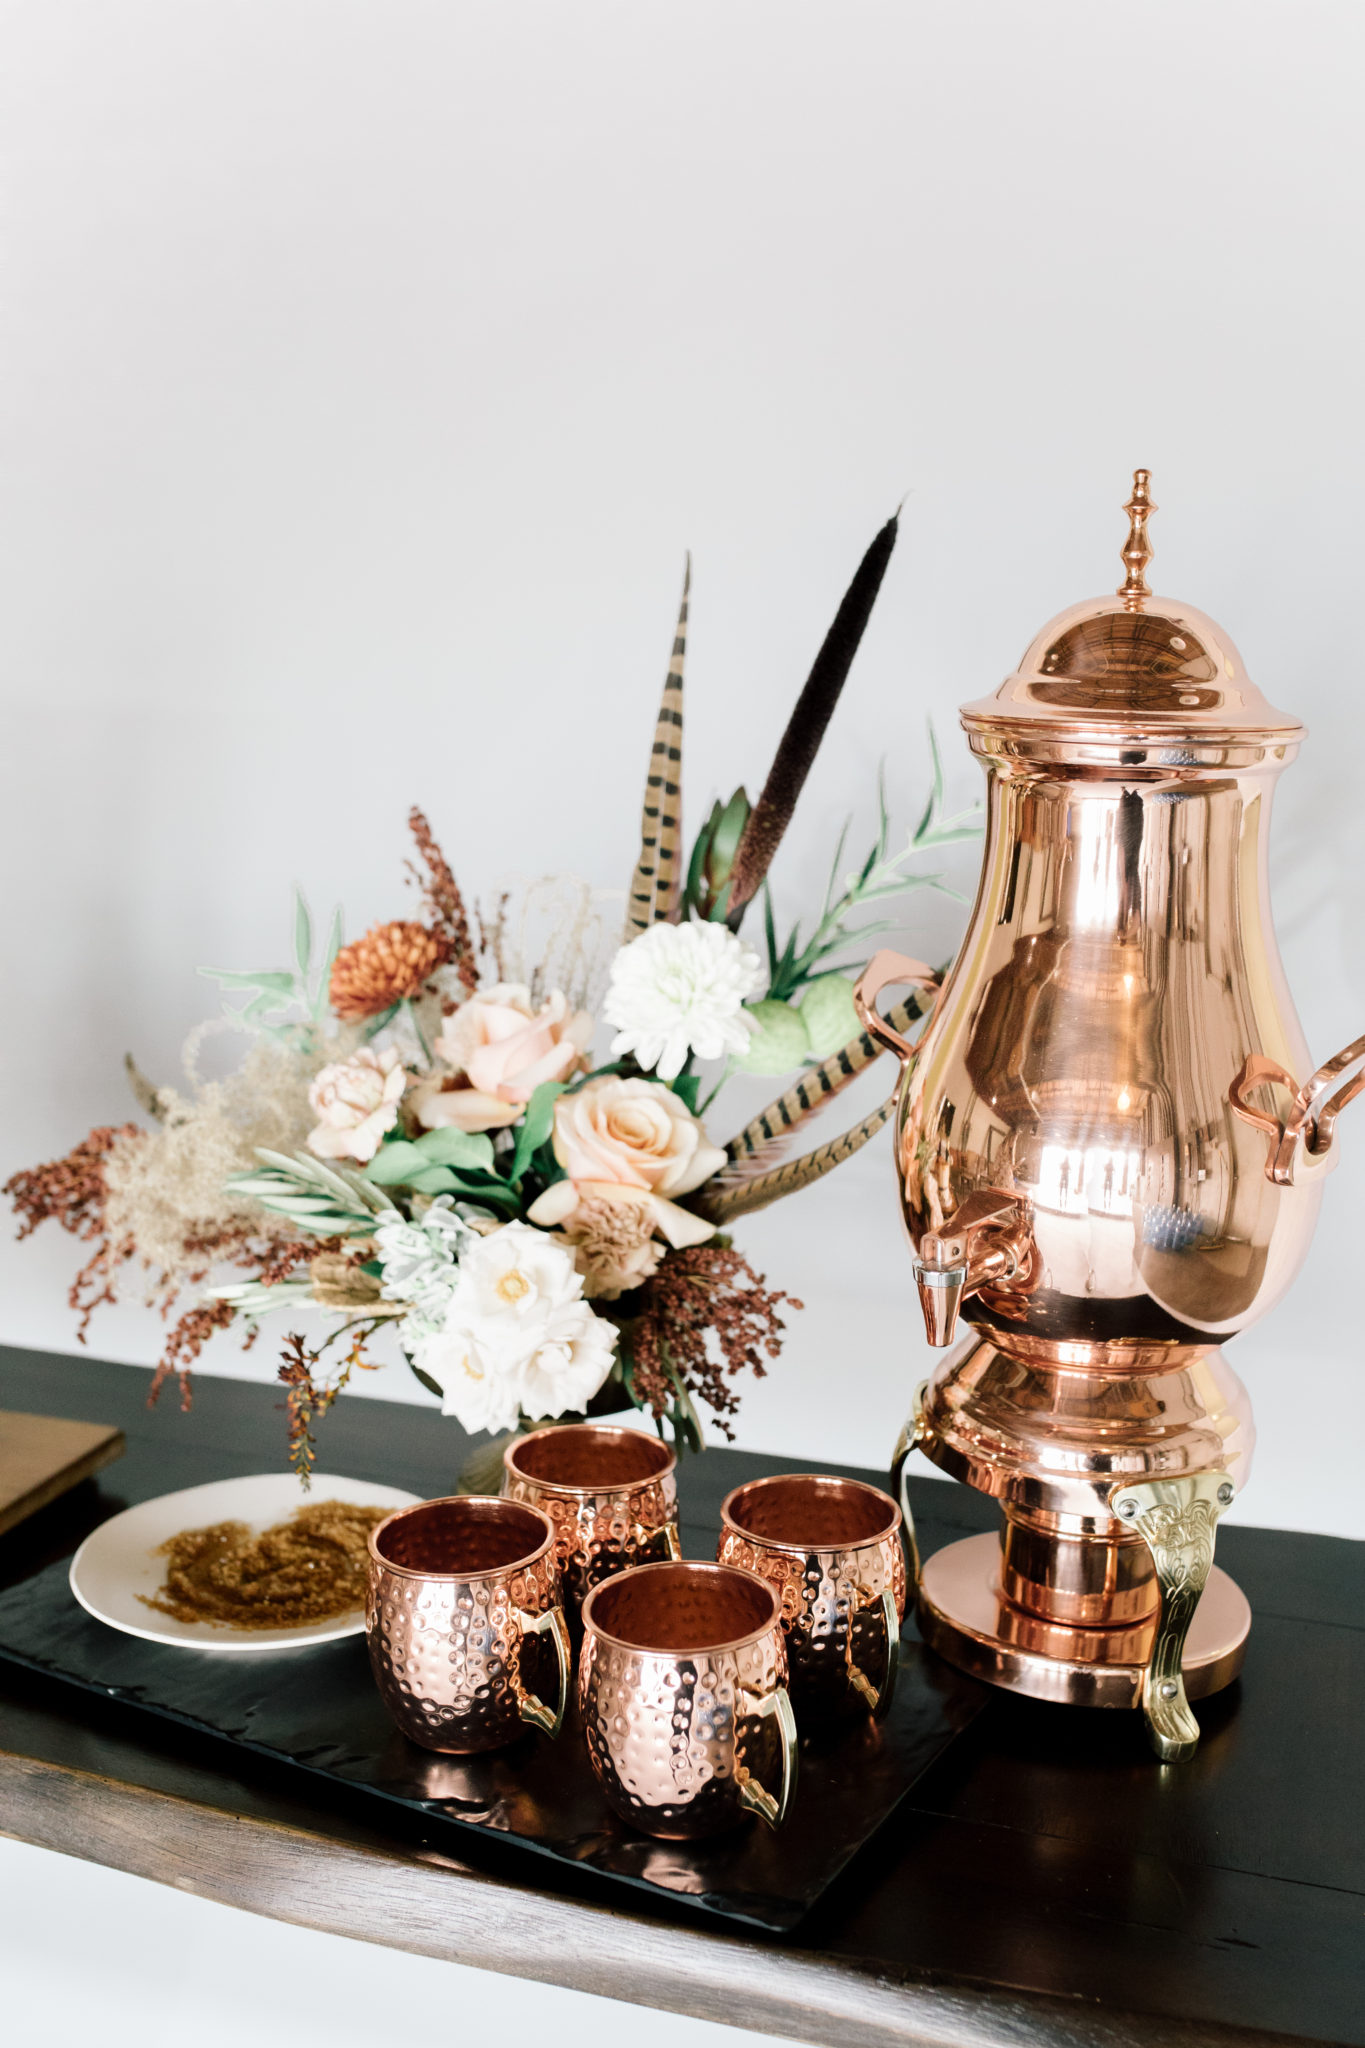
* Add a bar! This bar was rented from Please Be Seated (you can actually rent this entire set up for a really affordable price!). Throw a few champagne bottles (what is a party without champagne?) a cake, and a hot beverage dispenser with some copper mugs on there.
* Don’t skip cake! This beauty is from Copper Whisk Cakes. I promise you, she has the best cakes you could ever taste. There is a salted caramel flavor that is perfect for holiday festivities. We had this at Wilder’s birthday and a guest told us that he had often skipped cake at parties because he never knew it could taste like that. A cake just makes everything more festive!
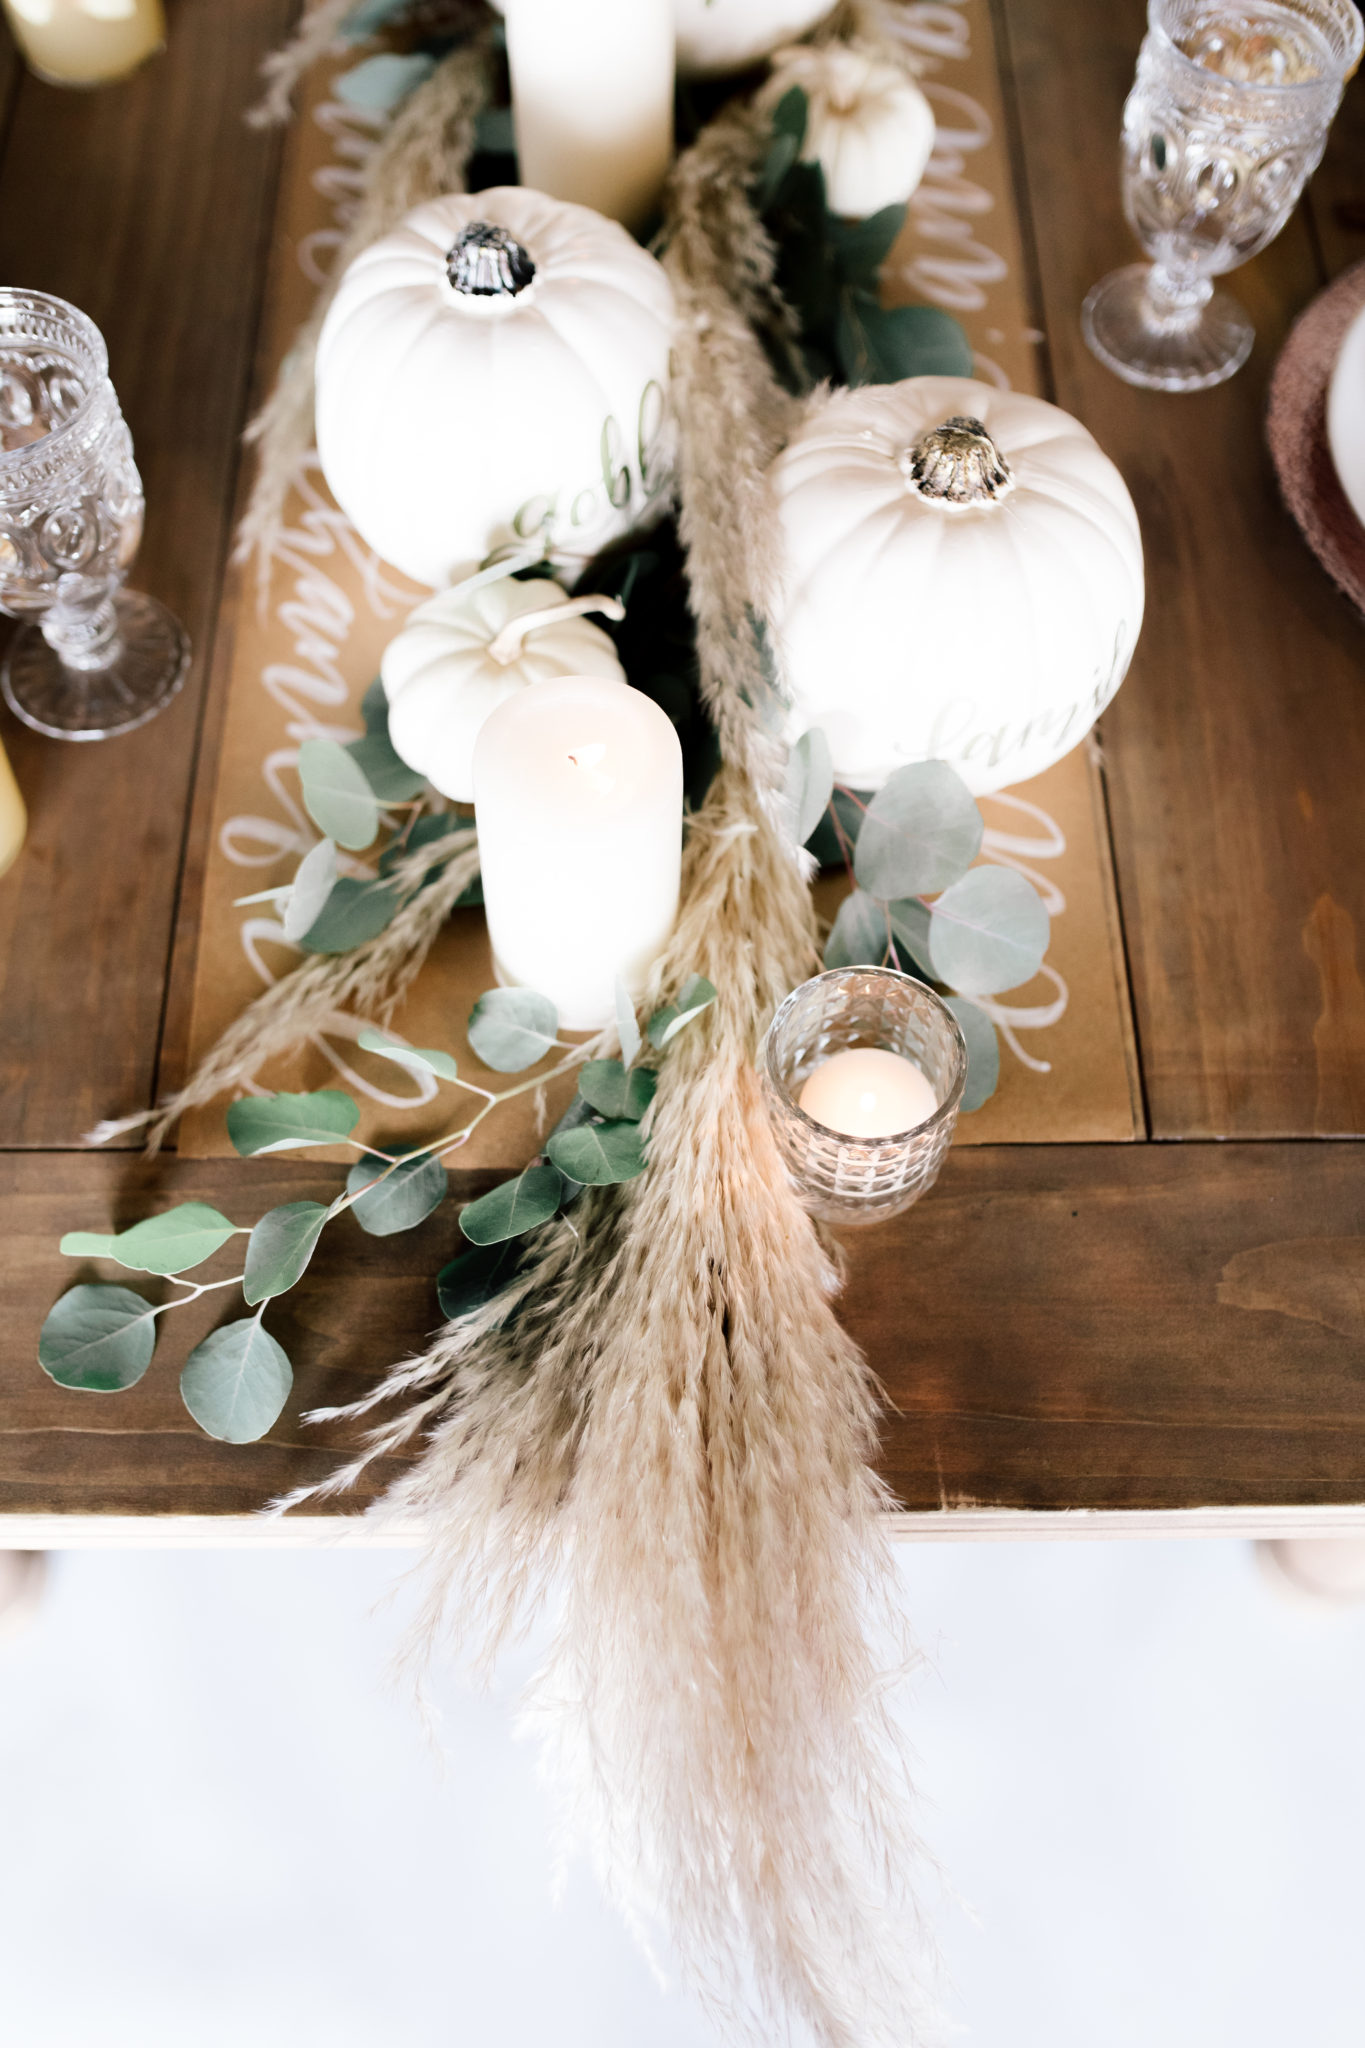
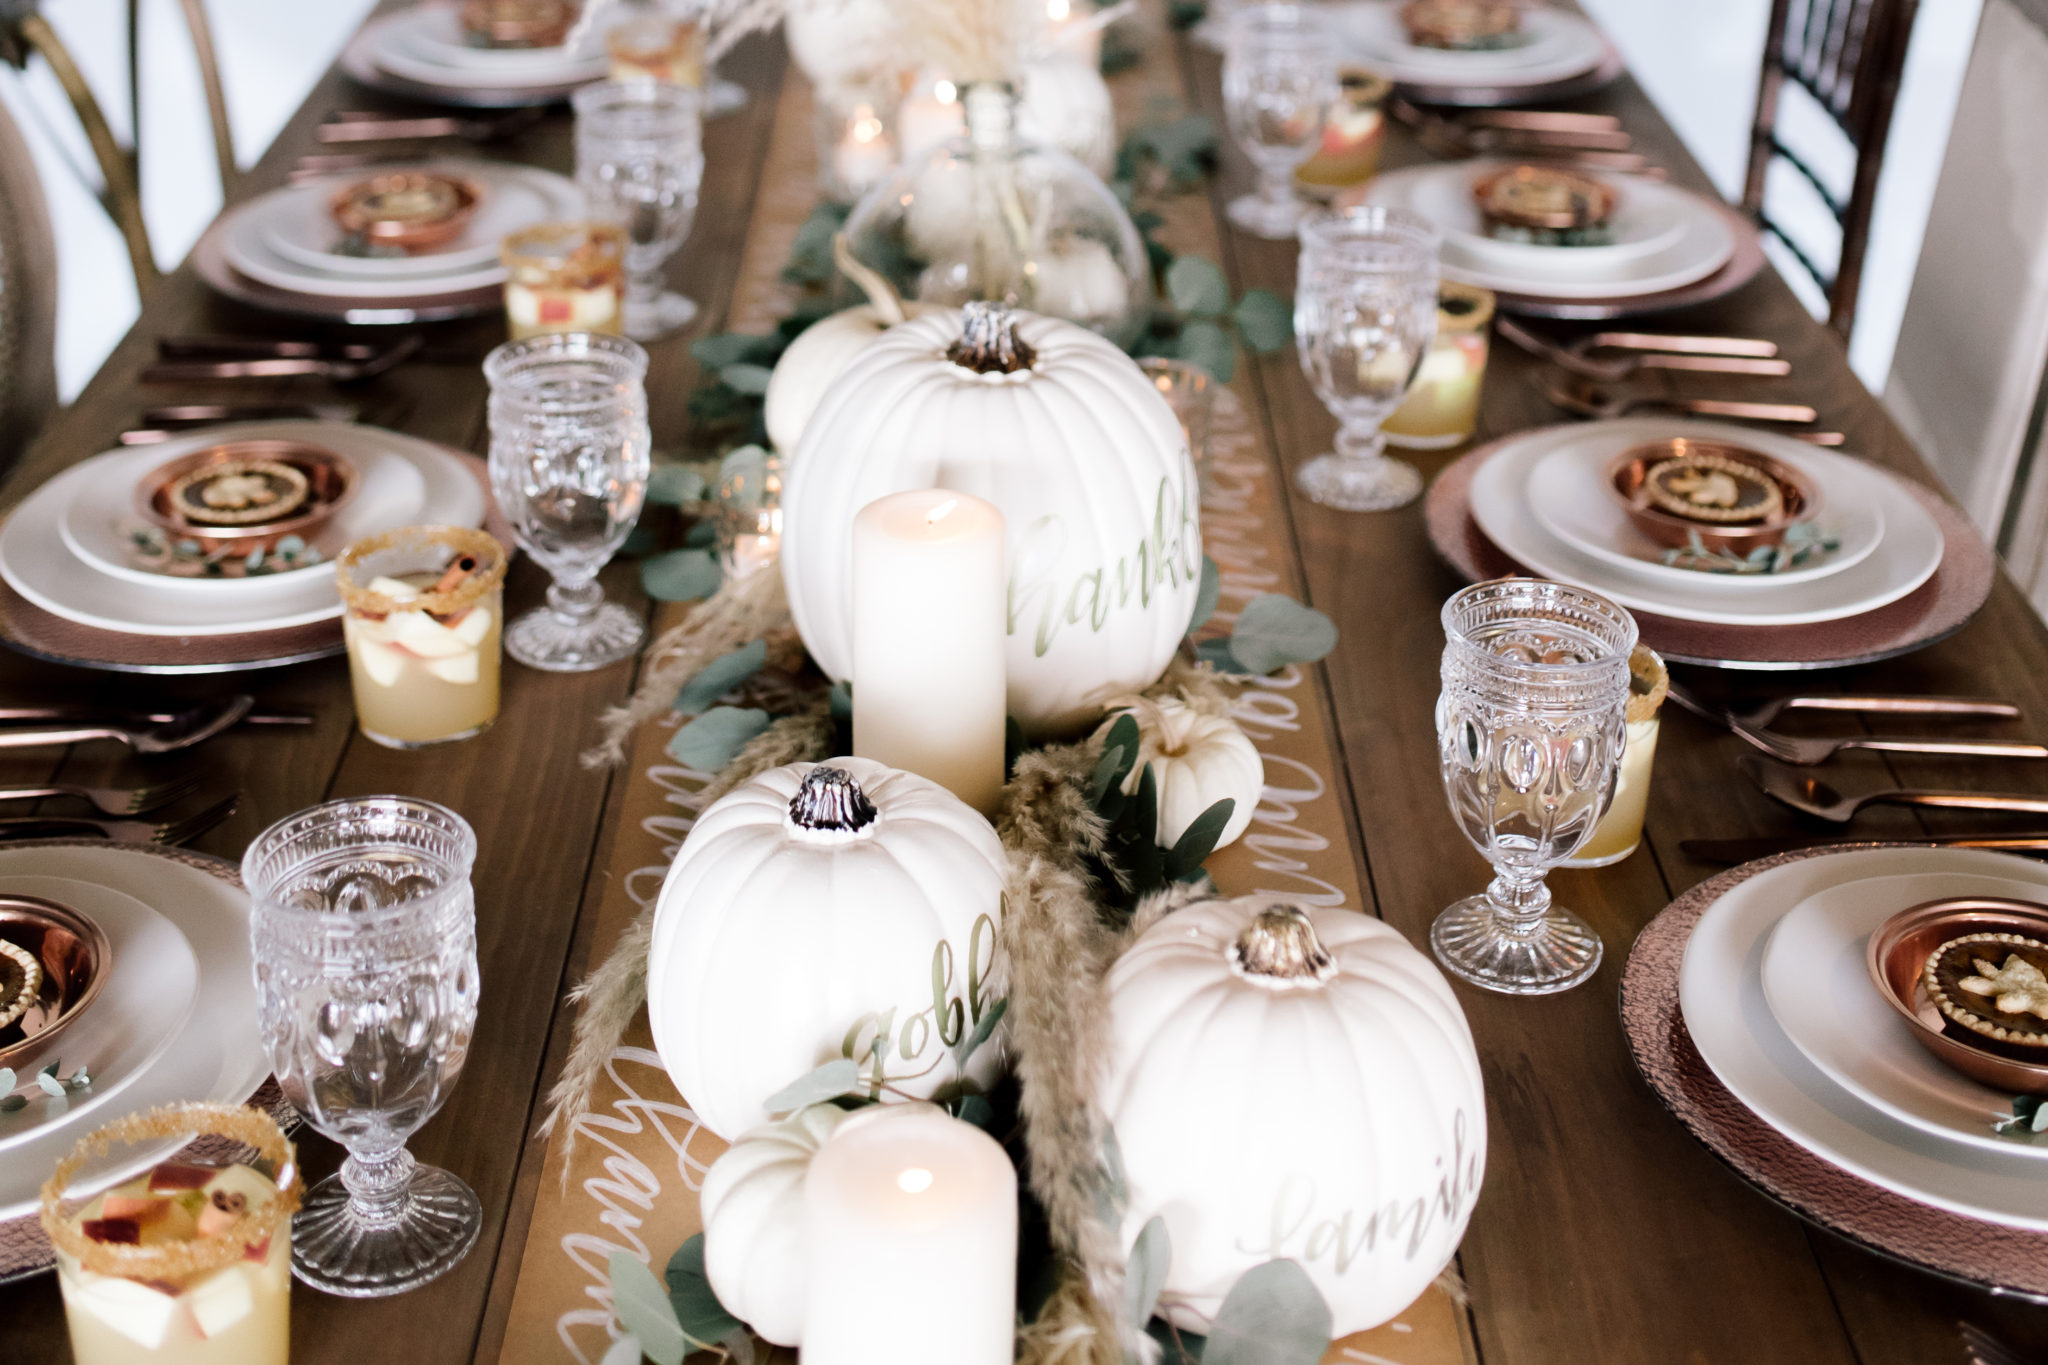
* Set a simple, but beautiful tablescape. This table runner from White Ink Calligraphy makes the perfect base. Also, add some calligraphy on white pumpkins. You could even add the guests’ names on the pumpkins and let them take them home as a sweet gift.
Foxglove & Heather is an amazing floral company and always has the best suggestions when it comes to floral arrangements and tablescapes. This is simple silver leaf eucalyptus and pampas grass. They both last a long time, and can be used after the event in your fall decor as well.
* Serve hot chocolate at the bar as an after dinner extra treat! Copper mugs are great for this!
* Have everyone bring their favorite dish that is special to their family traditions. It sparks conversation, and makes for a great meal when everyone is bringing the best of their best!
* Have a fun themed drink. This Apple Cider Sangria is a total crowd pleaser! My friend, Jenn sent me this recipe and I tweaked it a bit to make it my own. Such a hit!
APPLE CIDER SANGRIA
1 Bottle of Pinot Grigio
2 1/2 Cups Fresh Apple Cider
1 Cup Club Soda
1/2 Cup Ginger Brandy
1/4 Cup Ginger Bear
3 Honey Crisp Apples (Chopped)
3 Pears (Chopped)
Combine all ingredients and stir. Chill in fridge for at least an hour.
To Serve: Pour some brown sugar on to a plate. Wet the top of the glass and spin top of glass in brown sugar mixture to coat rim. Pour in sangria mixture and garnish with a cinnamon stick. Enjoy!
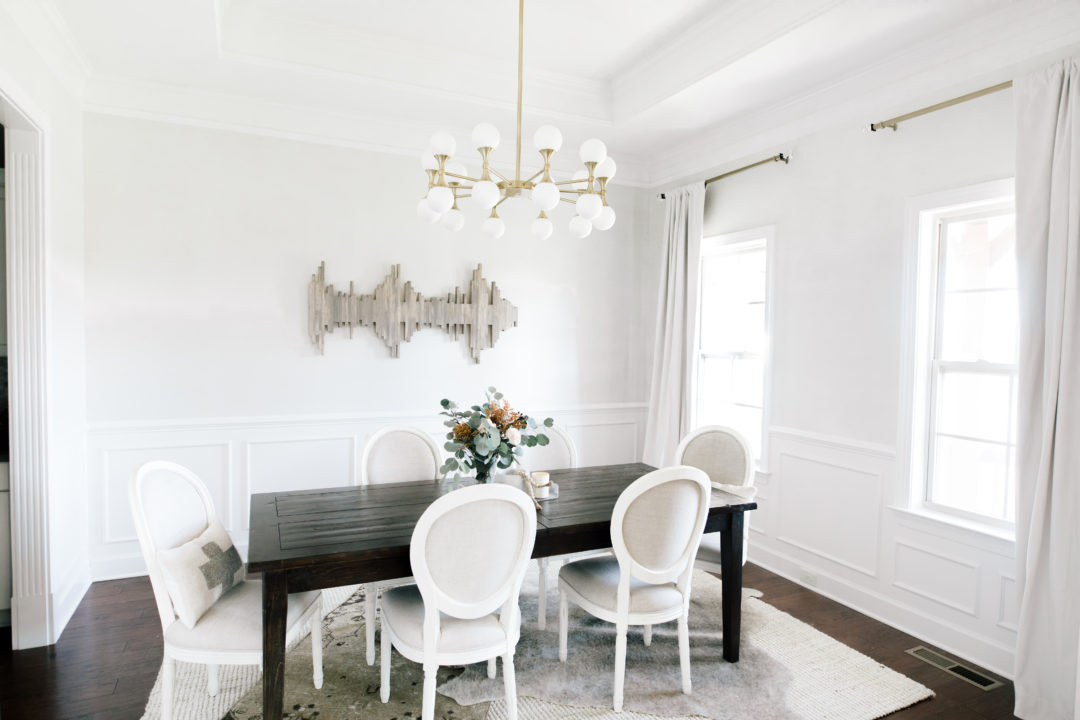
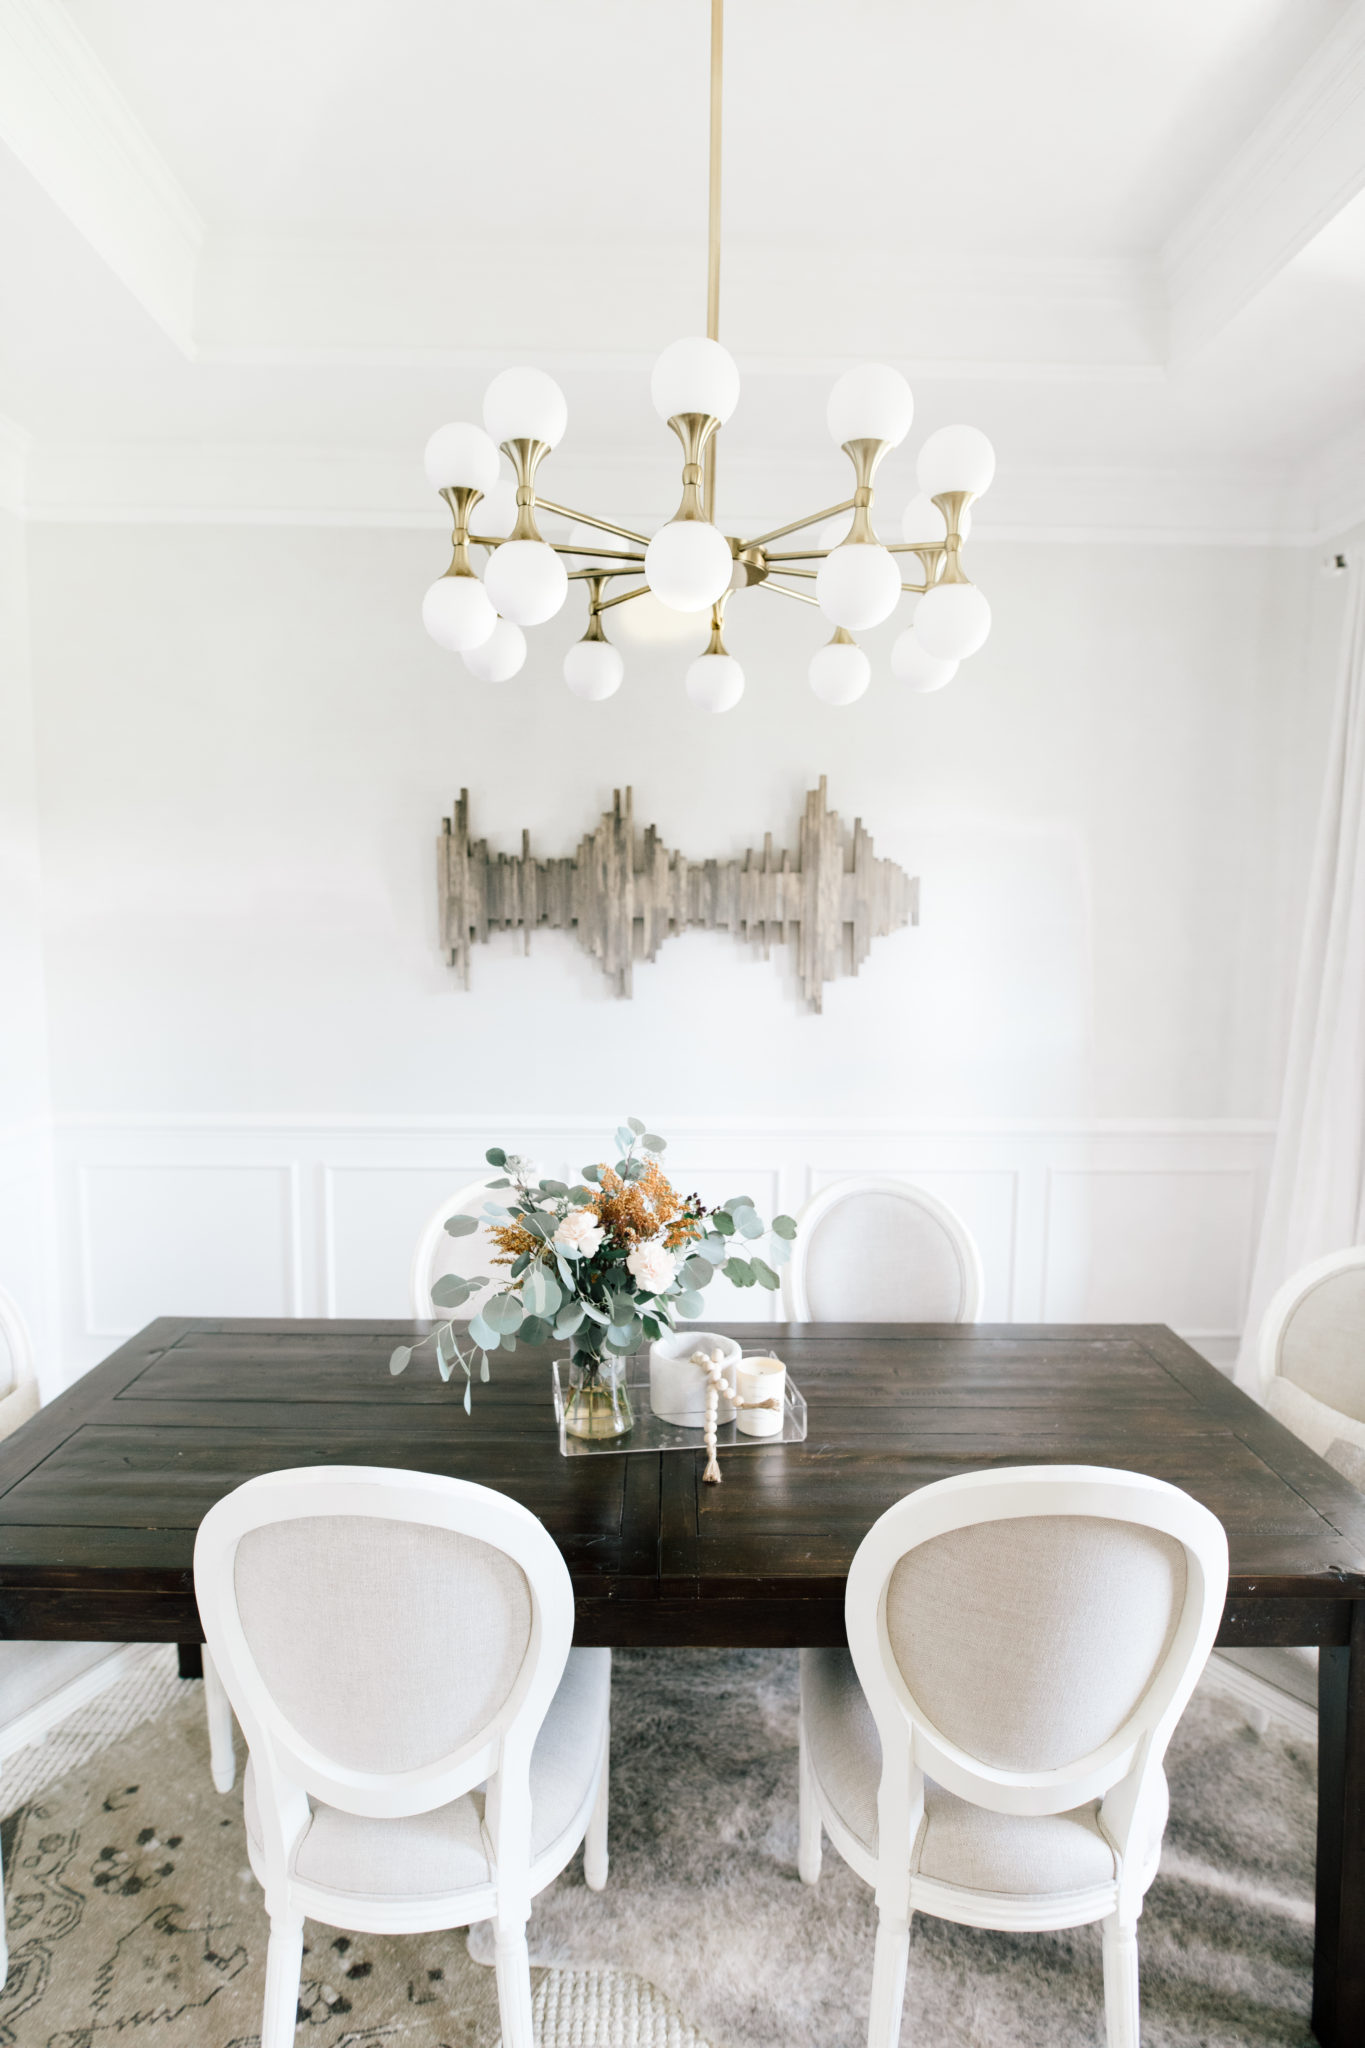
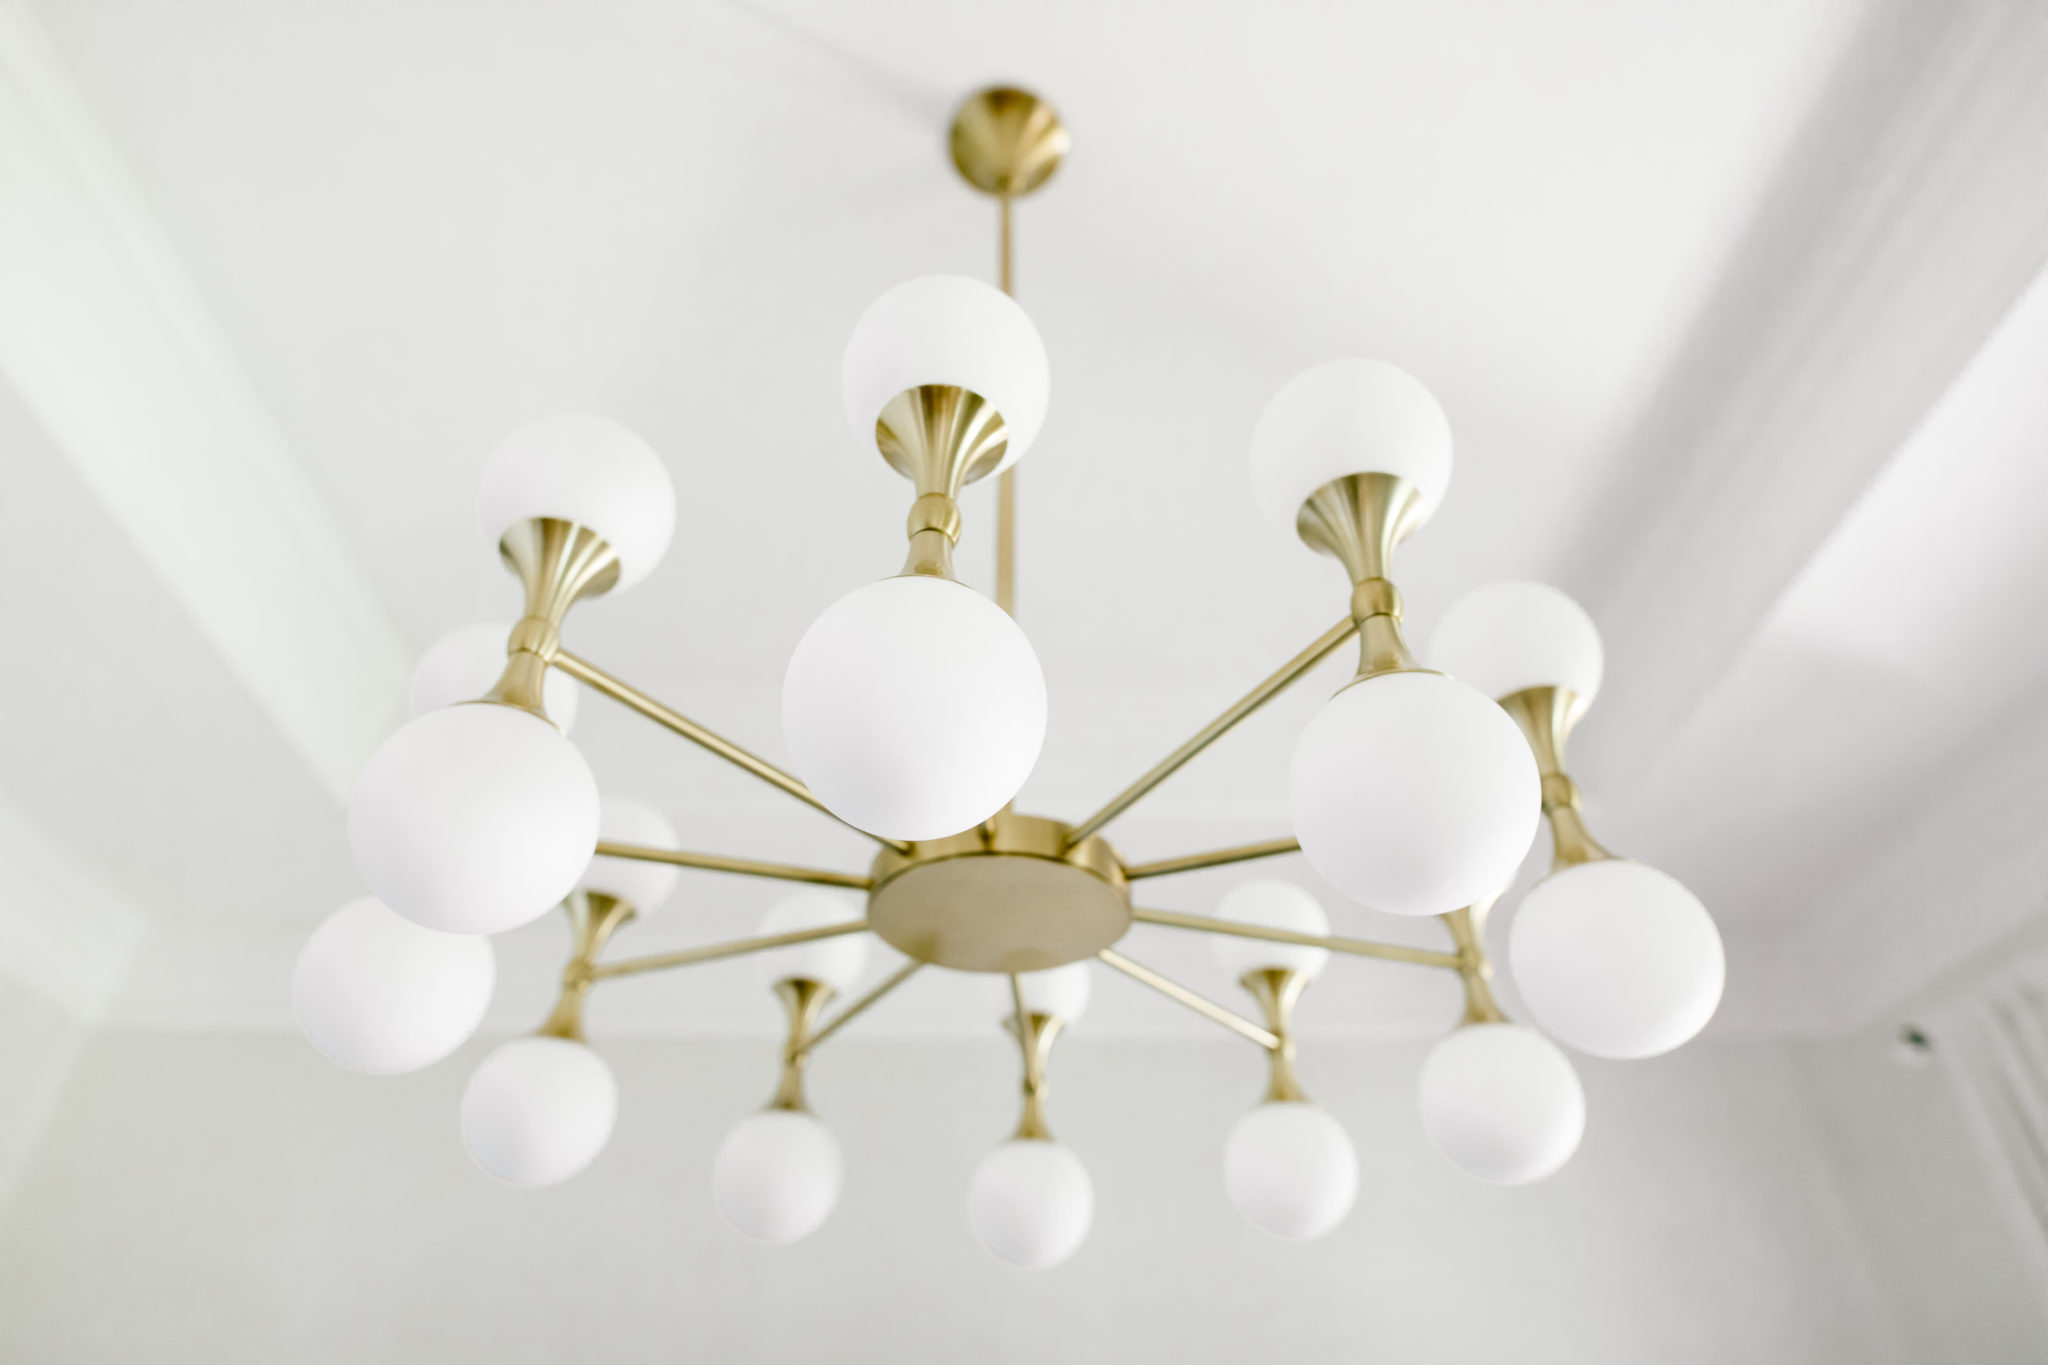
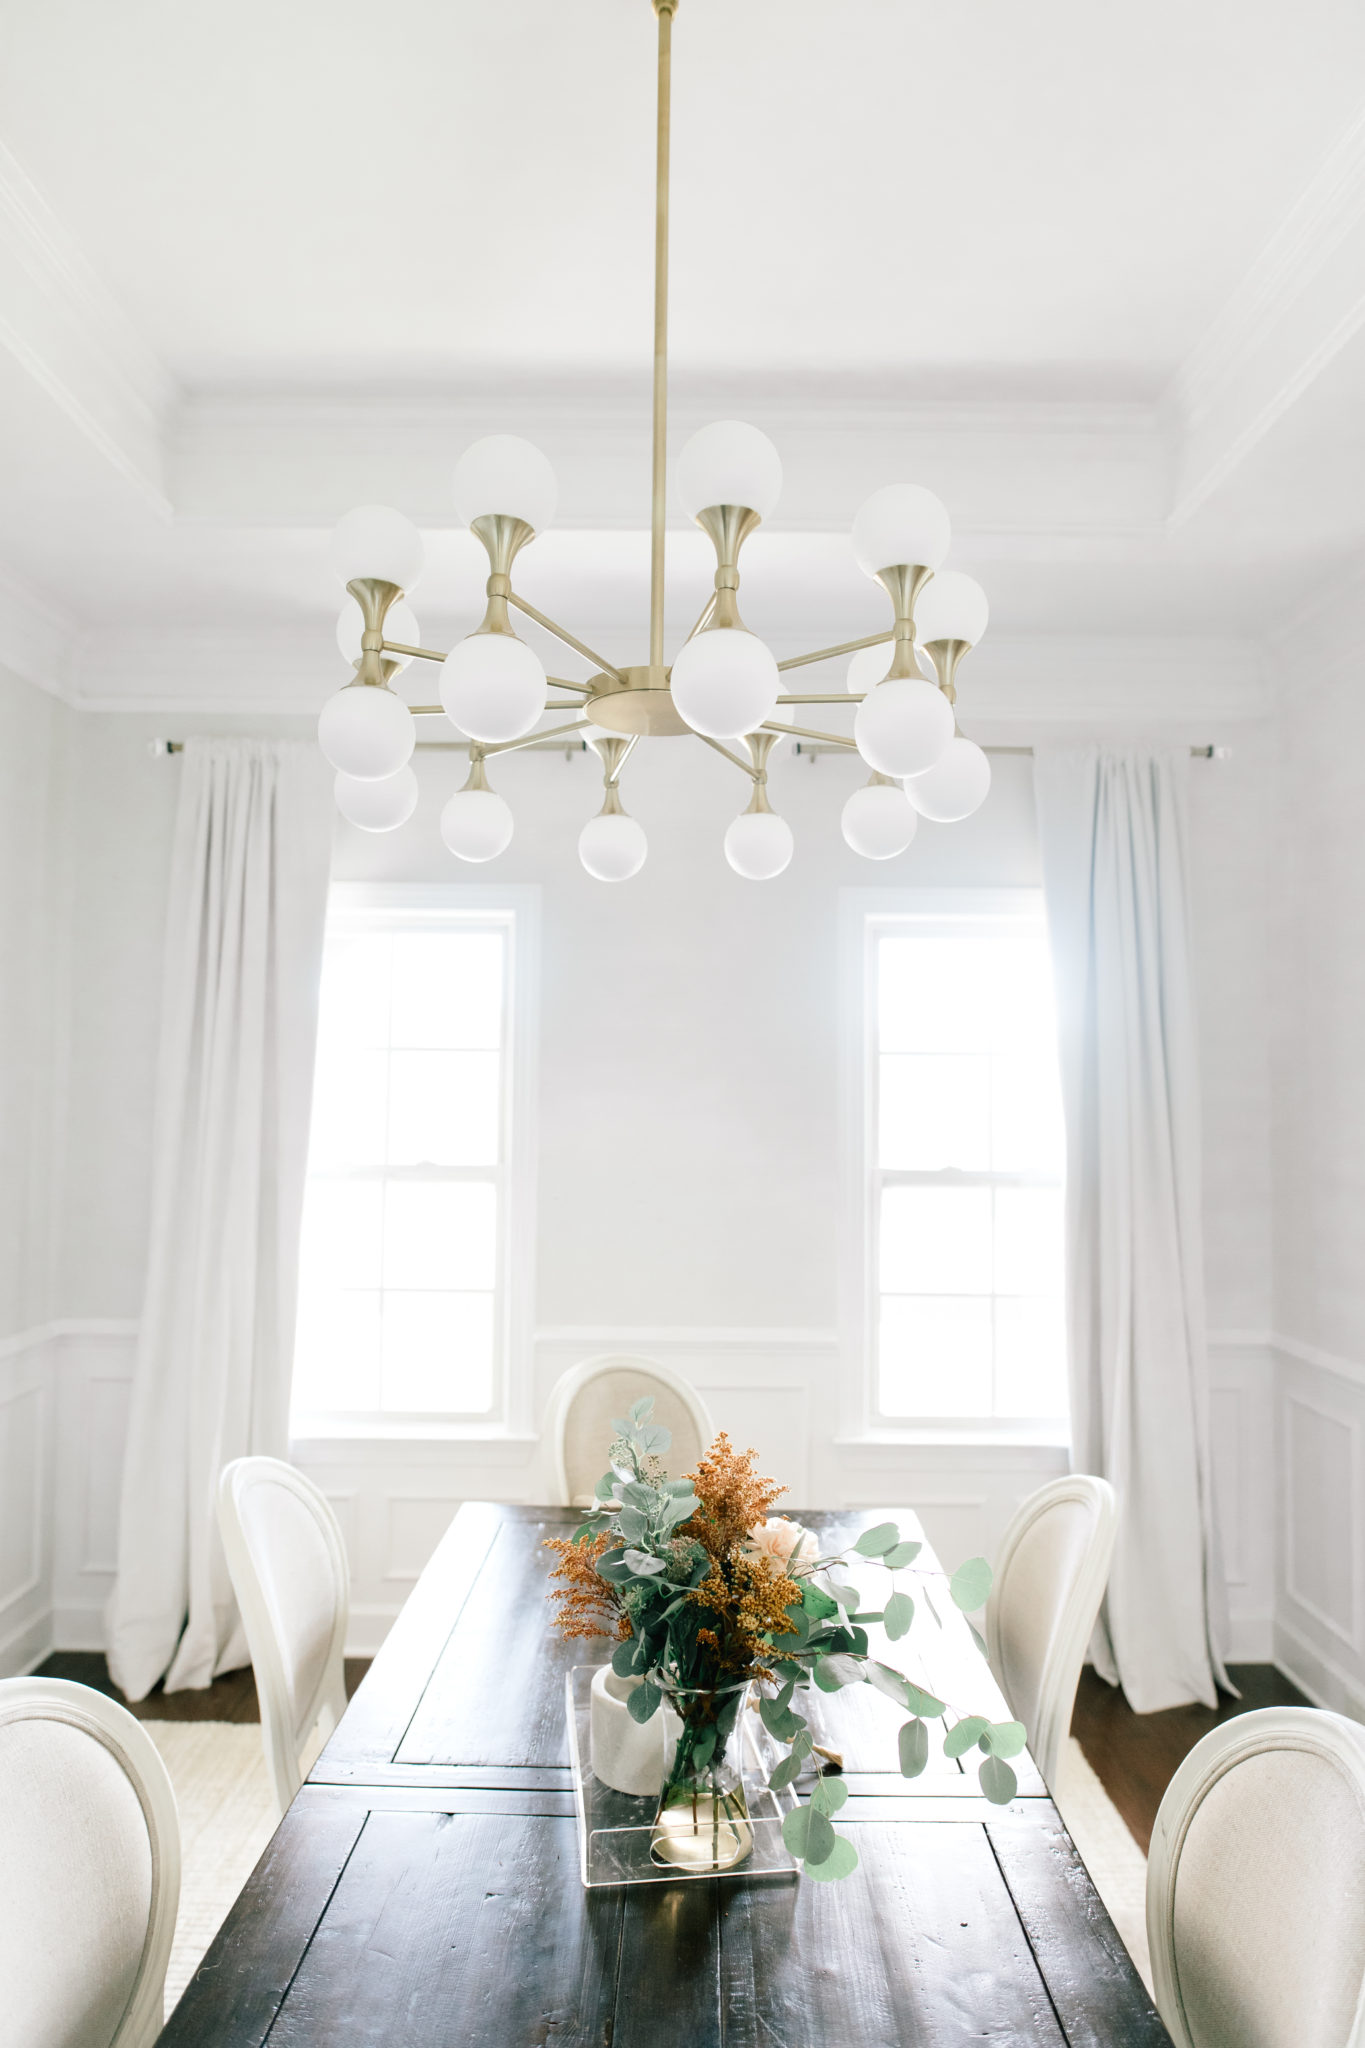
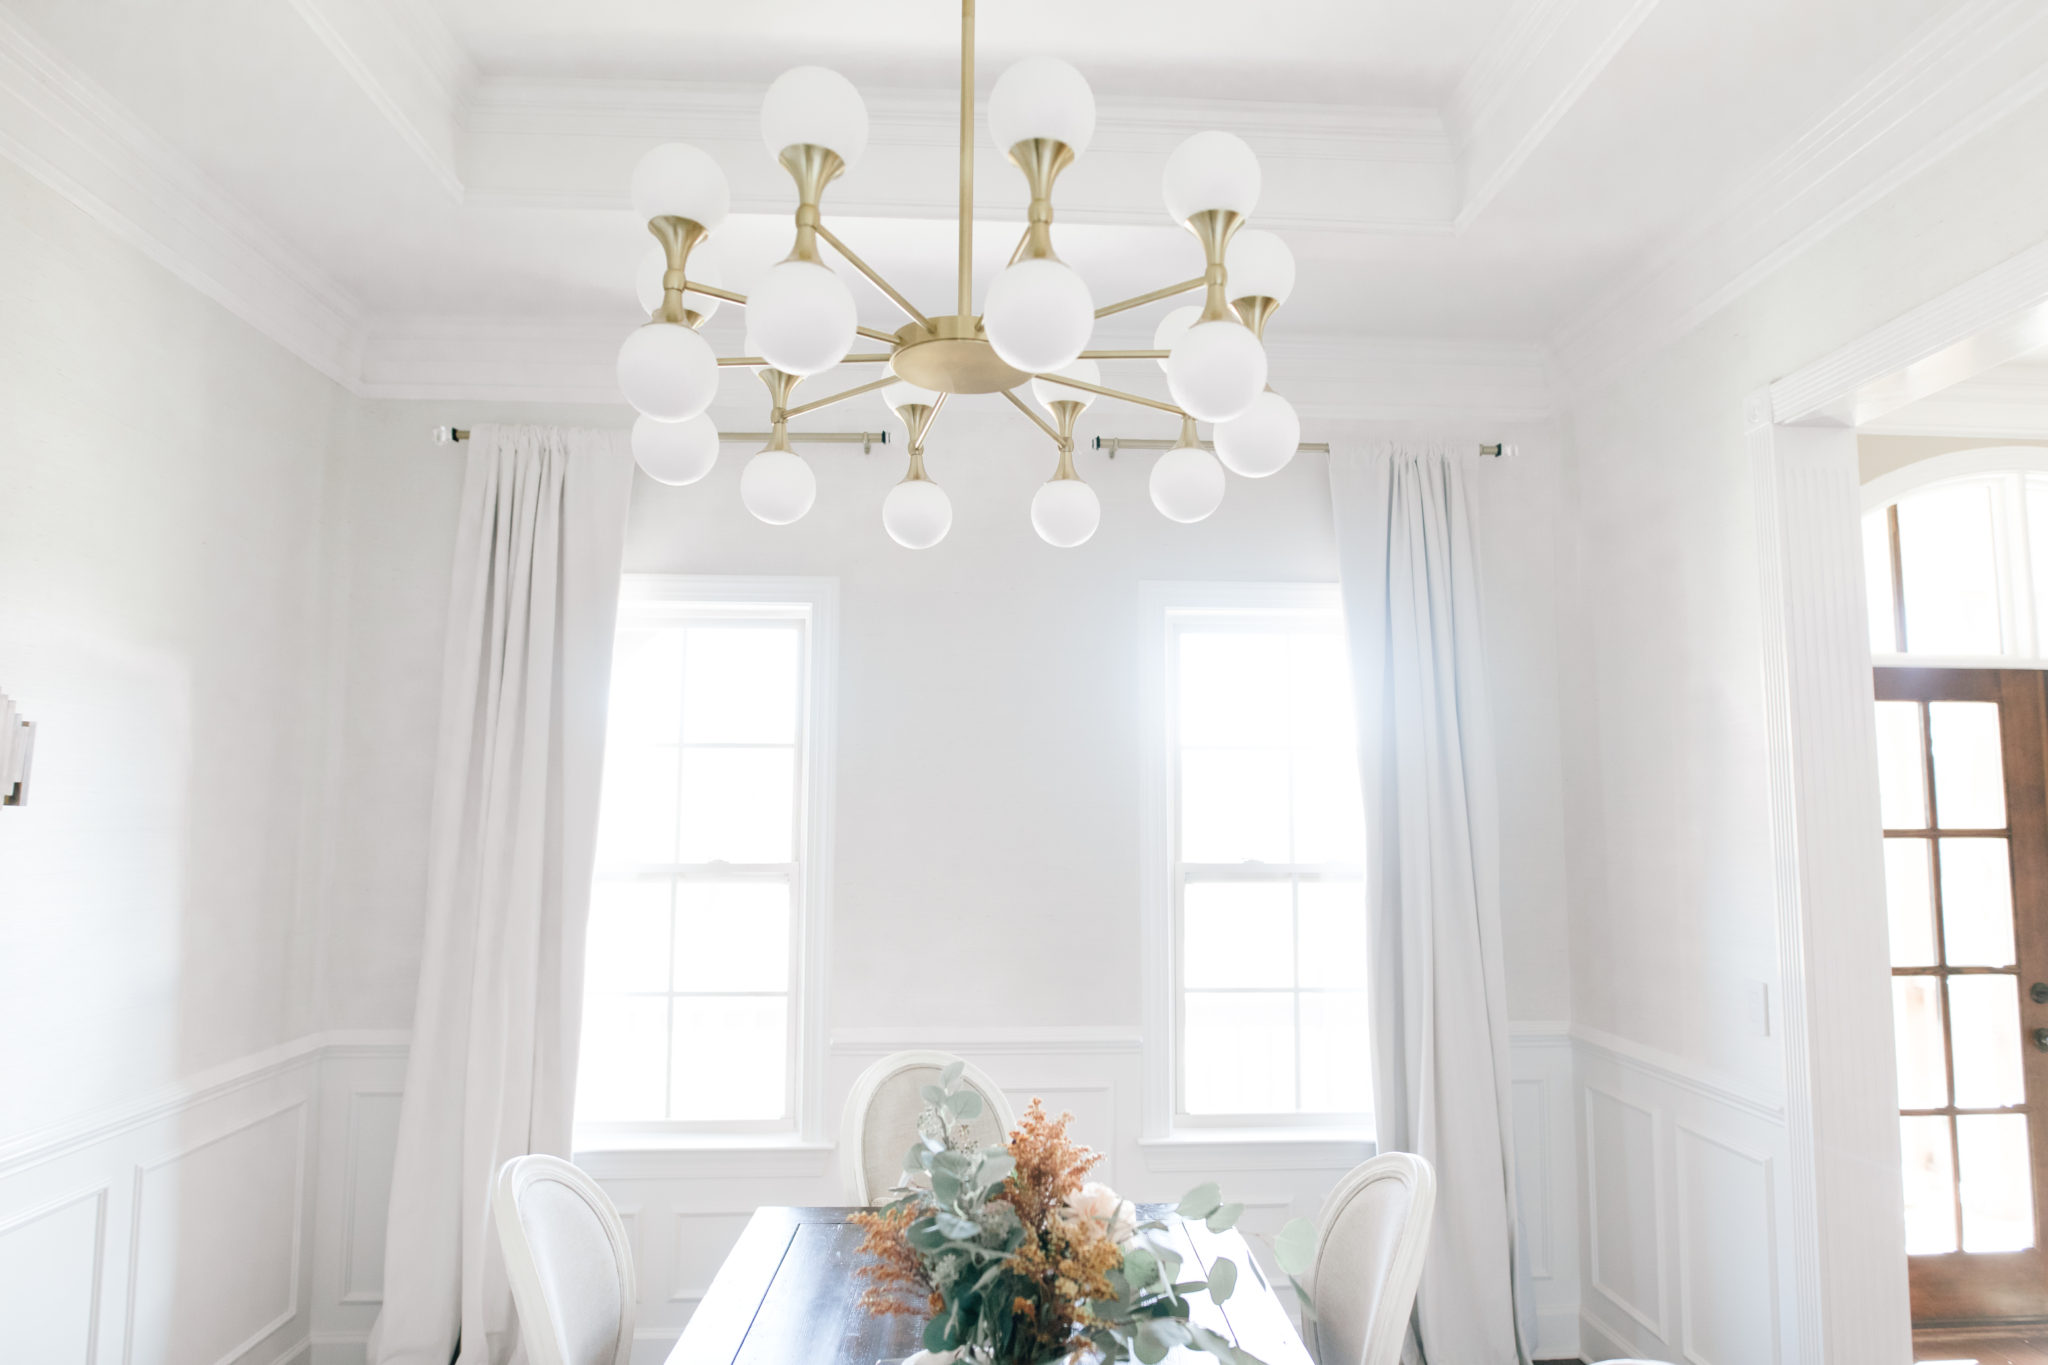
How stunning is this Hudson Valley Lighting Astoria Chandelier?! It was such a beautiful piece that I wanted to keep the rest of the dining room decor simple to let it shine. (Literally..ha!)
We started with a bright natural grasscloth. It’s a great way to add some texture into the space.
The rustic dark wood table tied in the darker tones of the floor. This exact table is Restoration Hardware. I’ve found a very similar, but more affordable option HERE.
The white chairs make a nice contrast to the table, and make it fun. (I’m still thinking of changing these out, but they work for now!) These exact are from Restoration Hardware as well. I’ve also found a similar, but more affordable option for those HERE.
Texture is my favorite to play with in home decor. If you stick with a more neutral palette (like our home) it’s the easiest way to add interest and have a more styled look. The easiest way to instantly add texture to a room is by layering rugs.
The base layer is this chunky jute rug. I can never deny a faux cowhide, and this grey version is at a great price point too! I’ve recently loved adding vintage turkish rugs into our home and the dining room decor was no exception! The prints are unique. This one was found at this Etsy shop HERE.
The curtains are velvet to continue with the texture play throughout the space.
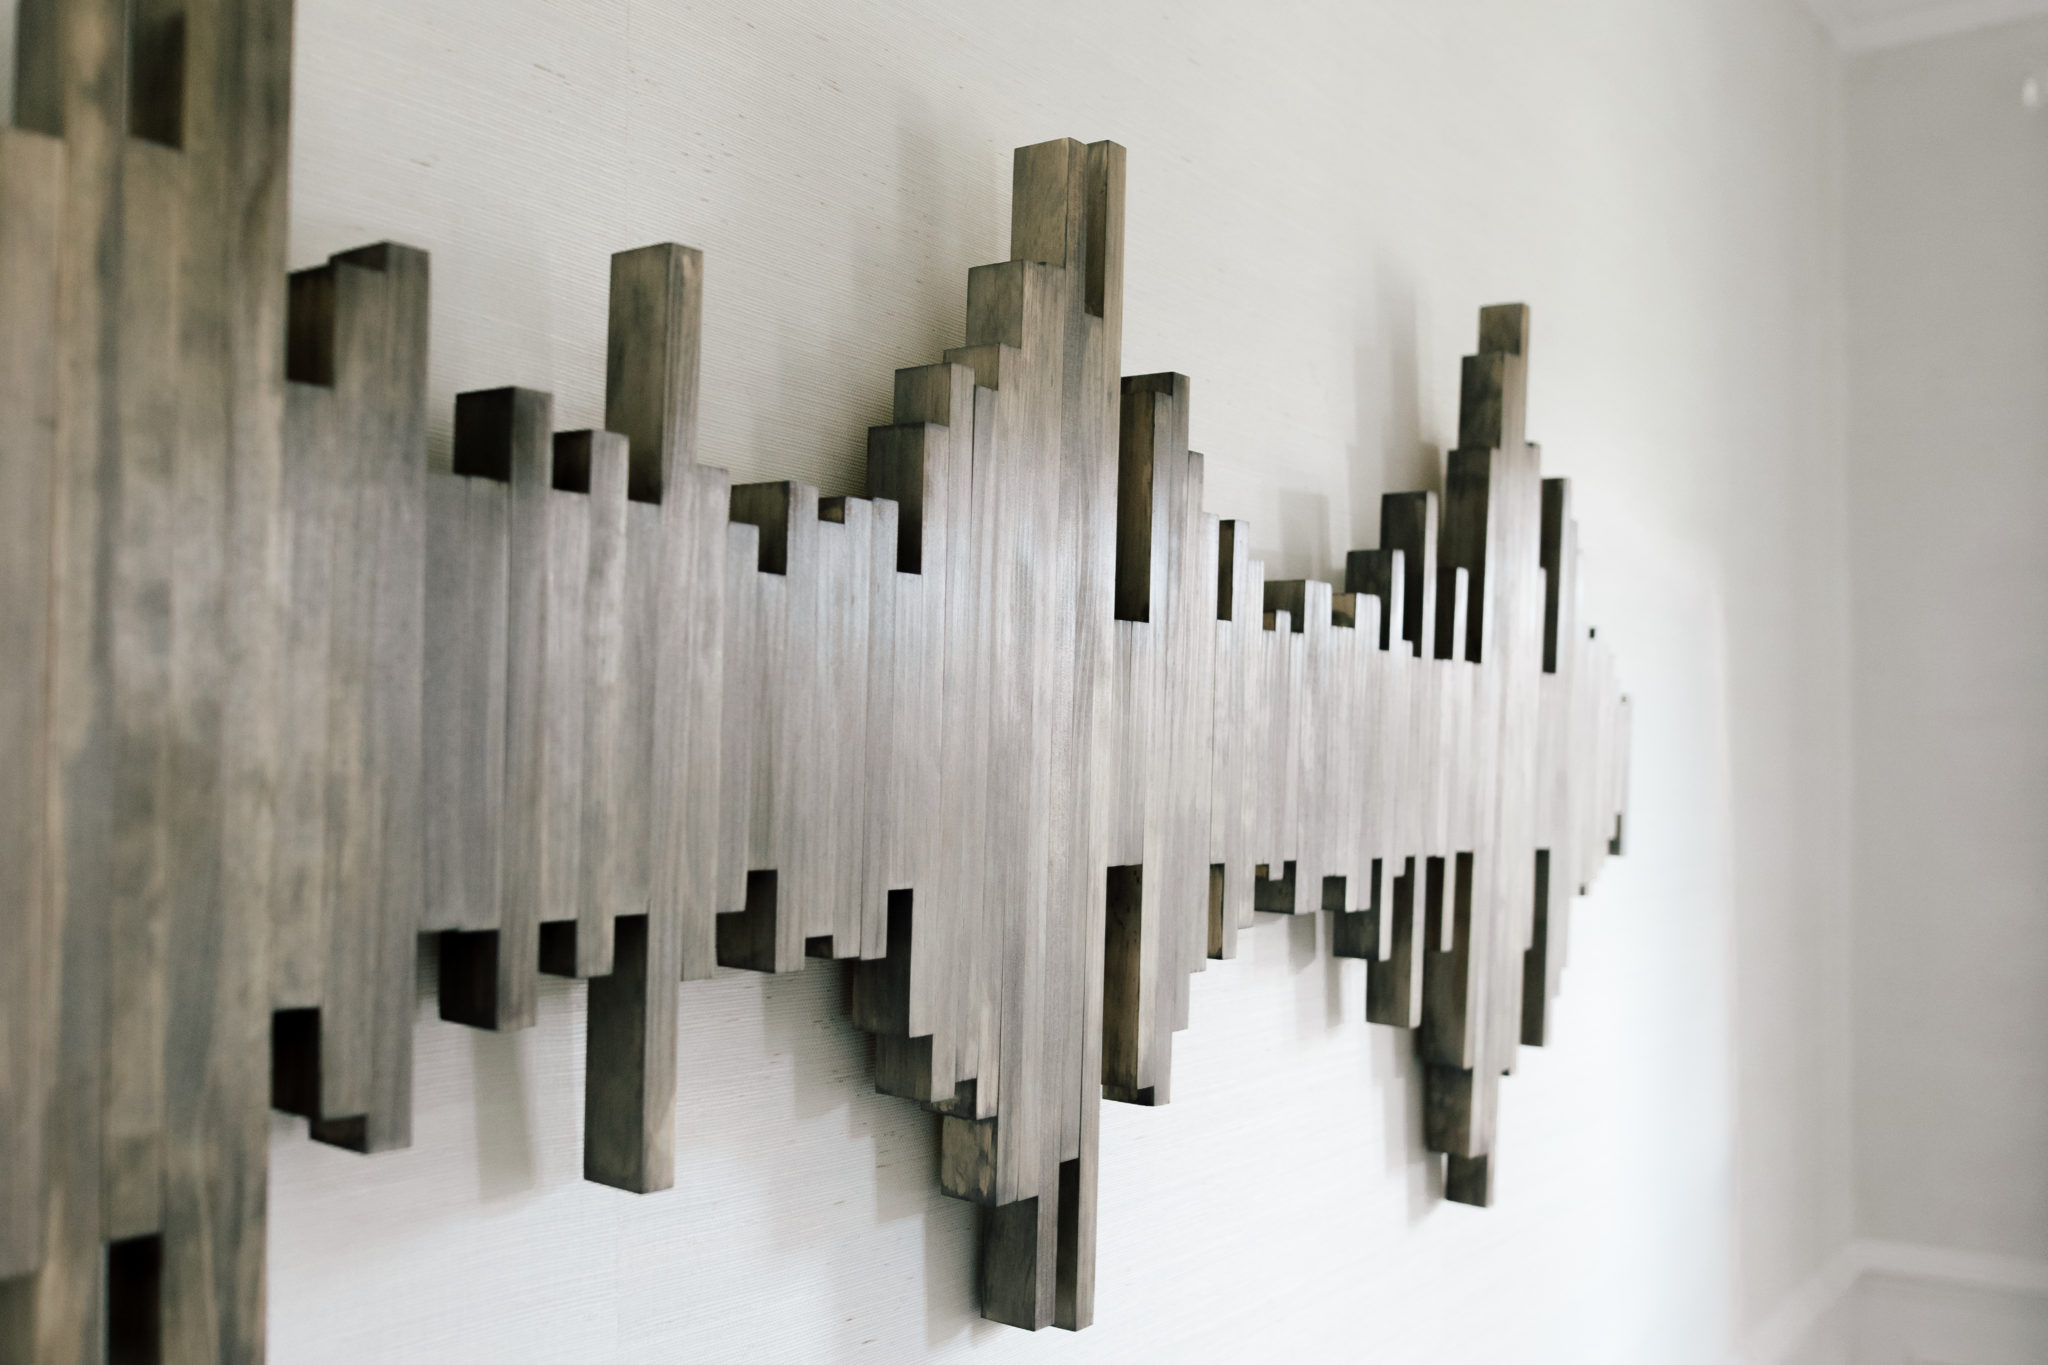
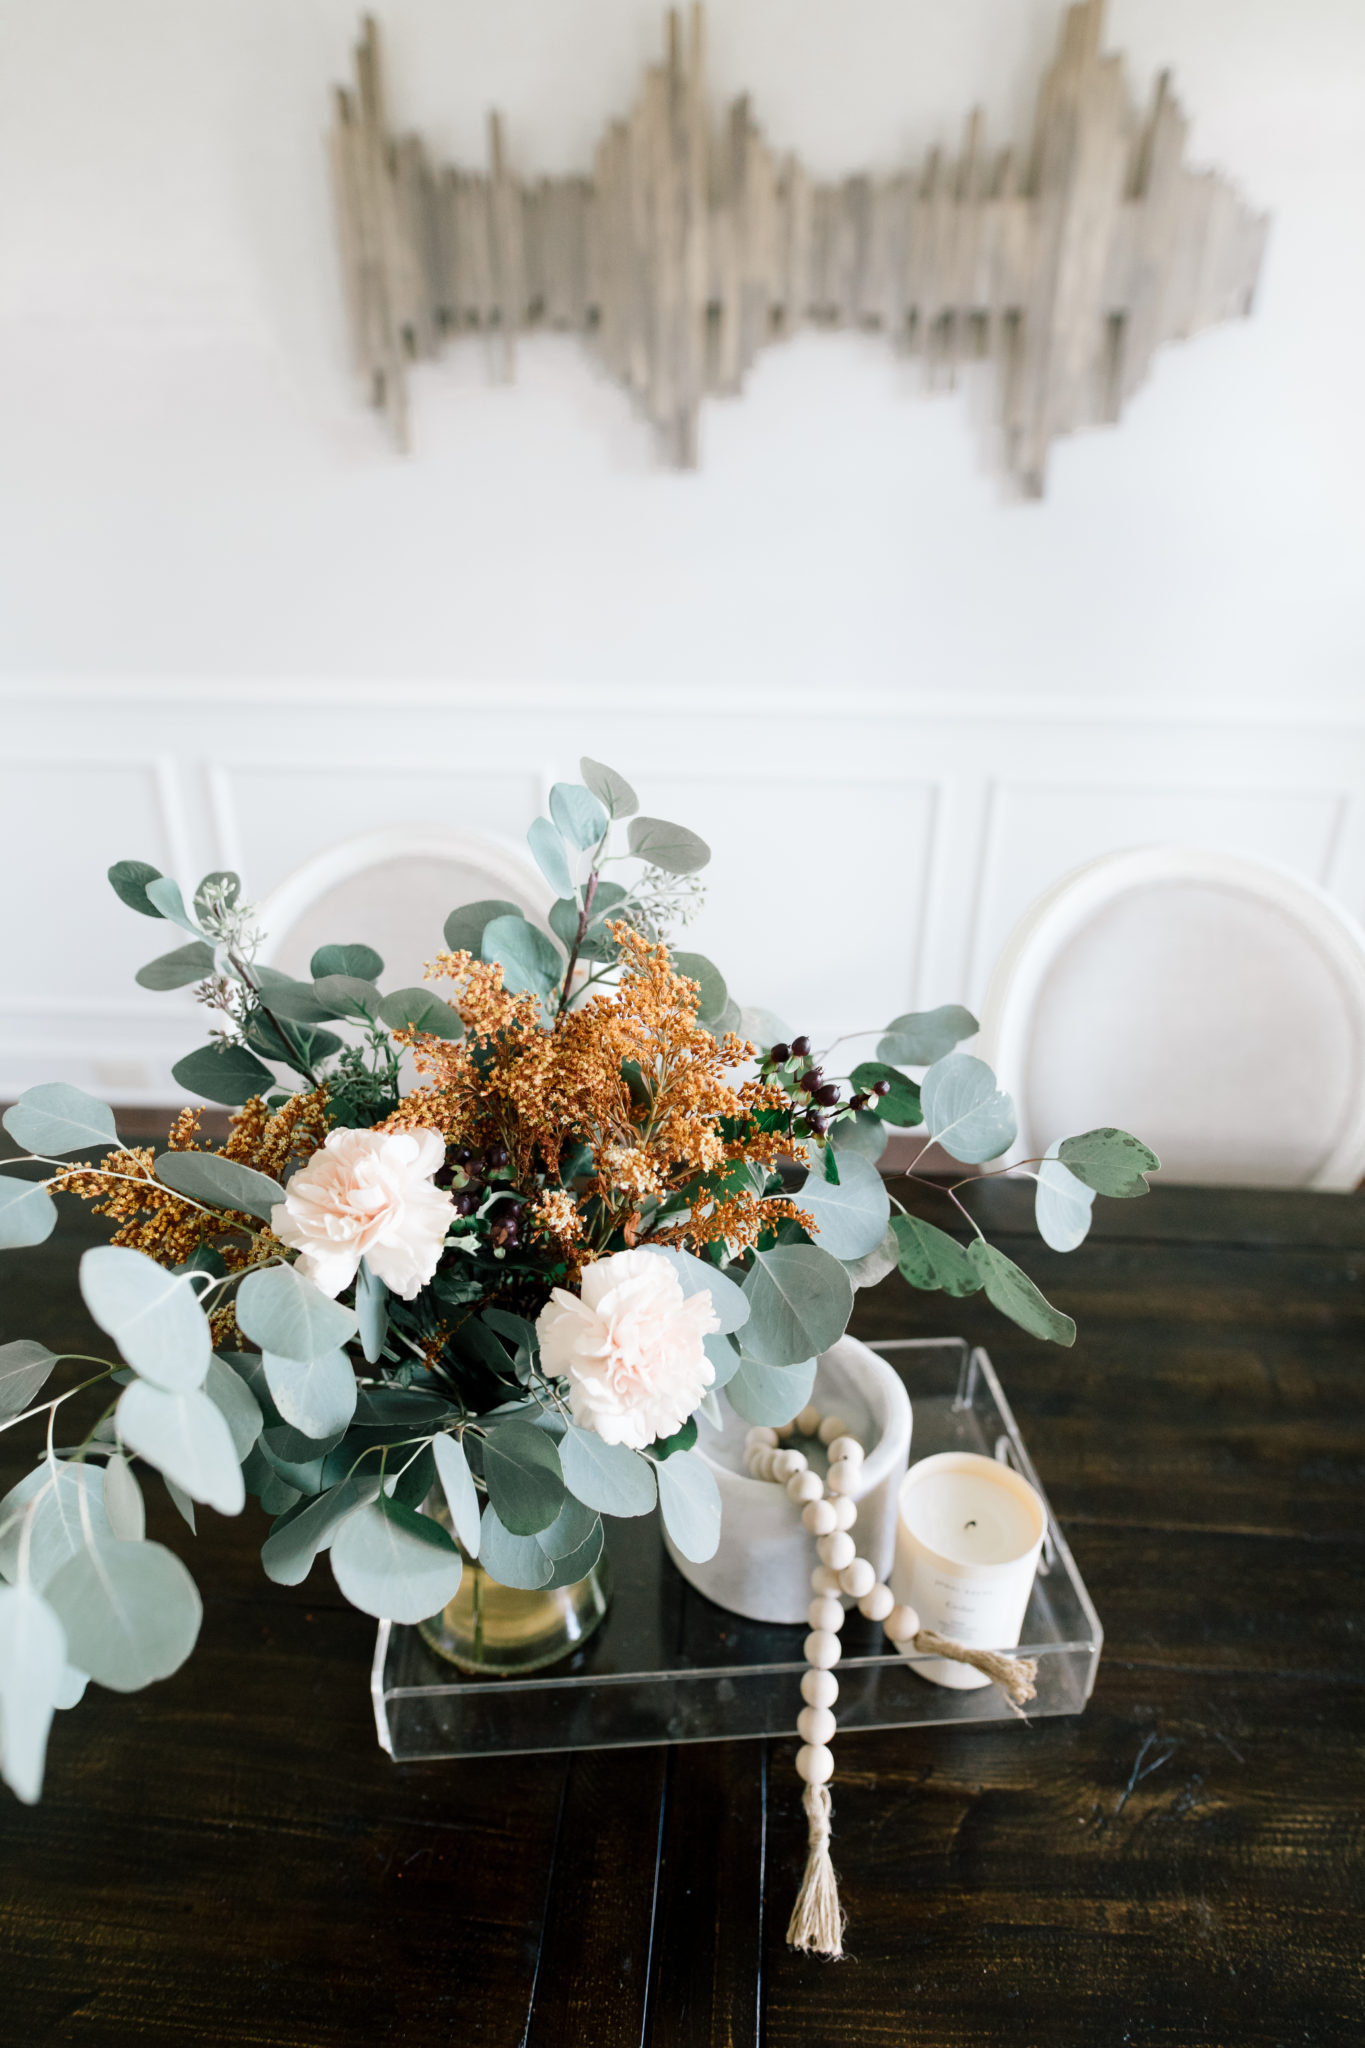
My favorite part of the room is this one of a kind Sound Wave wooden art piece my dad made for us. It is off the sound wave of the song lyric by the Avett Brothers, “Always remember, there was nothing worth sharing like the love that let us share our name.”
When you share a meal in this dining room, we wanted it to feel like family. It’s the most important part of my life and this piece is just so meaningful and special.
I’ve found a really similar one you can purchase HERE.
Recently, we went through the home buying process and it wasn’t quite the “House Hunters” experience I was hoping it would be. Nashville’s market is HOT and Trey and I are picky. That combo led to a full year of hunting.
We had specific things that we really wanted in our home. An all white kitchen, a large master suite and an in-law suite on the main floor with the boys’ rooms upstairs, a playroom, a movie room, a home office, etc. Finding these things in the style that we wanted was next to impossible. I thank my lucky stars everyday we were able to find our home, but it was like finding a needle in a haystack.
I recently discovered HomLuv and it can save you from some of these troubles and help you build your dream home!
* You pick a location. It is tailored to where you want to live. For us, we knew we wanted to be zoned for a specific school district. You could either niche down to a very small area, or choose a more broad location (i.e. Nashville) and let the home decide the location.
* It uses visual discovery! Hallelujah, some other visual people! They use actual images from builders. (Pinterest worthy by the way..) You can select by room. We were very particular about an all white kitchen, and a large master suite. You could specifically look for those things. You then “like” or “dislike” the different images.
* HomLuv tracks all of your “likes” and “dislikes”. It then formulates recommendations based on your style preferences, location, and budget. It pairs you with builders/homes that fit your needs.
For me, and I know so many others just getting started is the hardest part of the building process. HomeLuv takes that first step for you and makes it simple!
* HomLuv then becomes a tracking resource. You can reach out to builders directly from their site. You then have all communication from different builders in one location and can reference back easily.
It truly makes building your dream home a more streamlined and easier experience. If you’ve been thinking about a new home, this is such an awesome way to go!
One of the first things you see in a home is the entryway, but so often it’s the last to get decorated. I wanted to make ours a little more special and put it high on the “to-do” list when we moved in.
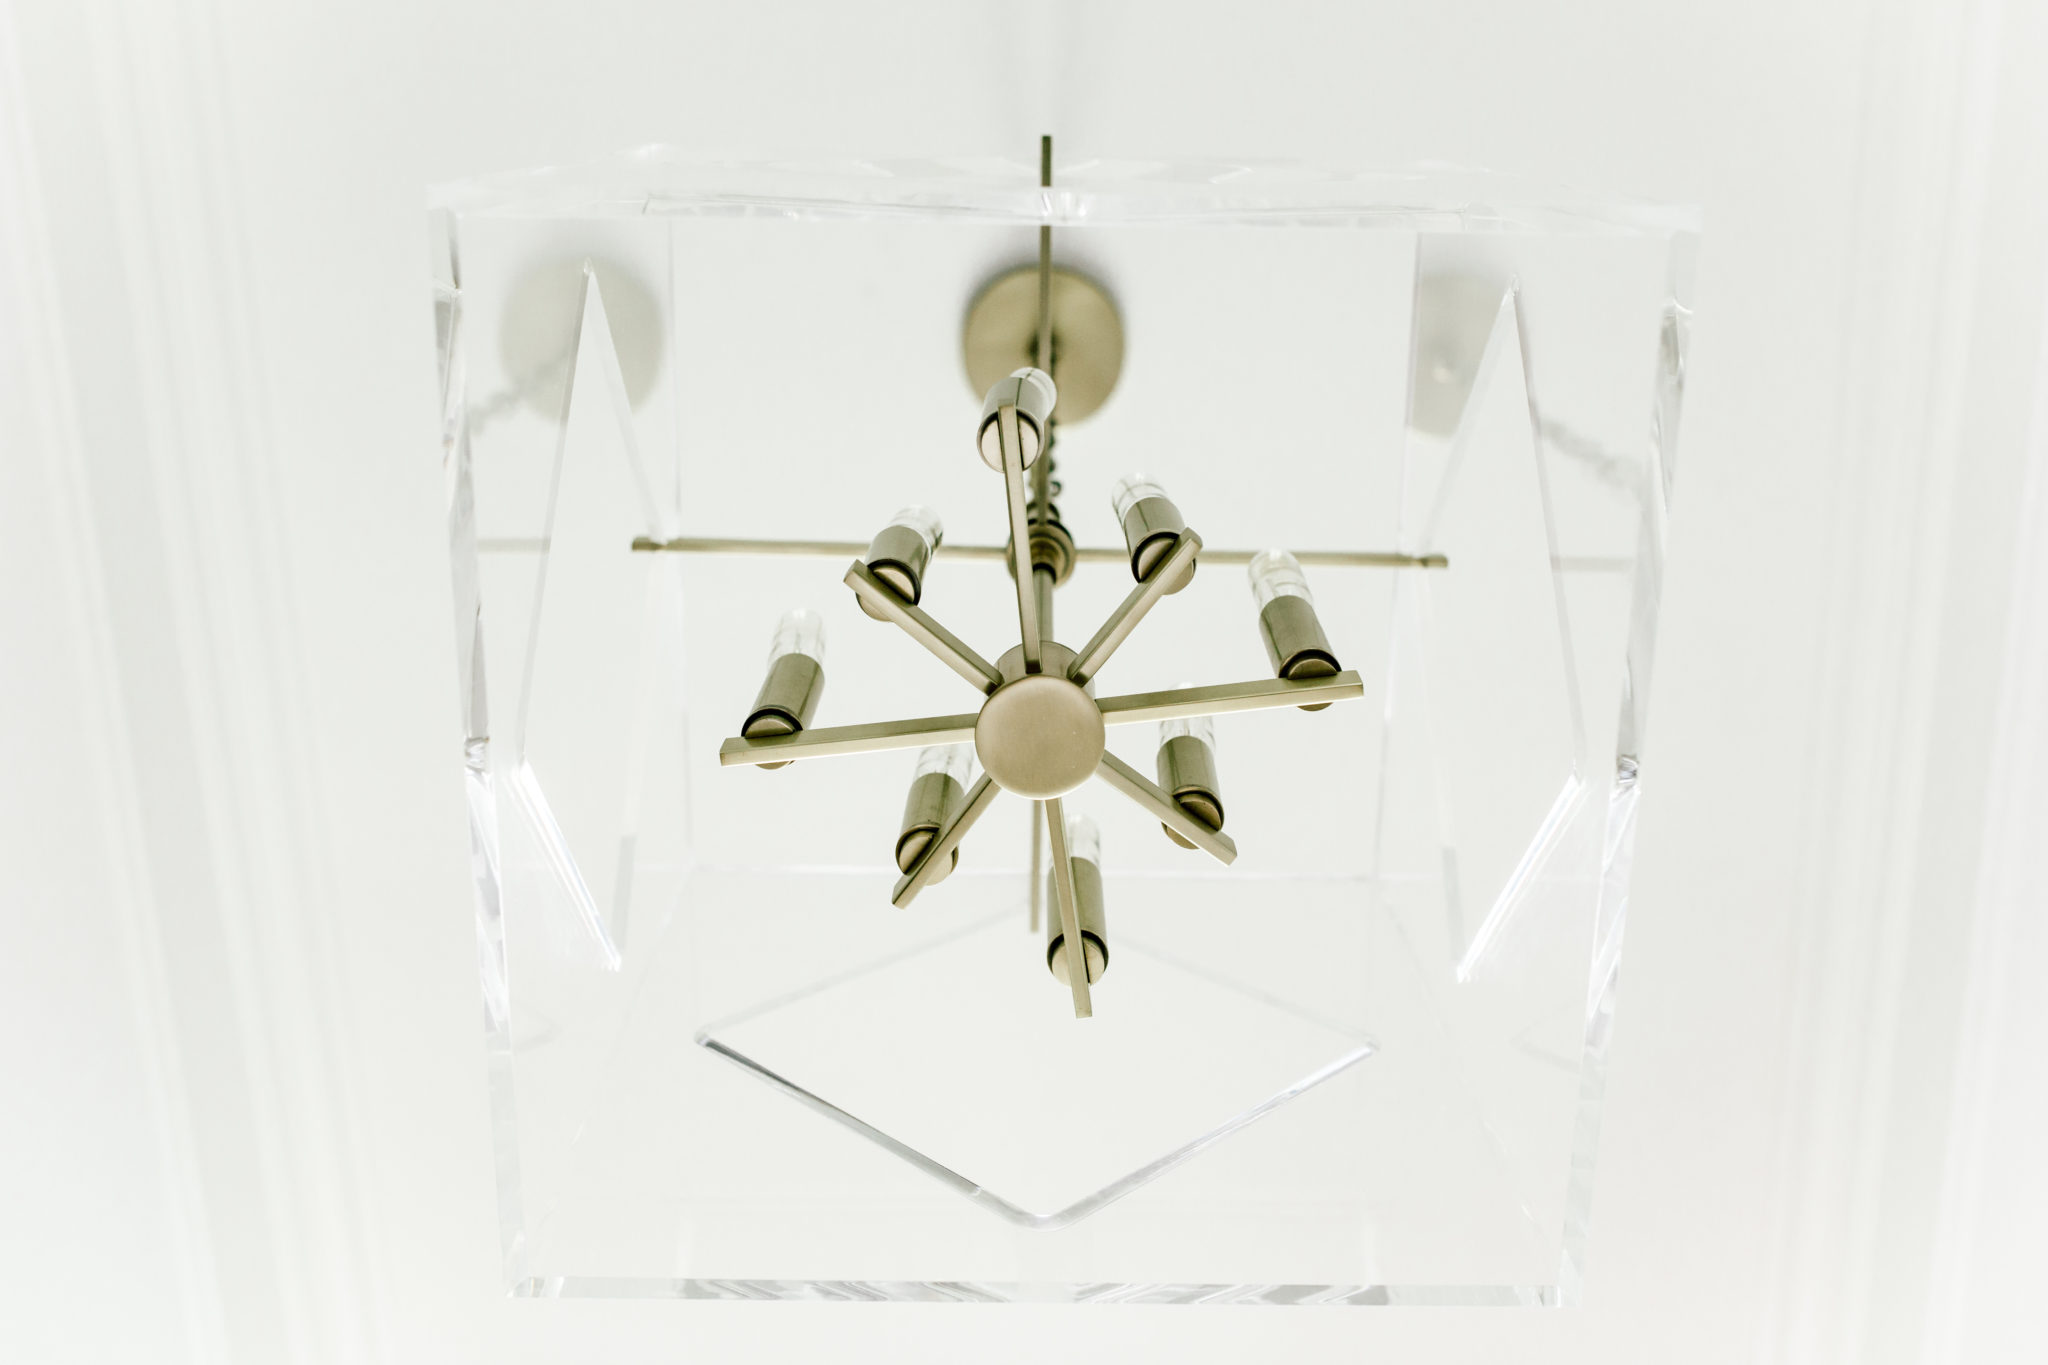
I pinned this Hudson Valley Acrylic Chandelier on a “dream home” board awhile back, and I knew that the entryway of this home would be the perfect place for it. It replaced a iron pendant that was pretty vanilla, and I couldn’t be happier with the transformation! There are several different sizes, but this is the Travis pendant 20″ in the aged brass finish. You can find the exact one HERE.
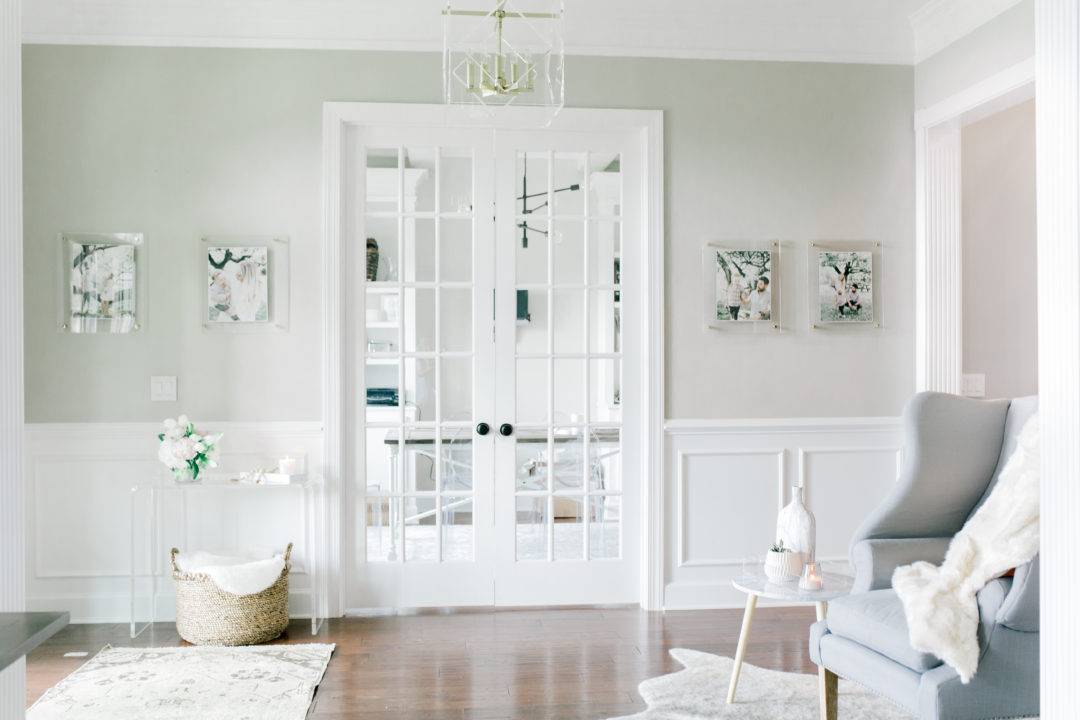
When designing a space I start with a statement piece and let that inspire the rest of the room. I found a few other acrylic pieces that compliment the chandelier well. These floating acrylic wall frames line the walls, and blend in perfectly. They have brass knobs that give it that little something extra. This acrylic console table is in our living room as well. It’s not a very large space, so the acrylic blends without looking too bulky for the space. It allows me to have a home for a braided basket for storage and a spot for a tray or fresh florals to freshen the space.
Even though I kept to my typical neutral theme, I like to add different textures and prints. An easy way to add that is with rugs. I loved this vintage turkish rug that covers a lot of space and wanted an additional faux cowhide to cover more of the dark hardwood as well.
I wanted an inviting and comfy chair in the little corner, and found this grey accent chair. The shape is interesting, and slightly modern. The bottom has nailheads and a rustic looking wood. The perfect juxtaposition. A big cozy blanket makes anything feel more “homey.” This one is by Little Giraffe. It’s a splurge, but SO comfy. Some items are worth splurging and you can balance it out with inexpensive pieces that can be traded in and out. This marble top nesting table came in a set of two on Amazon for under $50.
I’d still love to add a picture light above each of the acrylic frames in a brass color to really make it pop. These aren’t cheap so it’d be an investment, but I think it could really make a statement! What do ya’ll think? Should I pull the trigger?
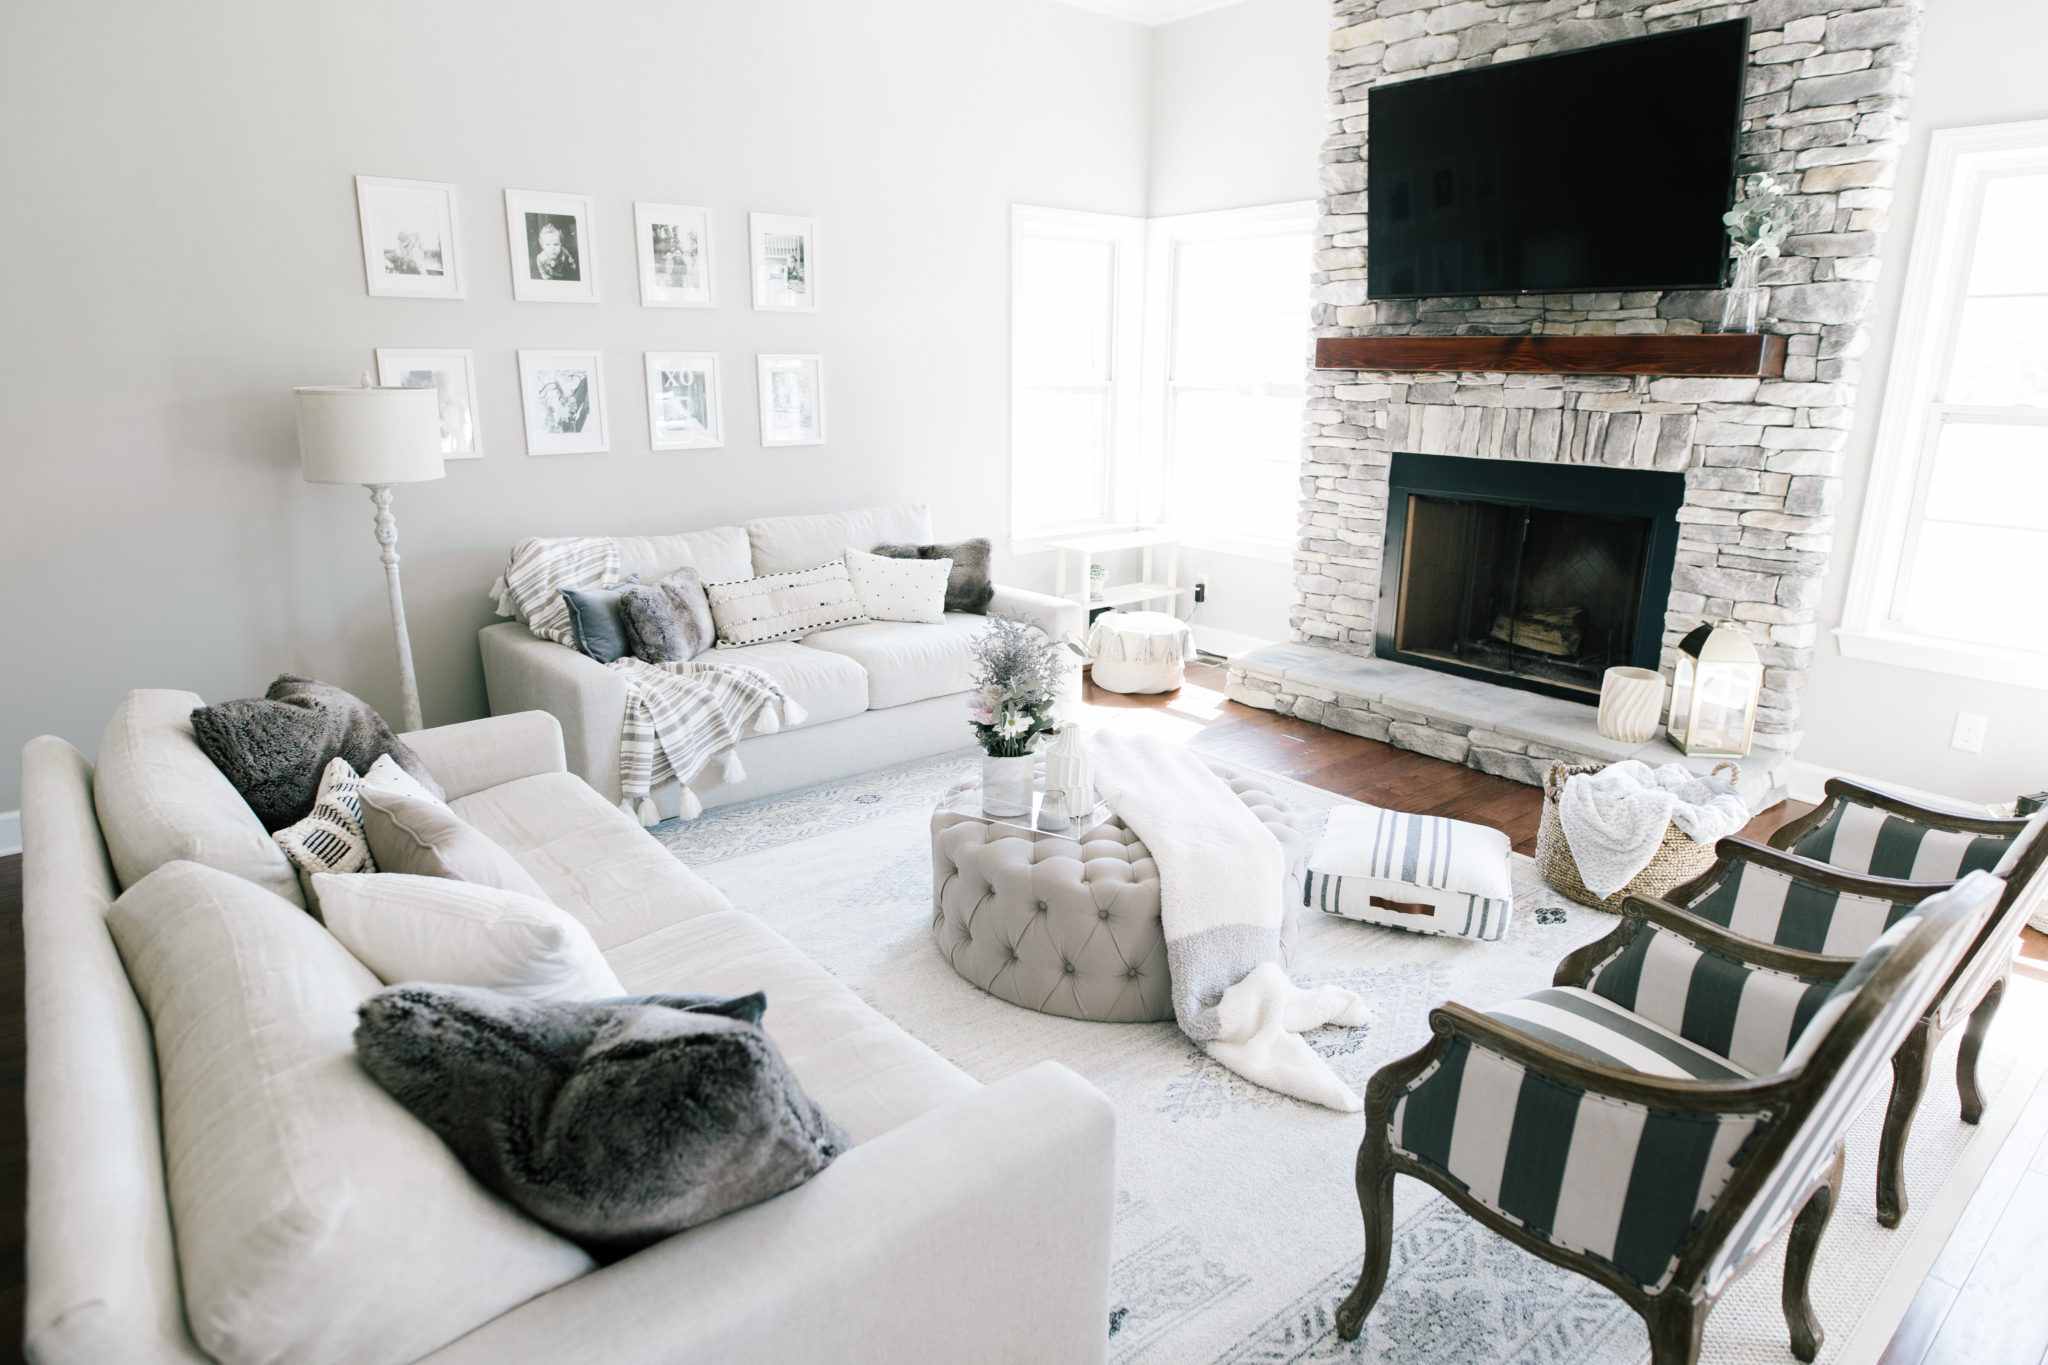
I wanted to keep this space light and bright, but bring in a lot of different textures and mix matched prints to keep it interesting.
One of the best part of working with a monochromatic palette is that any print or texture can be brought it and play well together.
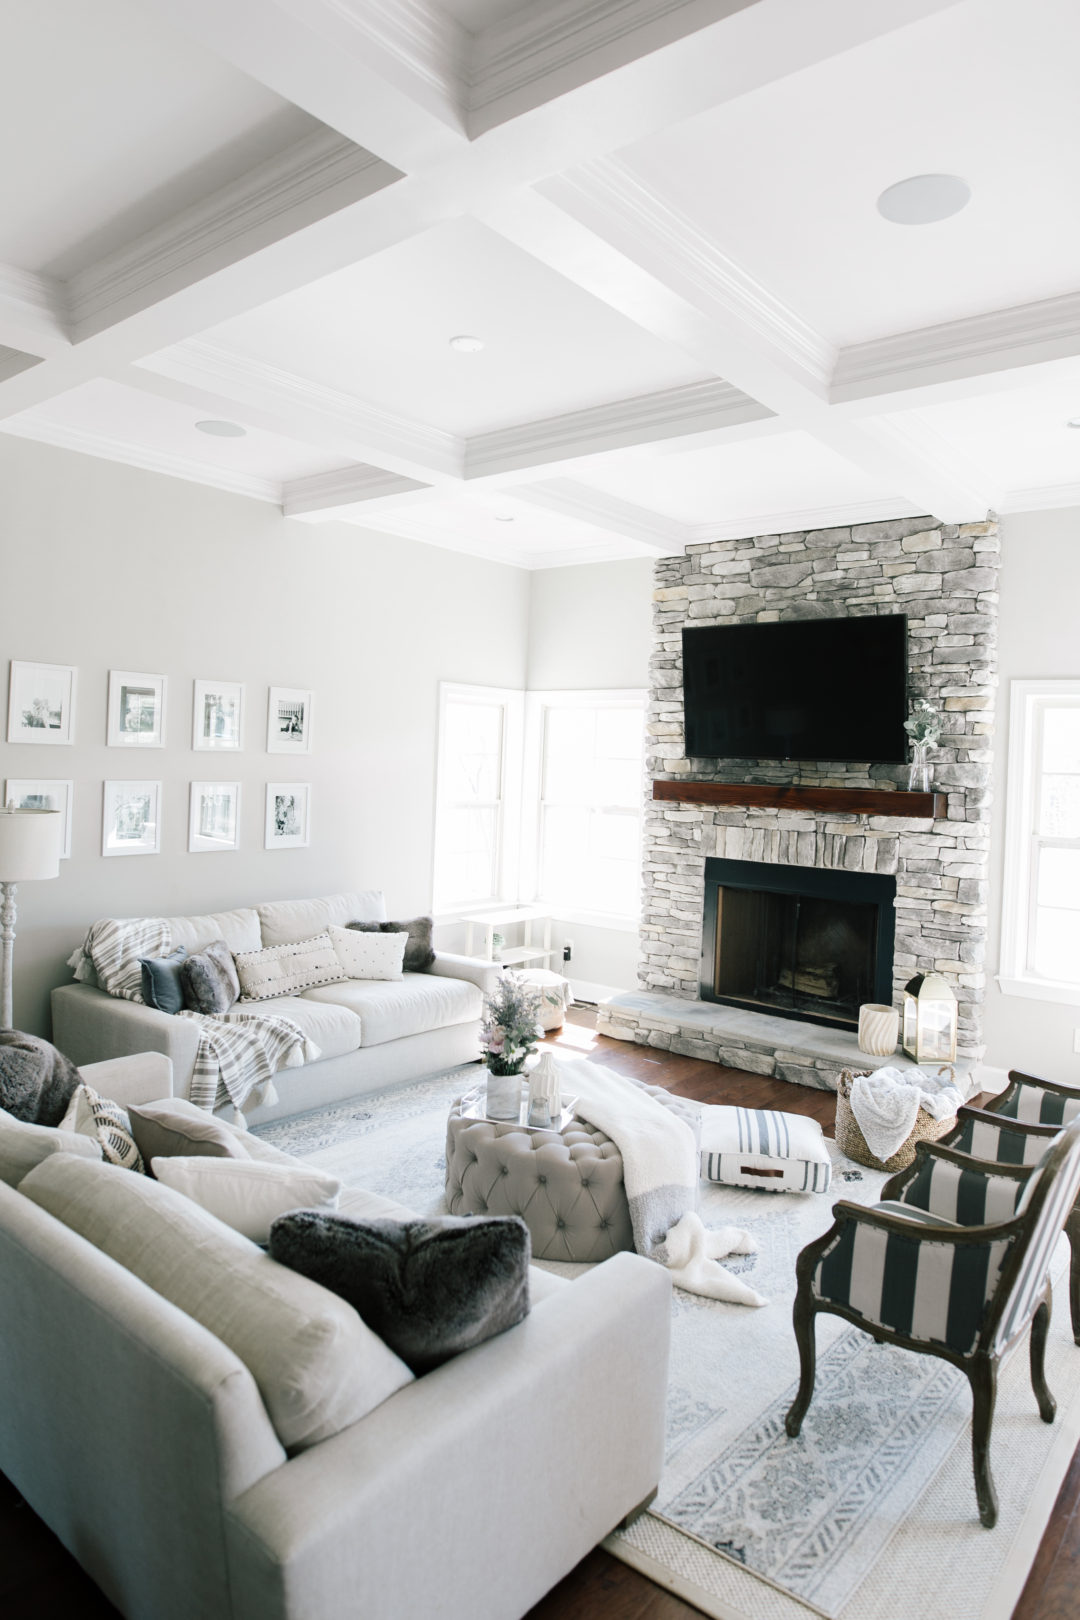
Once you’ve decided on a color scheme you can pick a statement item or two and build around that. I had these striped chairs in the office prior to this, and decided I wanted to move them to living room. They are a bold statement piece so I started building from there.
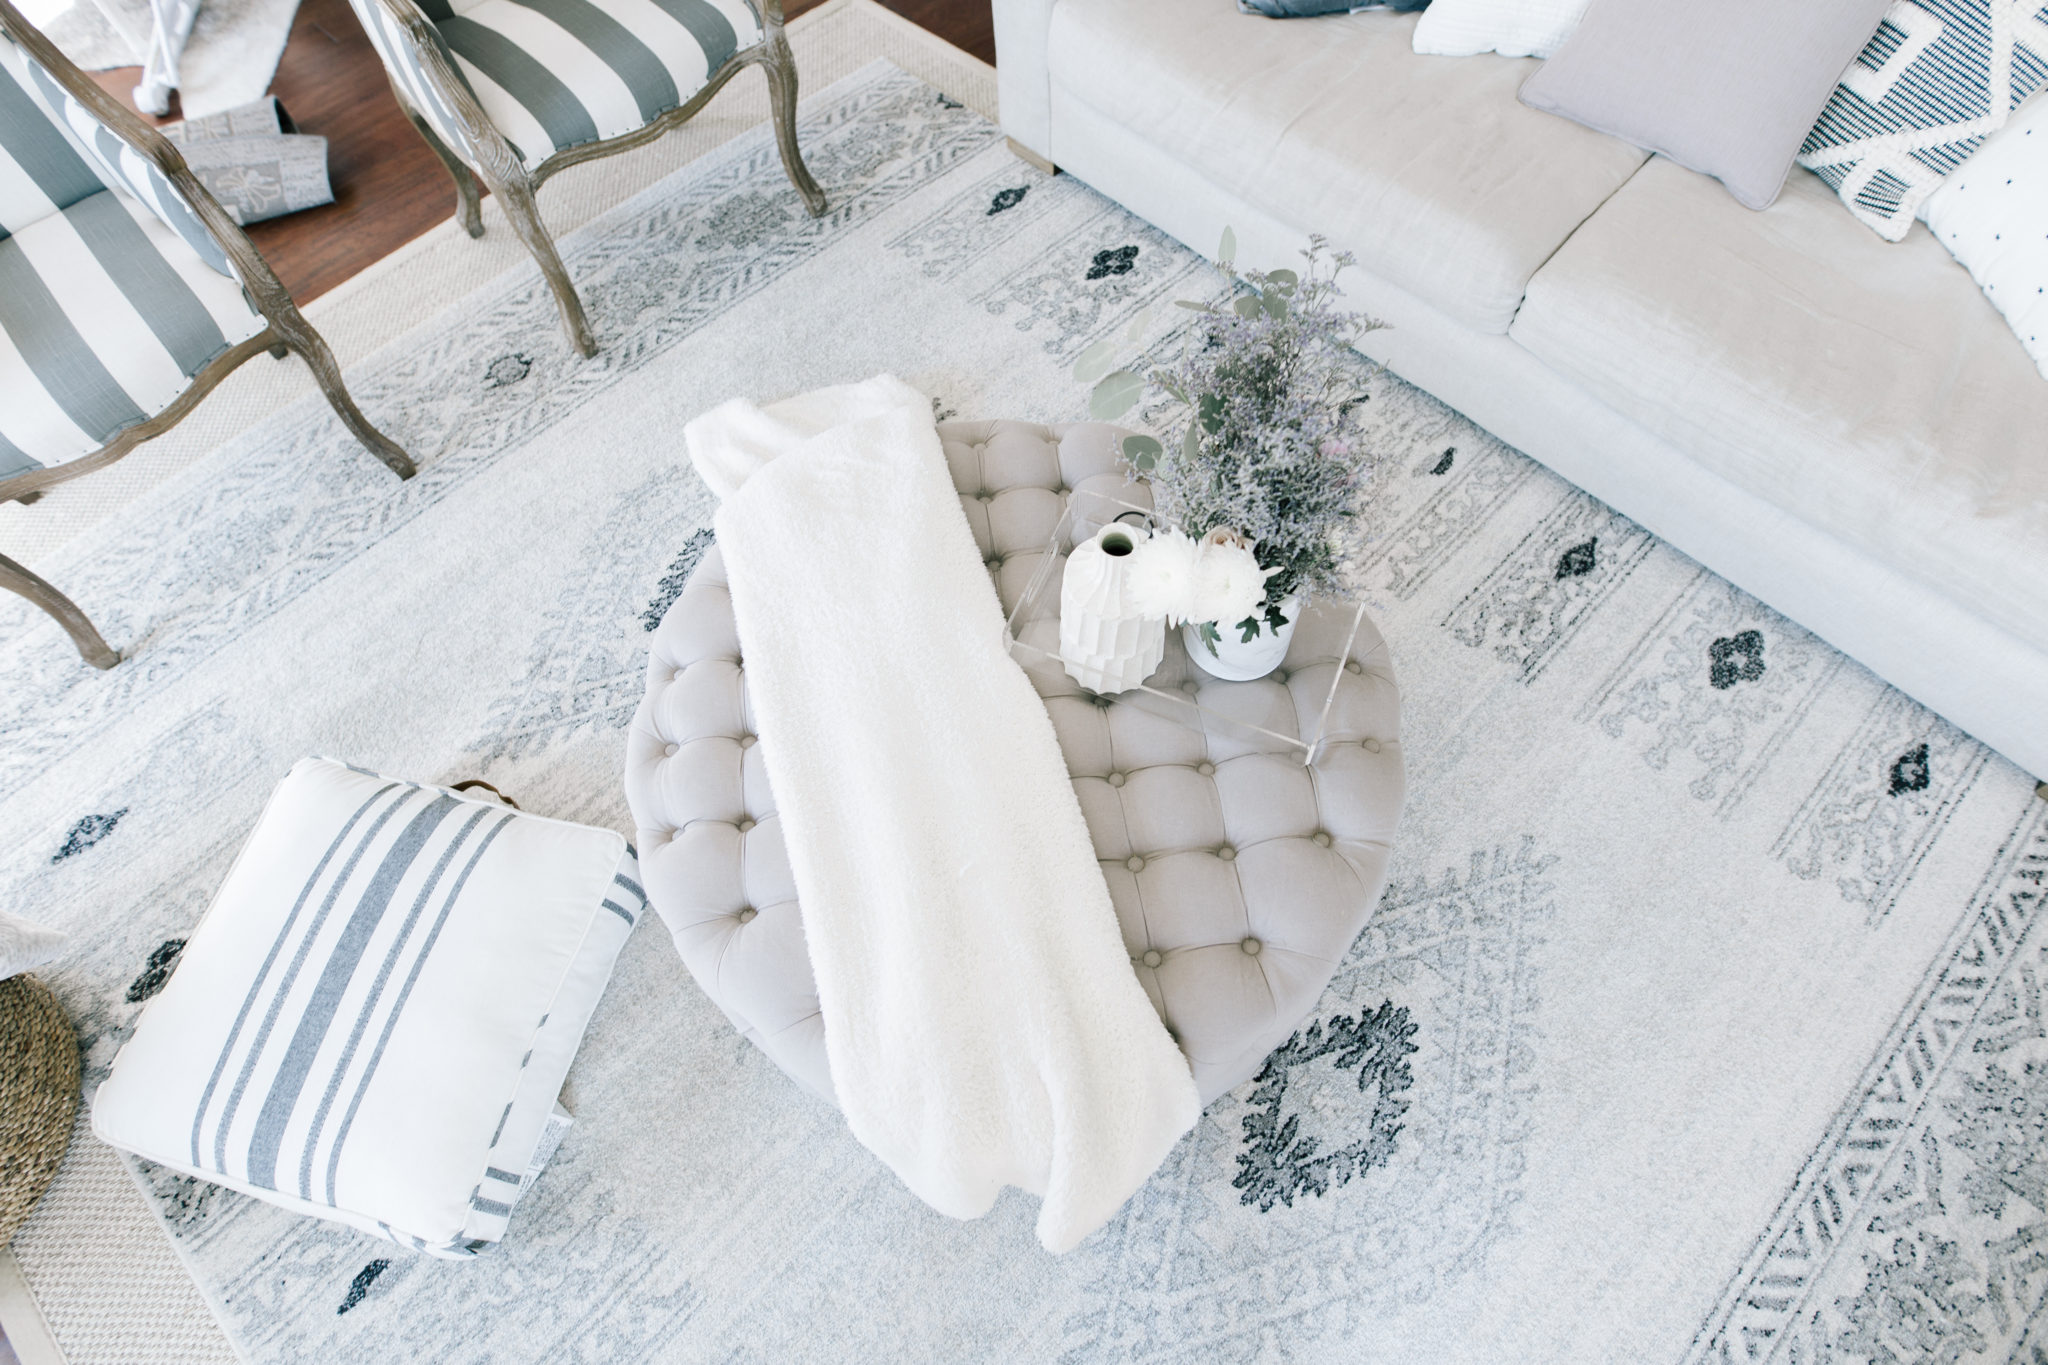
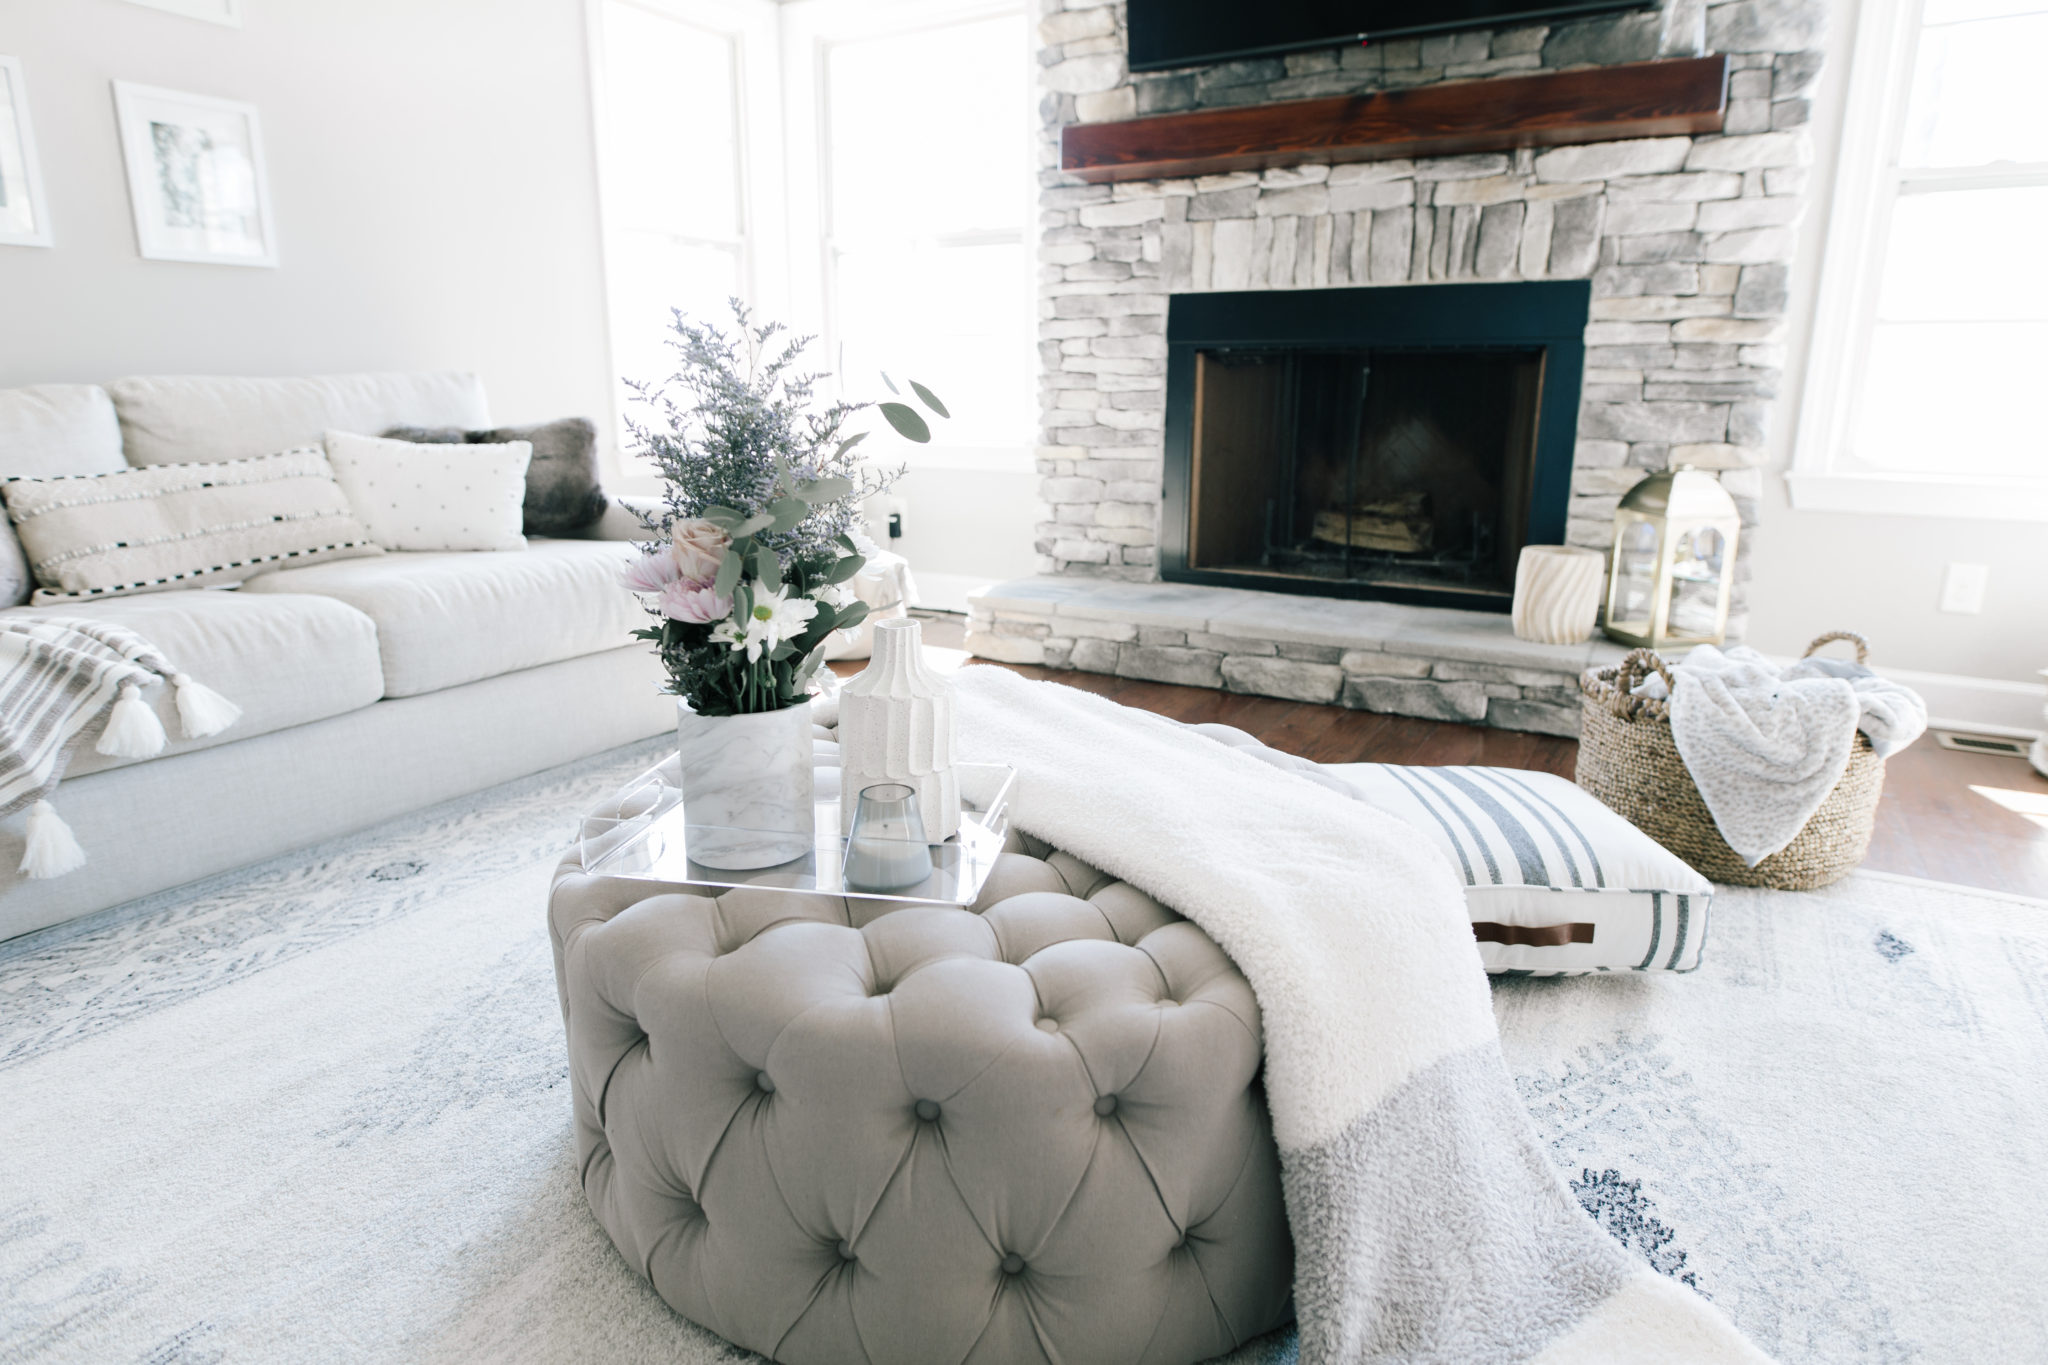
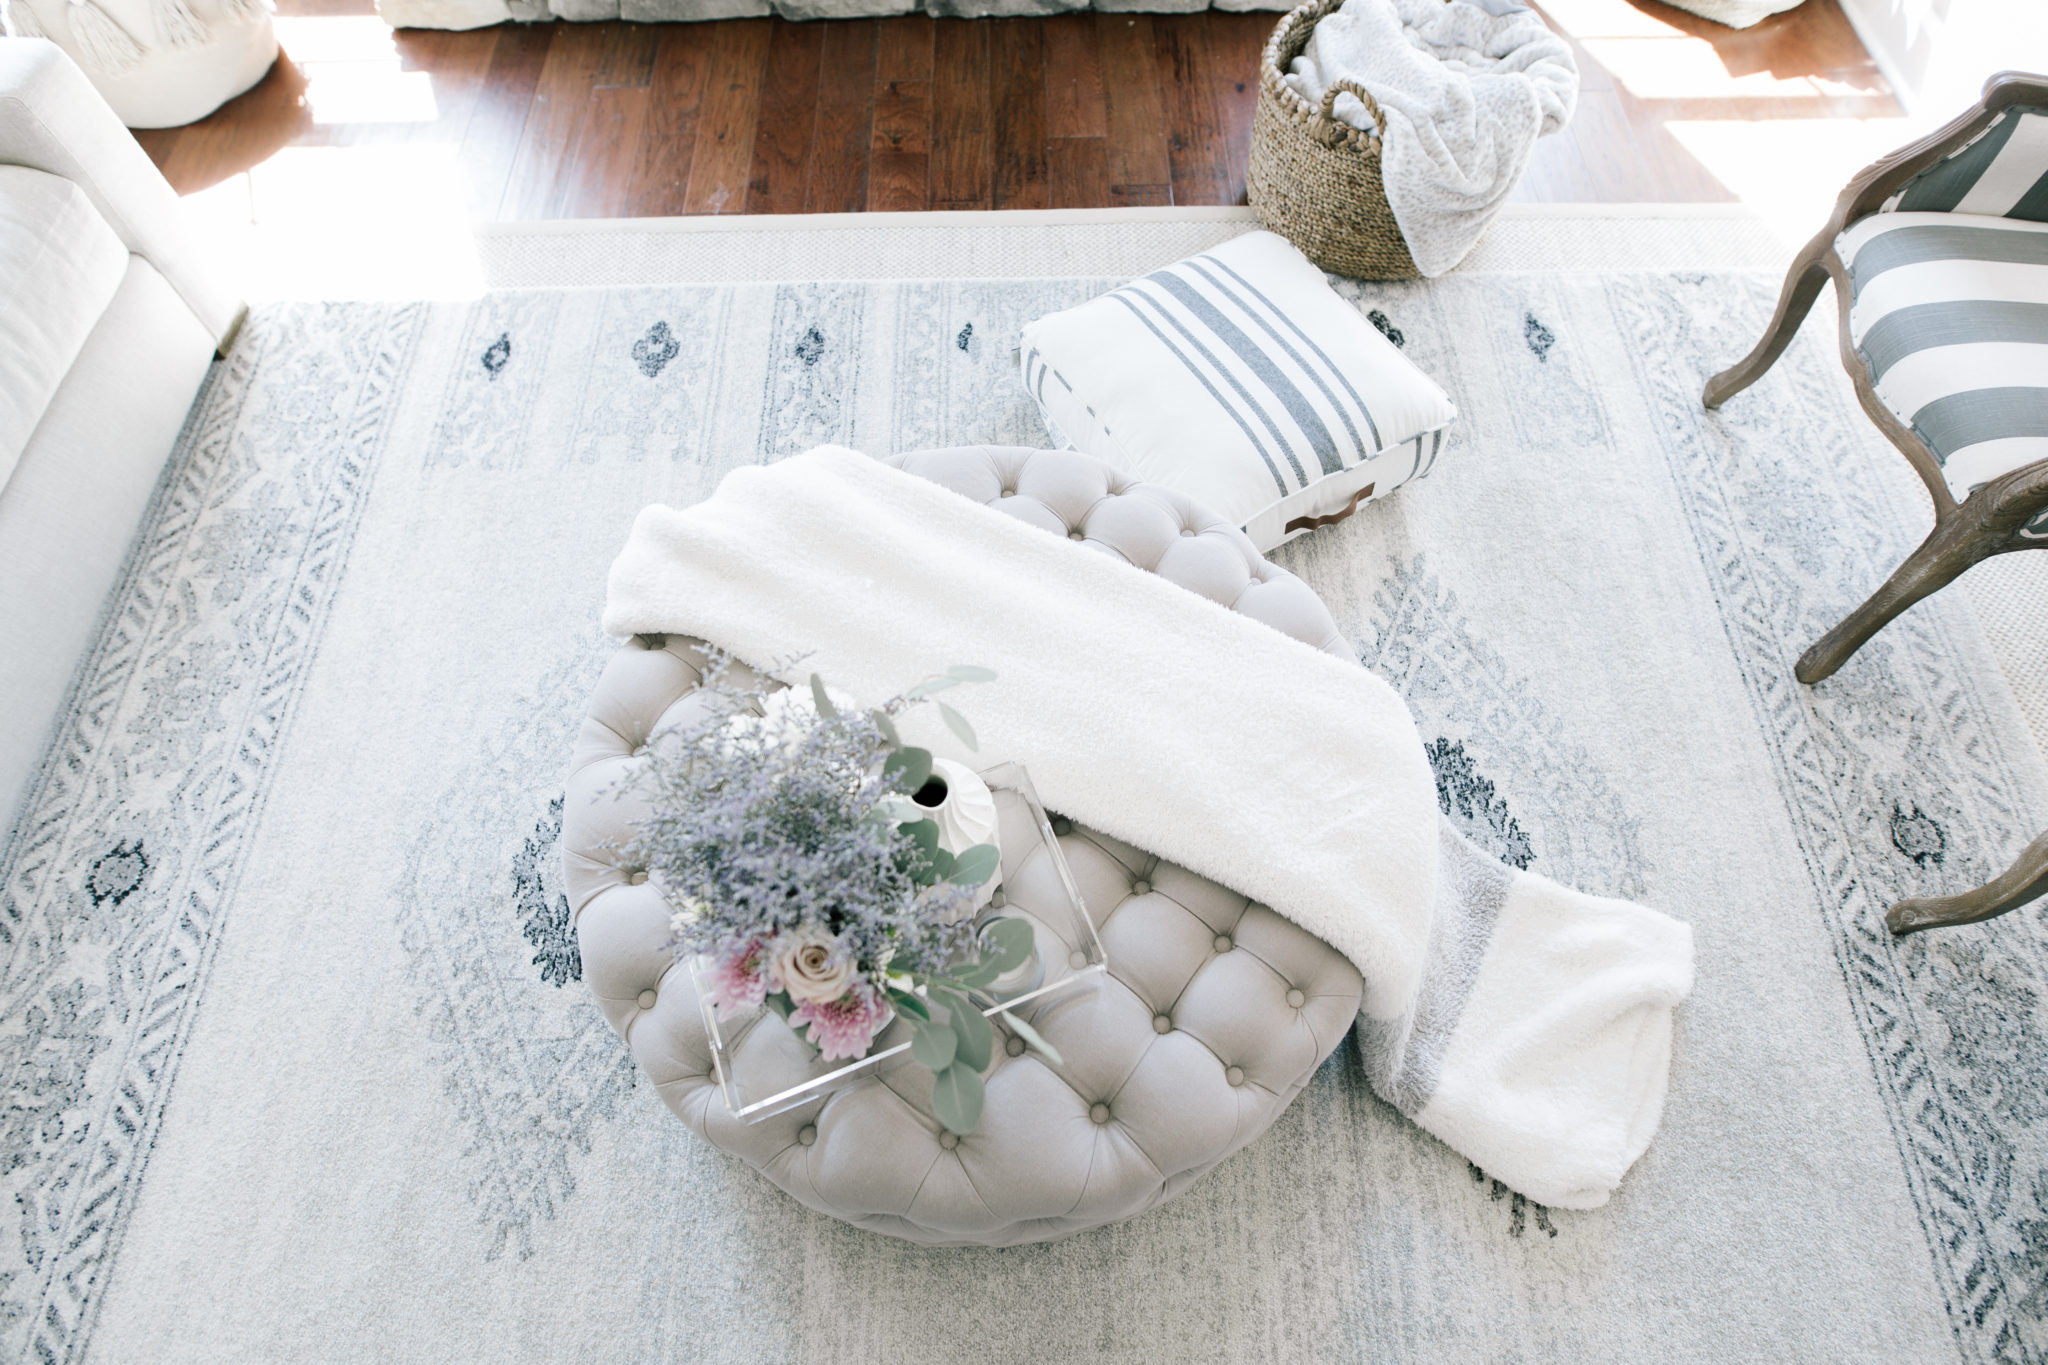
If you have kids I HIGHLY recommend replacing a typical coffee table with a round ottoman . It’s easy for the babes to pull themselves up without hitting their head or gauging an eye out on a sharp corner. (These are my concerns when decorating these days…)
When designing this neutral living room I always knew I wanted a big light colored jute rug to cover and protect the dark wood floors. It’s more of a heavy duty material than a typical rug. I layered that with this monochromatic print rug. (This is also something that I could switch out to change up the look.)
I get asked about these couches a lot. They are from Restoration Hardware in the luxe depth. (Size of a twin size bed deep, for reference.) This is the belgian linen in the color “sand.” I like to mix some higher end pieces like the couches, with easy to change out affordable pieces. (Like throw blankets and pillows.)
Baskets are so important for us because they can hold toys, blankets, pillows, etc and hide the “crazy” when company comes over. I found this large braided basket at Target and LOVE it. It’s $35 and looks identical to the pottery barn option that’s 4x that price. It’s very sturdy and can hold a good amount of items. (By “items” I really mean toys that I cover up with some throw pillows and blankets…)
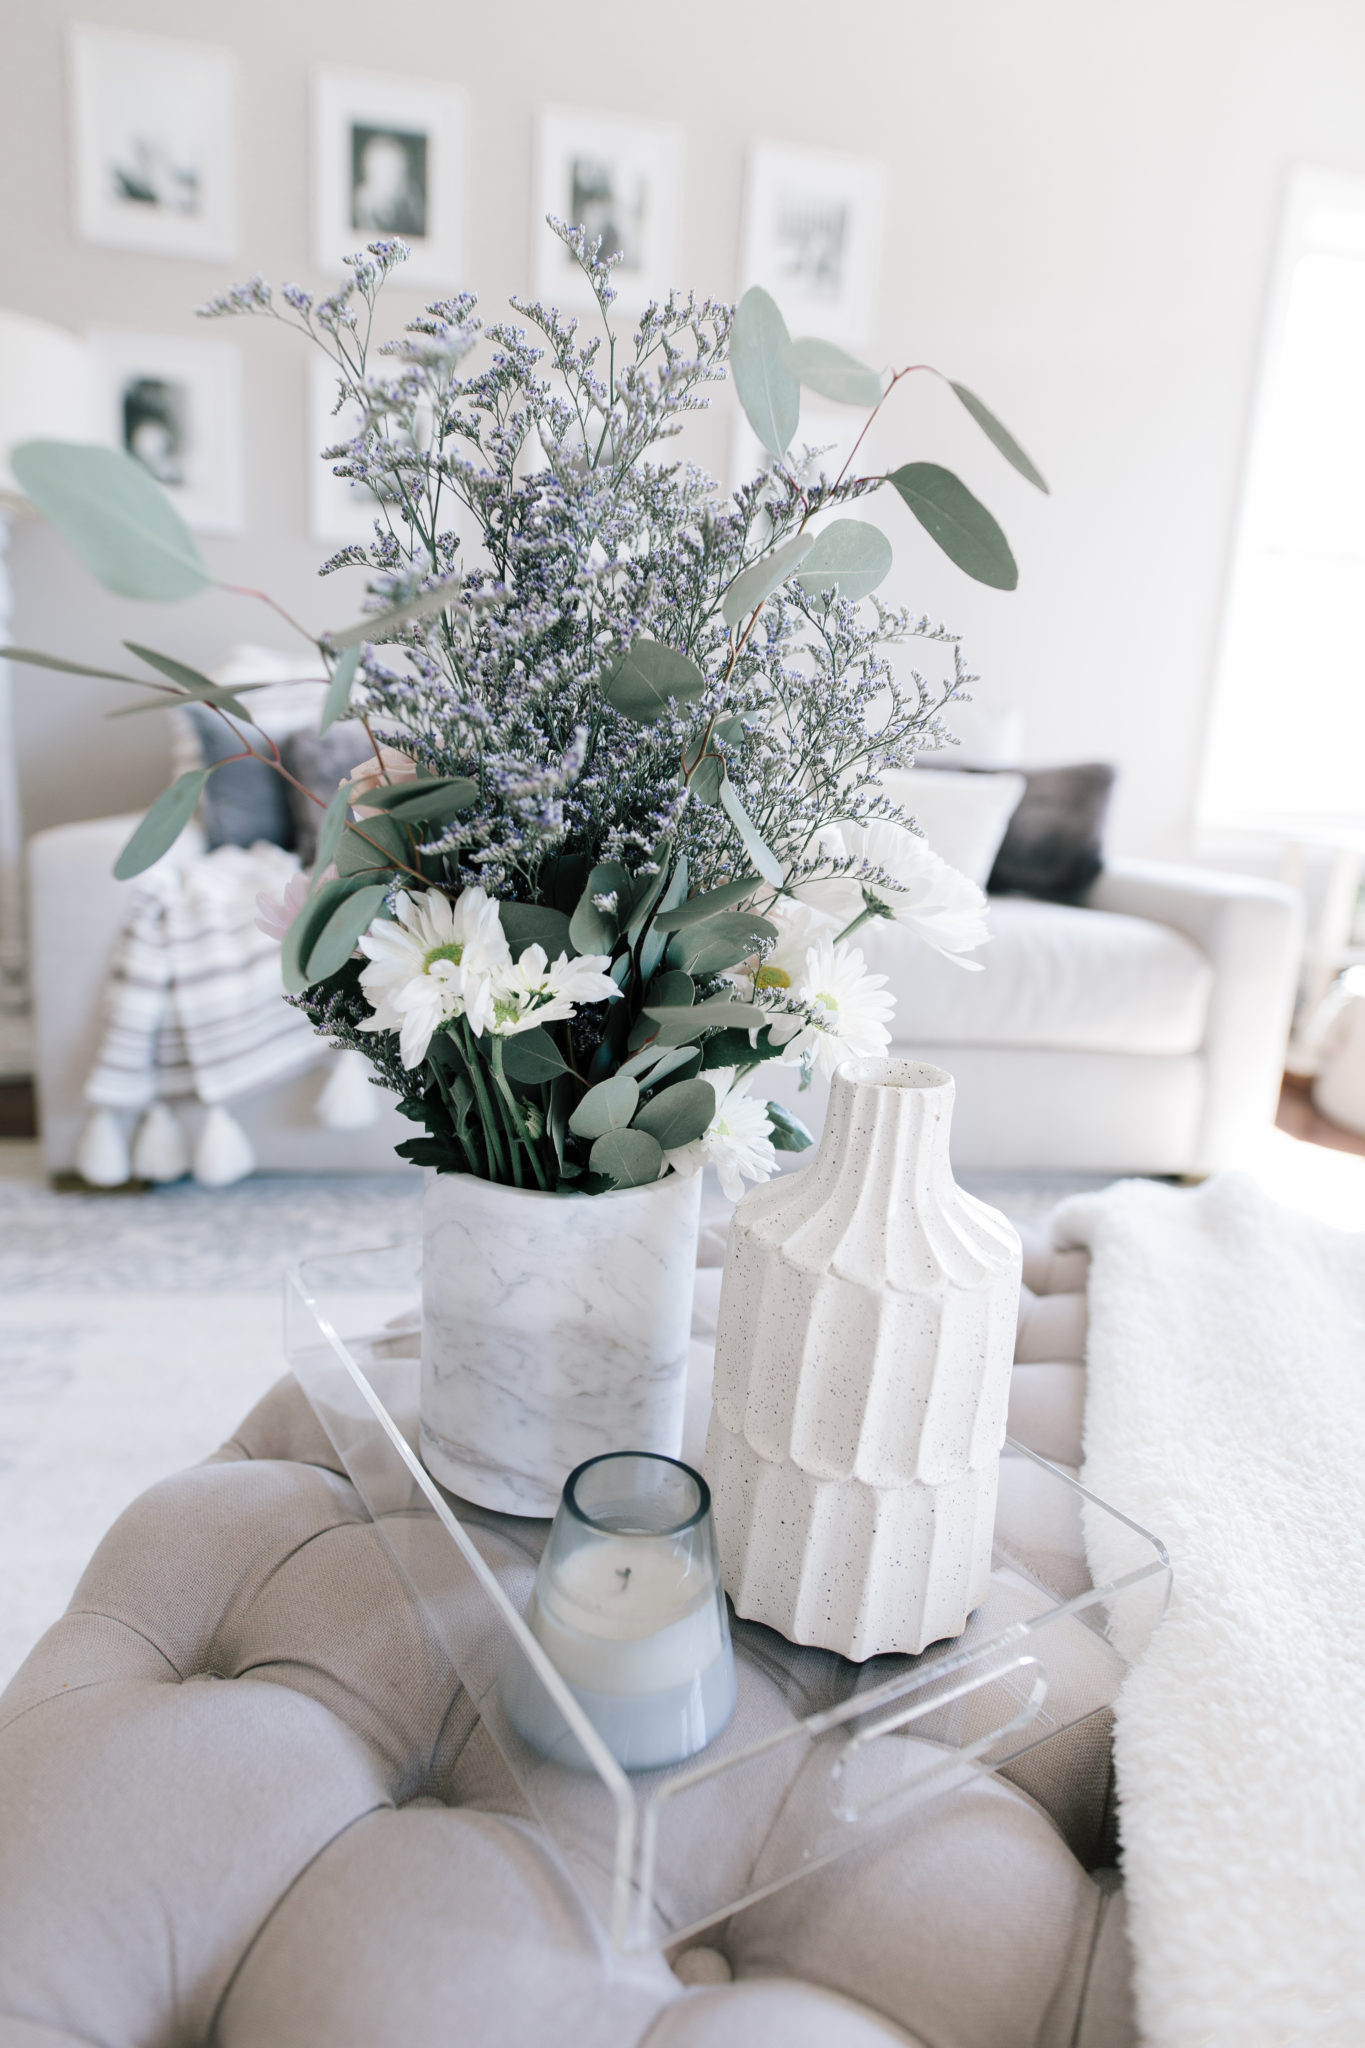
Acrylic furnishings are trending right now, and I wanted to “glam” up the more boho space with a few. This acrylic tray is such a versatile piece that I have several of them all throughout our home. You can throw some florals or candles on one to freshen up a space easily.
I also found this acrylic console that blends in perfectly with the space. I topped it with a marble tray (another home decor must have at $25) and some florals, candles, and this wood bead garland. (Side note, this roses candle is the best smelling candle I’ve ever had.)
Making our house feel like a home and putting our own spin on the decor has been so much fun! Can’t wait to show you the entryway I’m working on next.
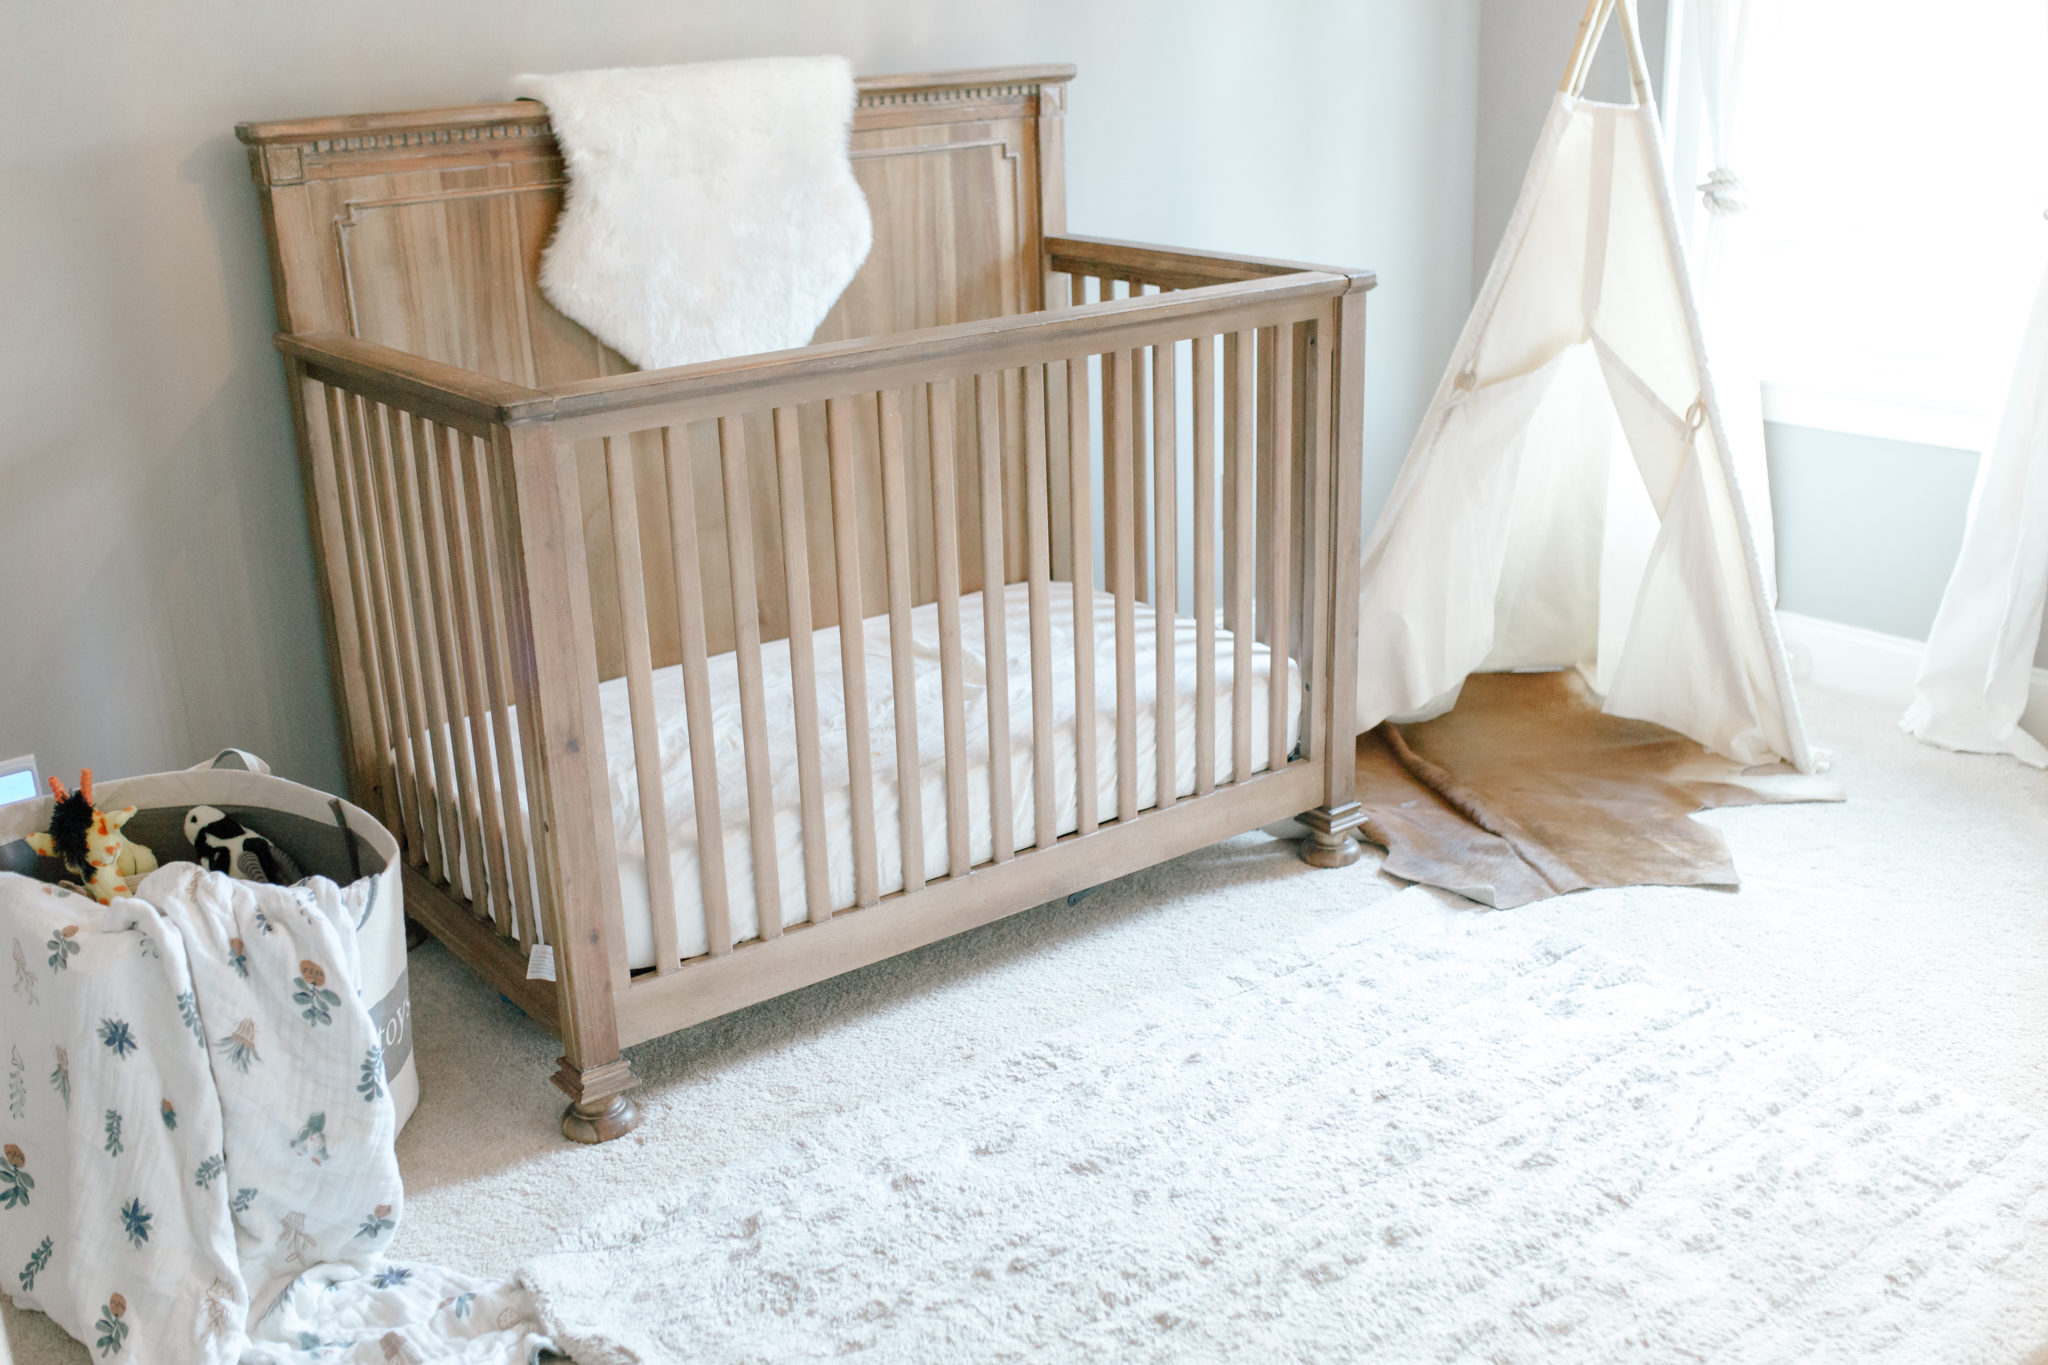
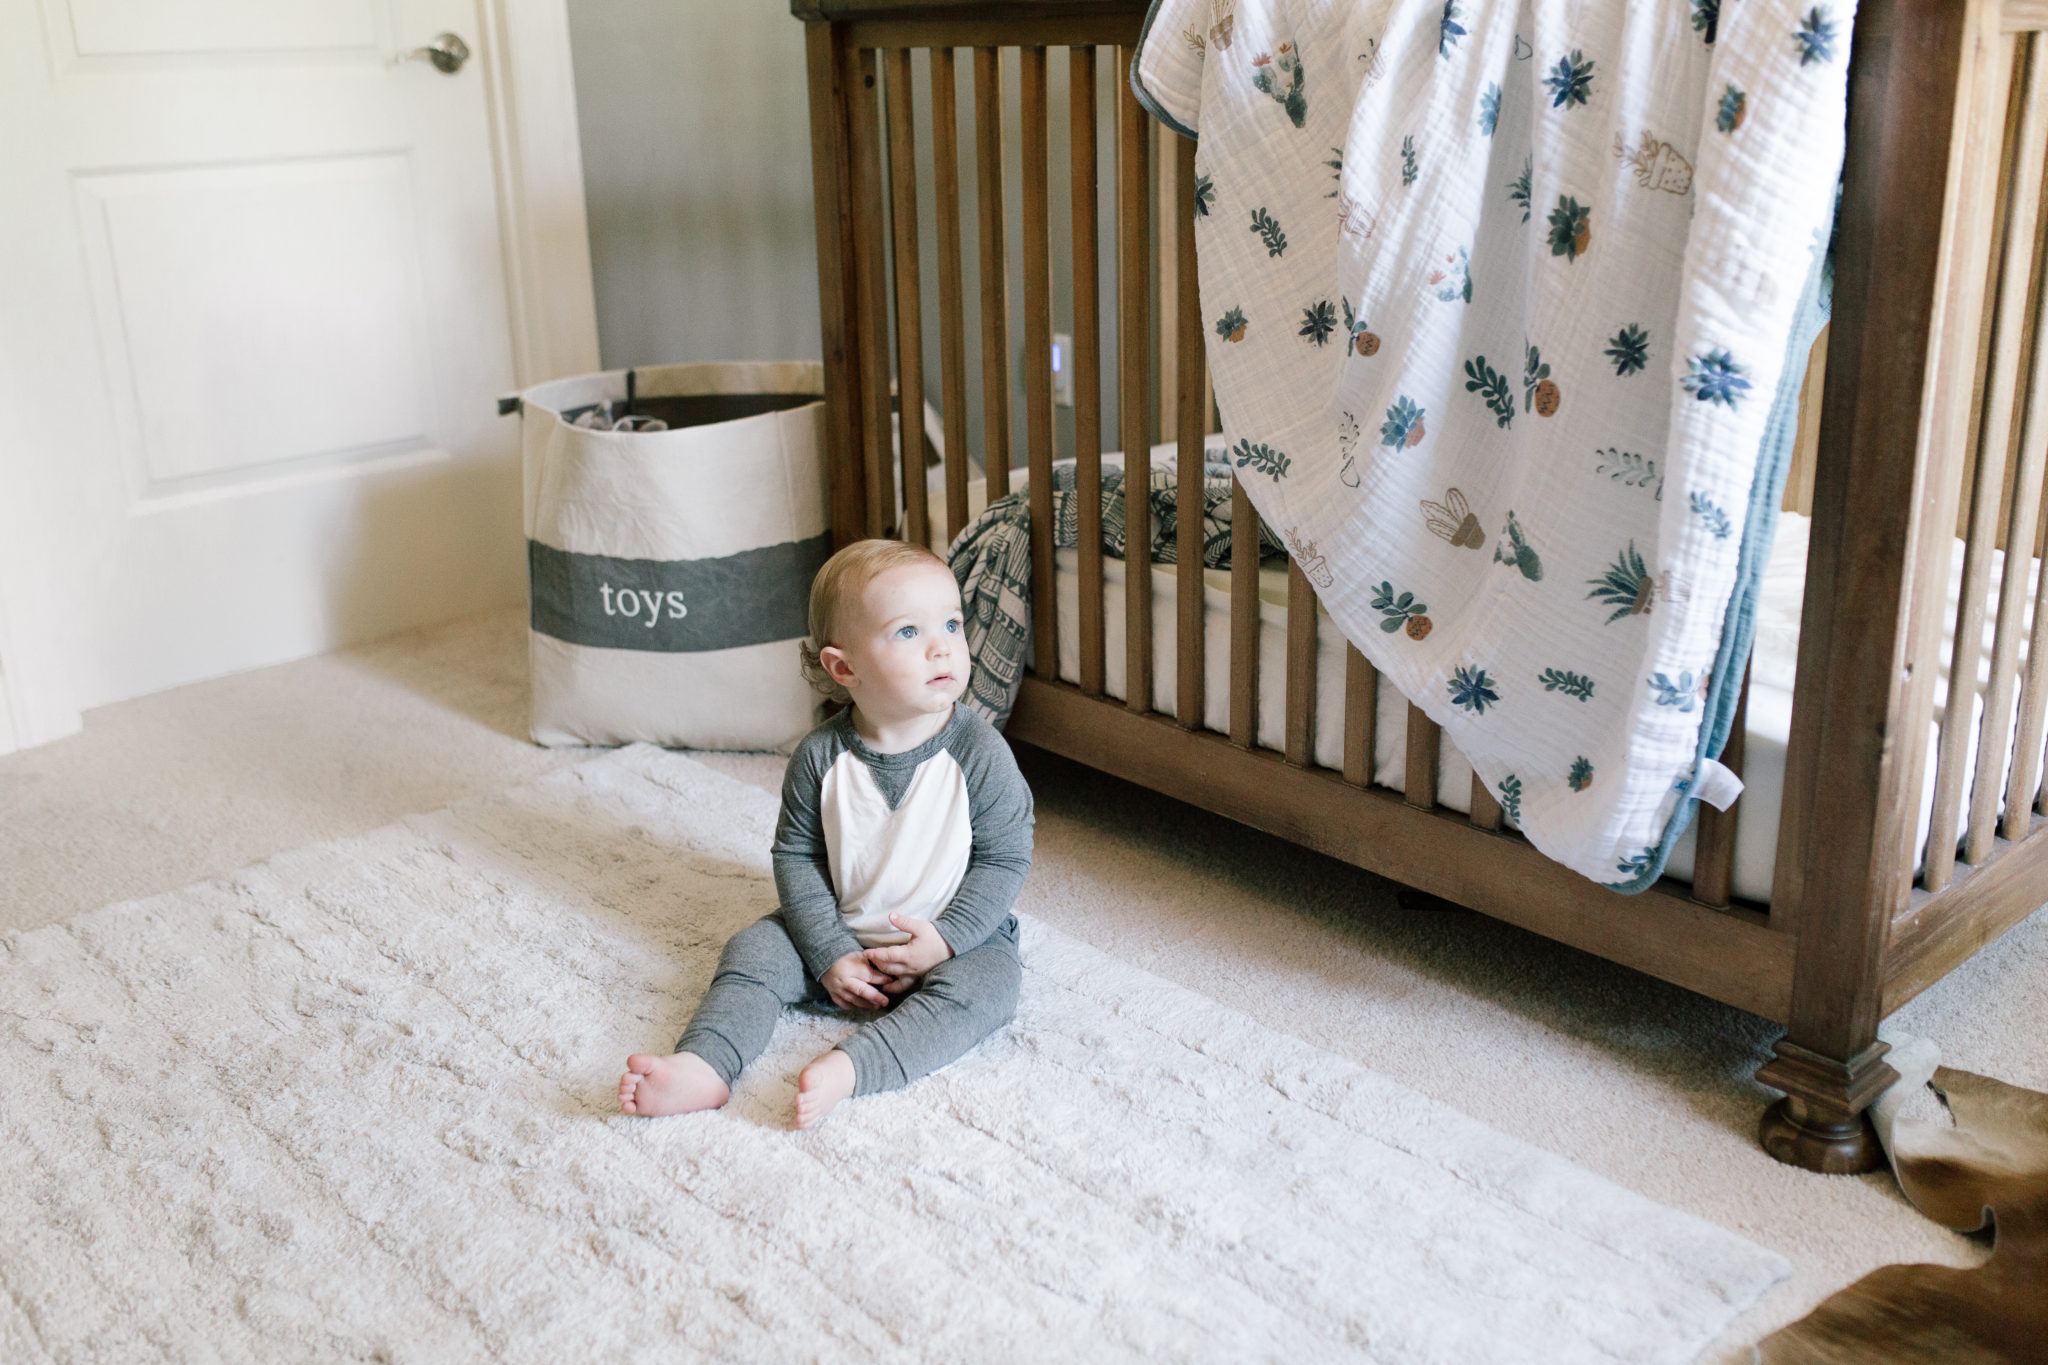
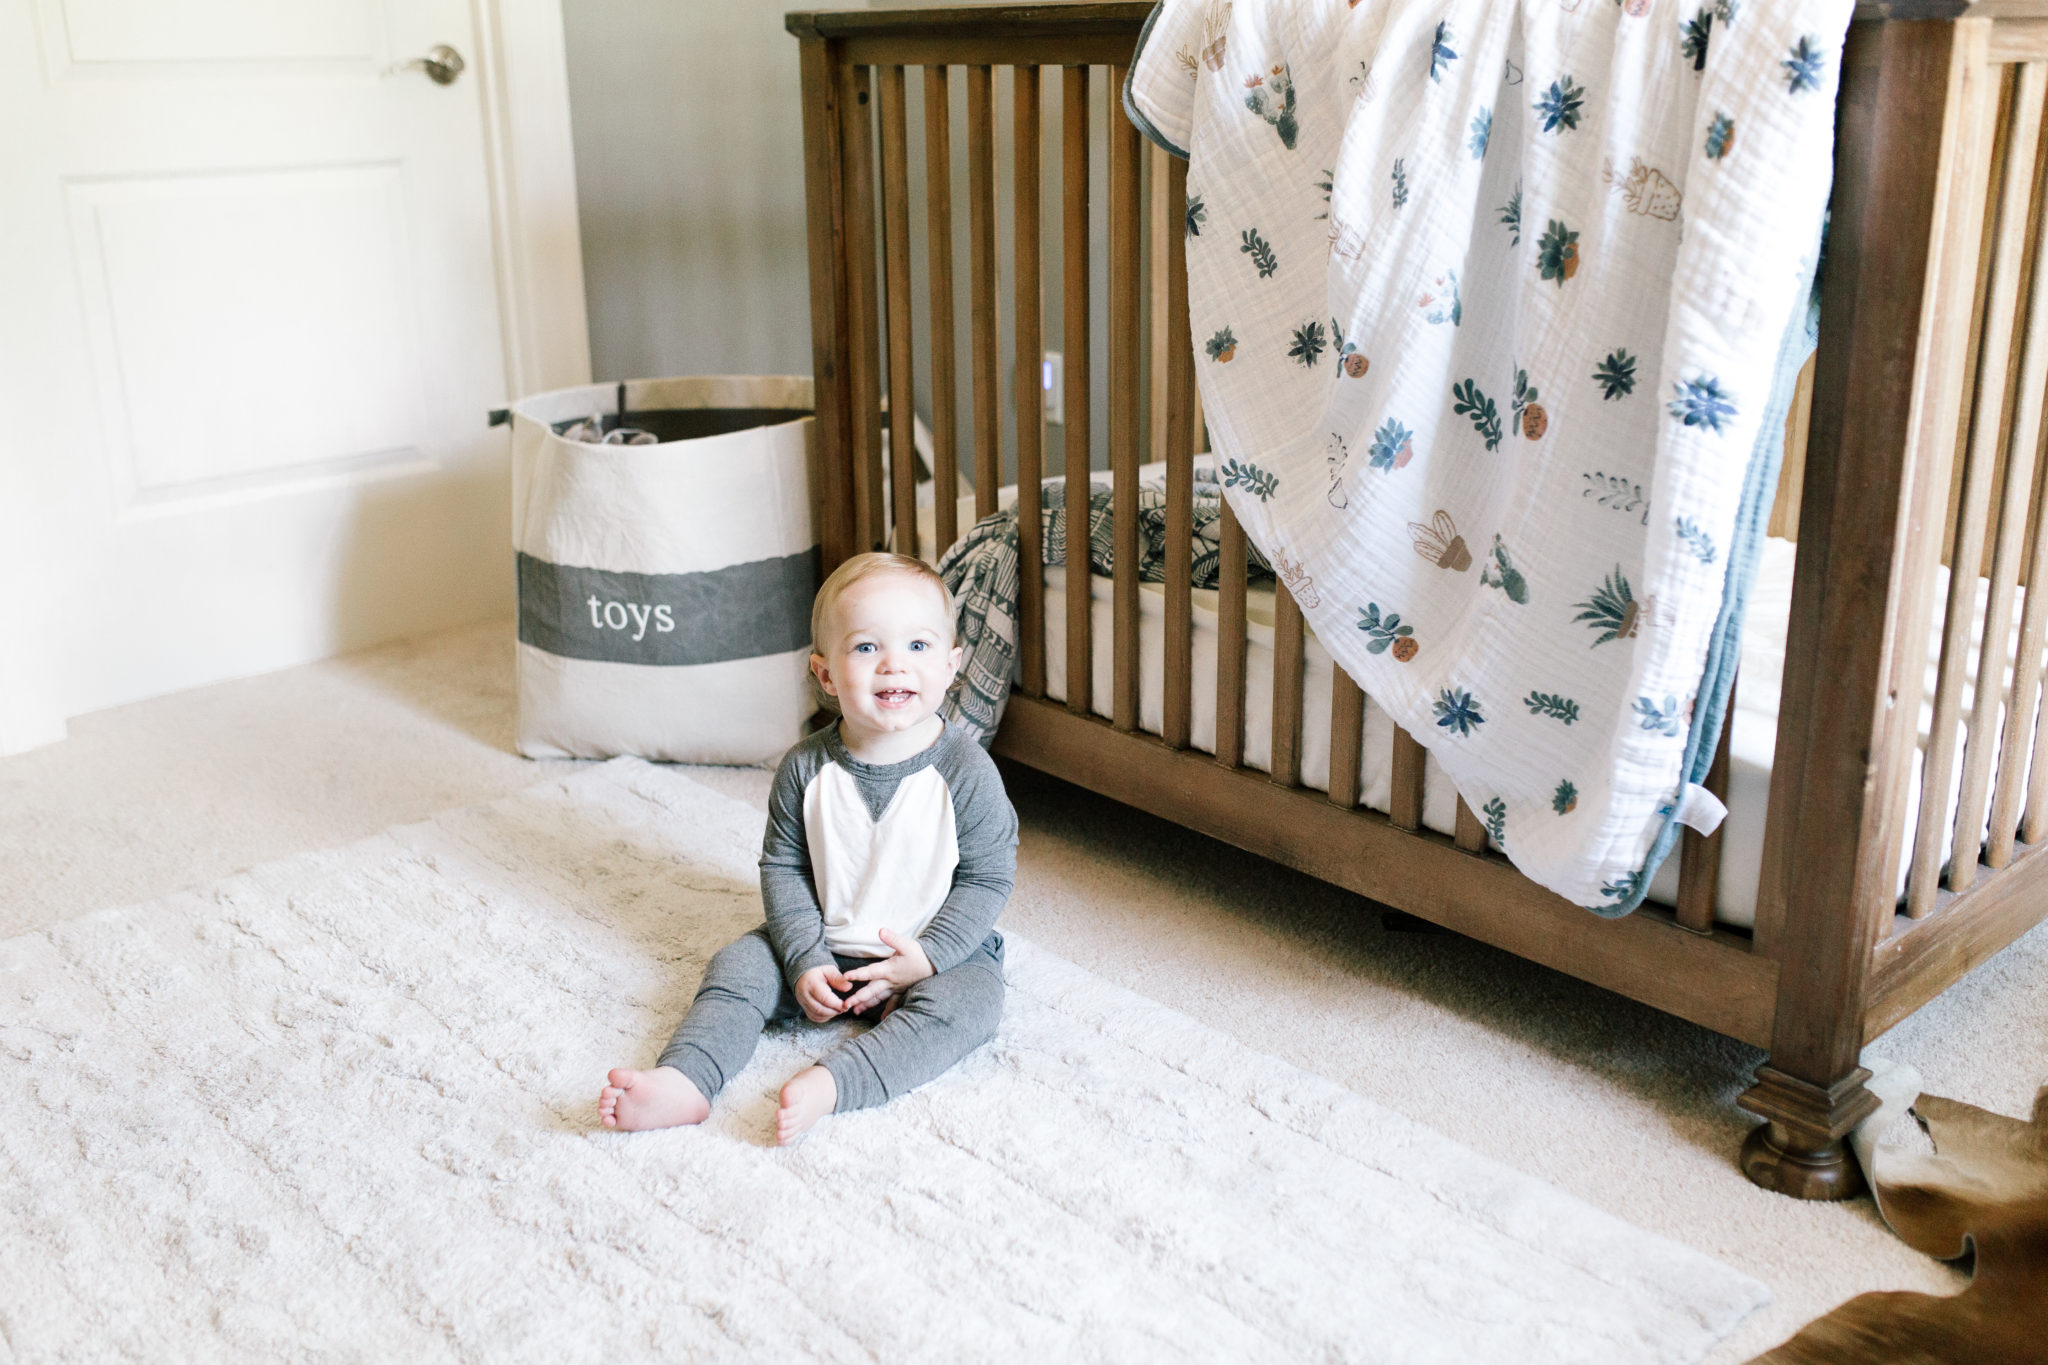
Just days left on the baby 2 countdown, so it was time to adjust the nursery to accommodate two babies. We plan to be in a new house before this babe will need his own nursery. It was a better option to make G’s room more suitable for both of them. Baby 2 will be in a bassinet in our room for these first several months. When we make the move, each boy will get their own room.
First, I added a rug to the room. It was important for G to have plenty of places to play. Currently, we have a couple things for him to play in our room. Since the new baby will be sleeping in there a lot (hopefully) I wanted him to be able to play in his room more. This Lorena Canals was perfect for that. It’s machine washable, all natural (no VOC’s!) and handmade. I kept it neutral so it can grow with him or go in any space later.
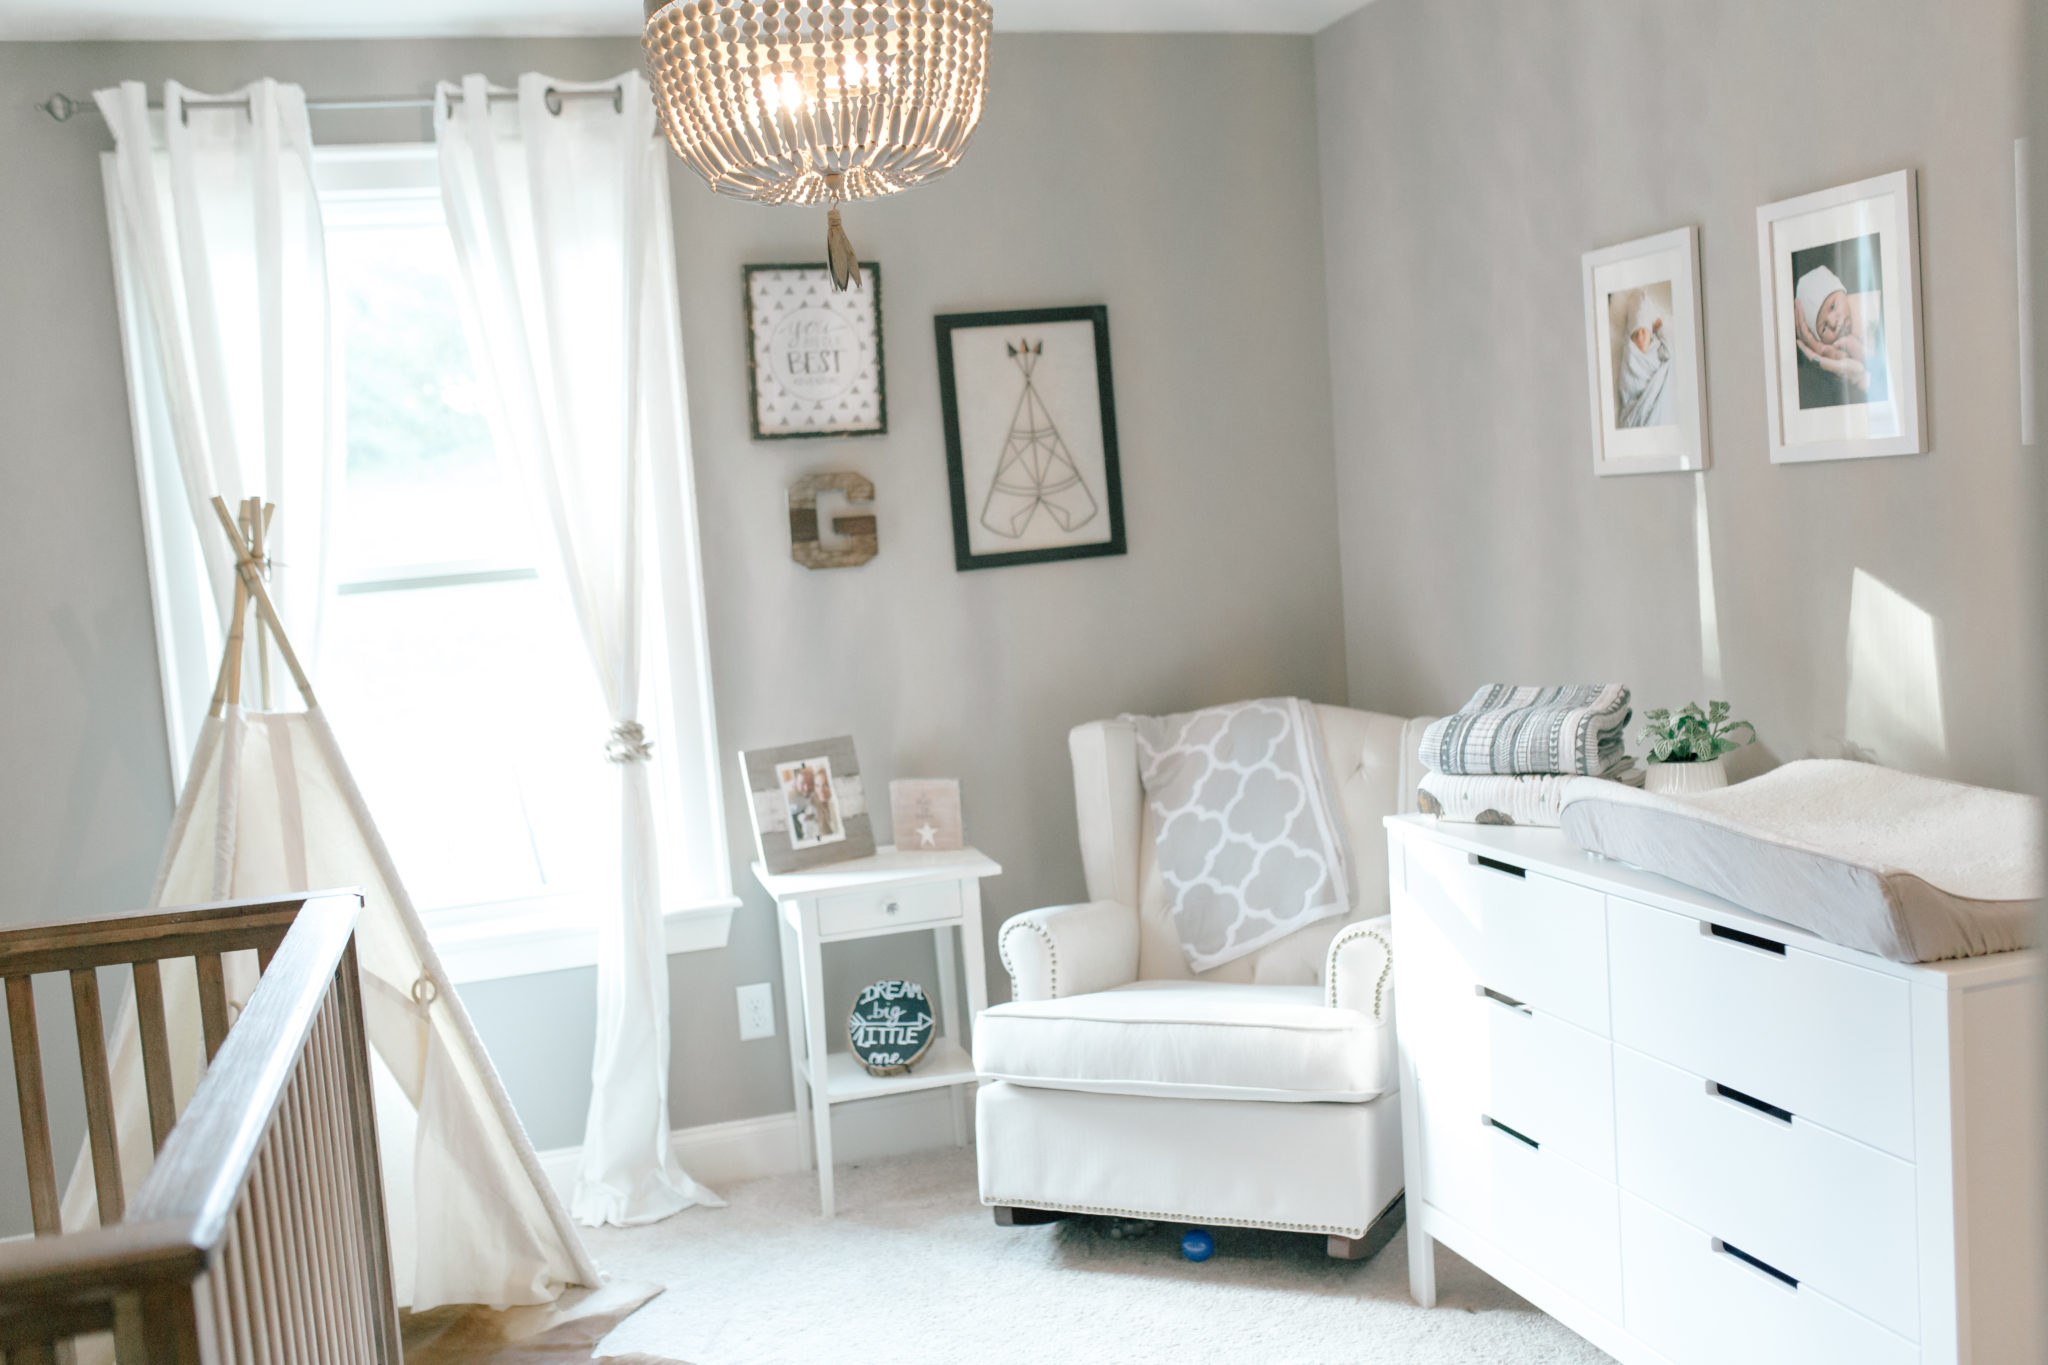
Next, I switched up the changing table/dresser. Previously, I had a changing table that was open on the bottom with some baskets. That is now in the closet underneath the hanging clothes, with accessories and various items. This Carter’s by DaVinci Dresser was clean and simple, but provided more adequate storage. The top can also be a changing table. I saved the top drawers for each of the boys’ diapering needs. Then each boy has a side with their most worn clothing items for the easiest access.
We also added the first letter of baby 2’s name to the collage near the rocking chair. (I took it down for the picture, to keep it a secret!) Once he is here we will also change up the pictures in the frames to include both boys’ sweet faces. 🙂
Lastly, I found these closet dividers with months on them. I sized the closet from newborn- 2T so both of their clothes could be organized together.
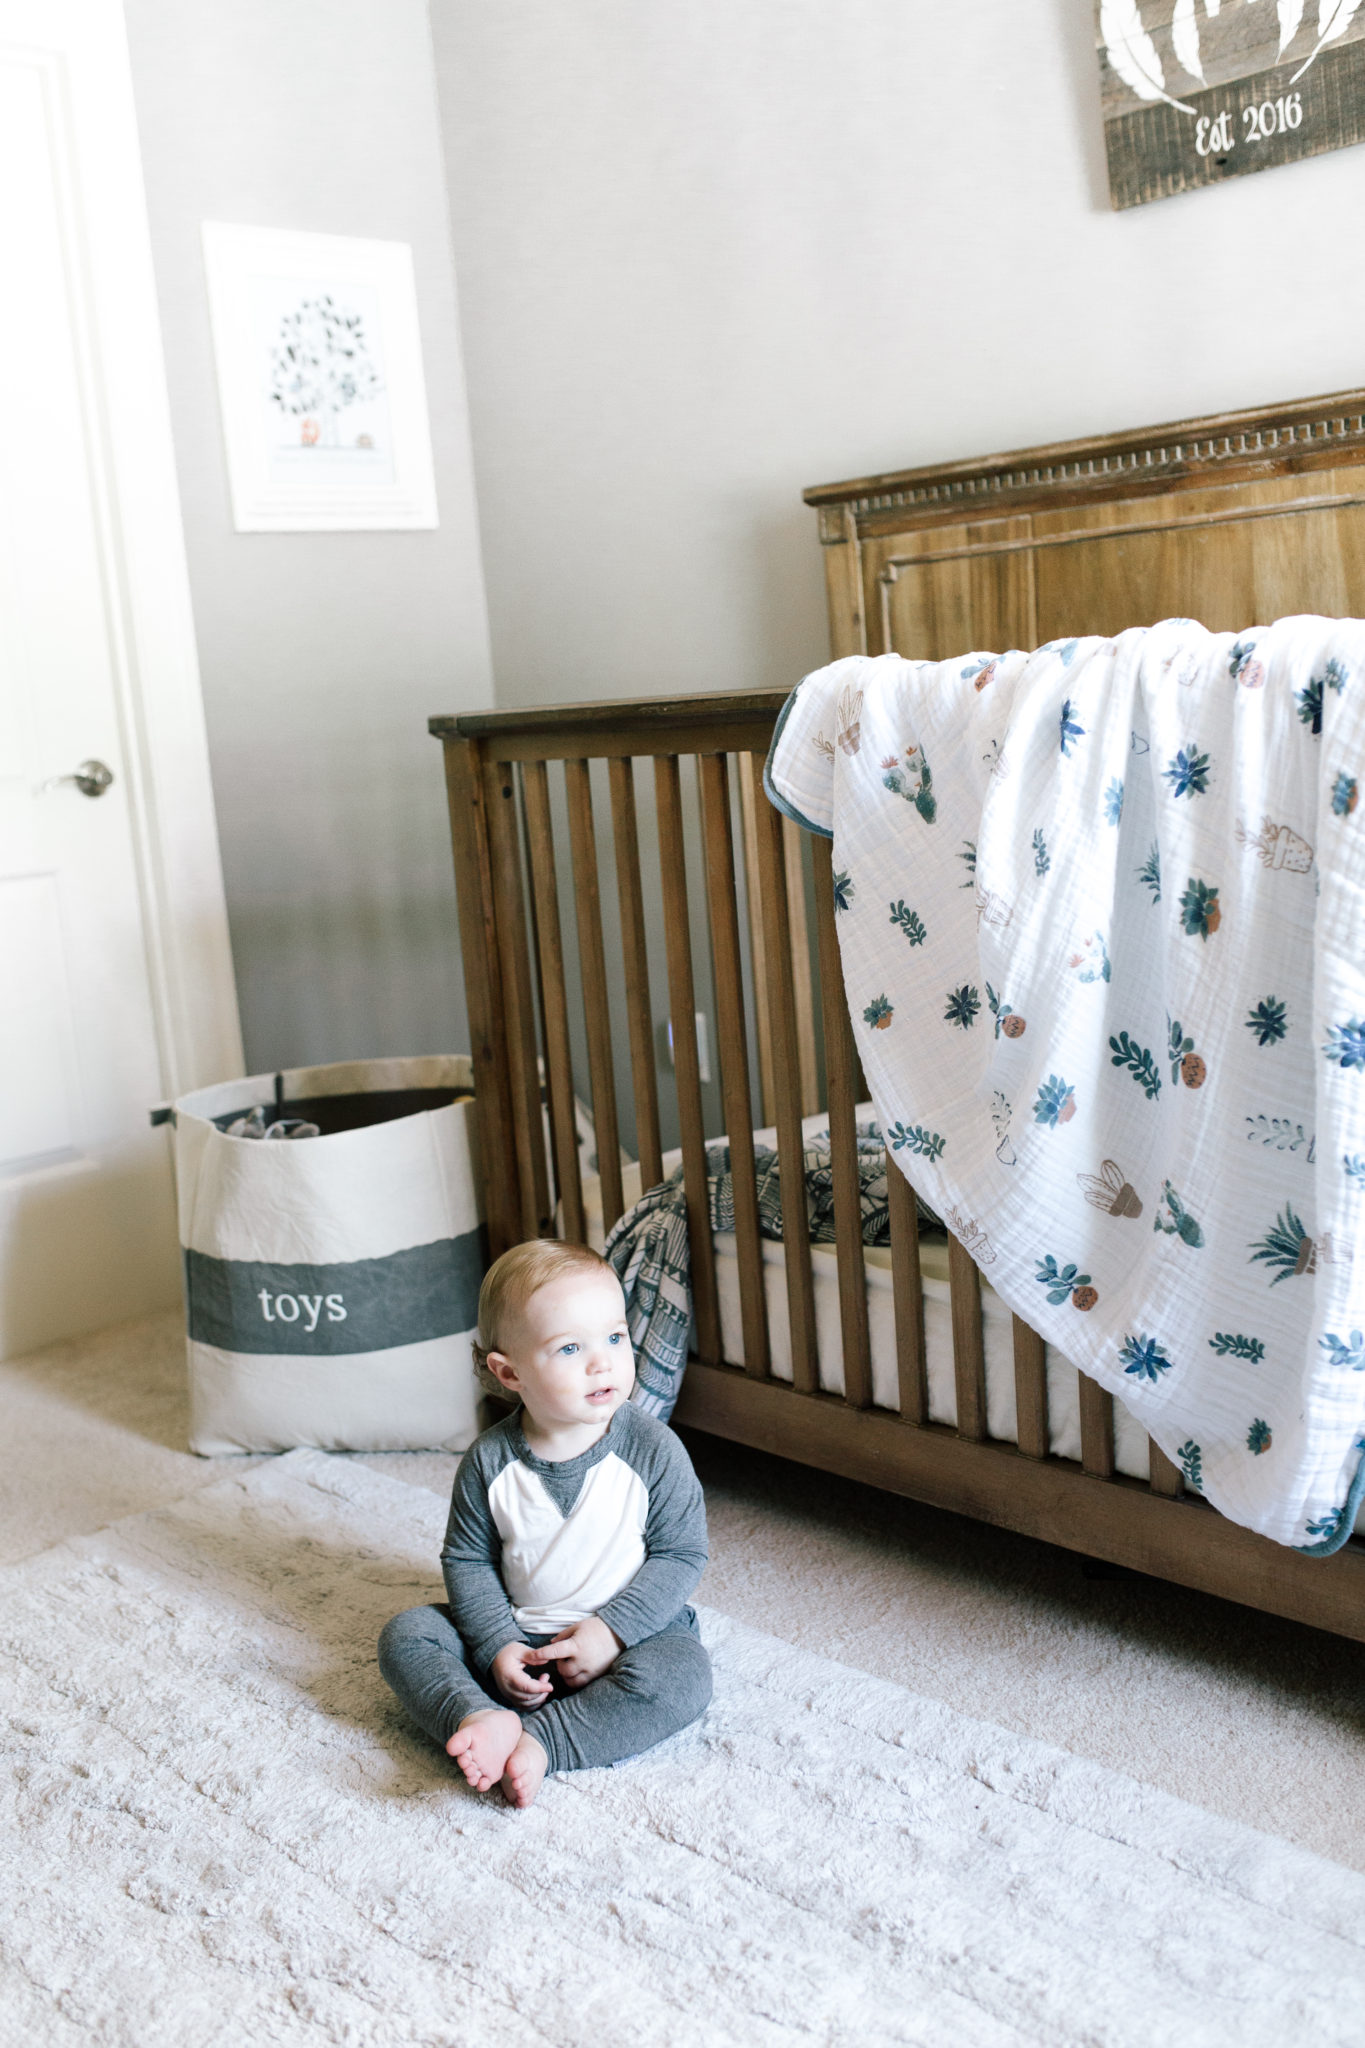
I’m so excited to welcome a new precious little guy into our home, and for G to become a big brother! That doesn’t stop the mom guilt about him not getting the attention he needs, but it’s really helped having Trey home more with the long holiday this past weekend. We were able to really give him lots of QT and soak in the last days of being a family of 3!
P.S. G’s little outfit is from Moon & Beck. They are local out of Nashville, and it’s the softest fabric EVER. (Bamboo and Spandex mix.) A lot of their stuff is mix and match, and I stocked up for him and for the new babe.
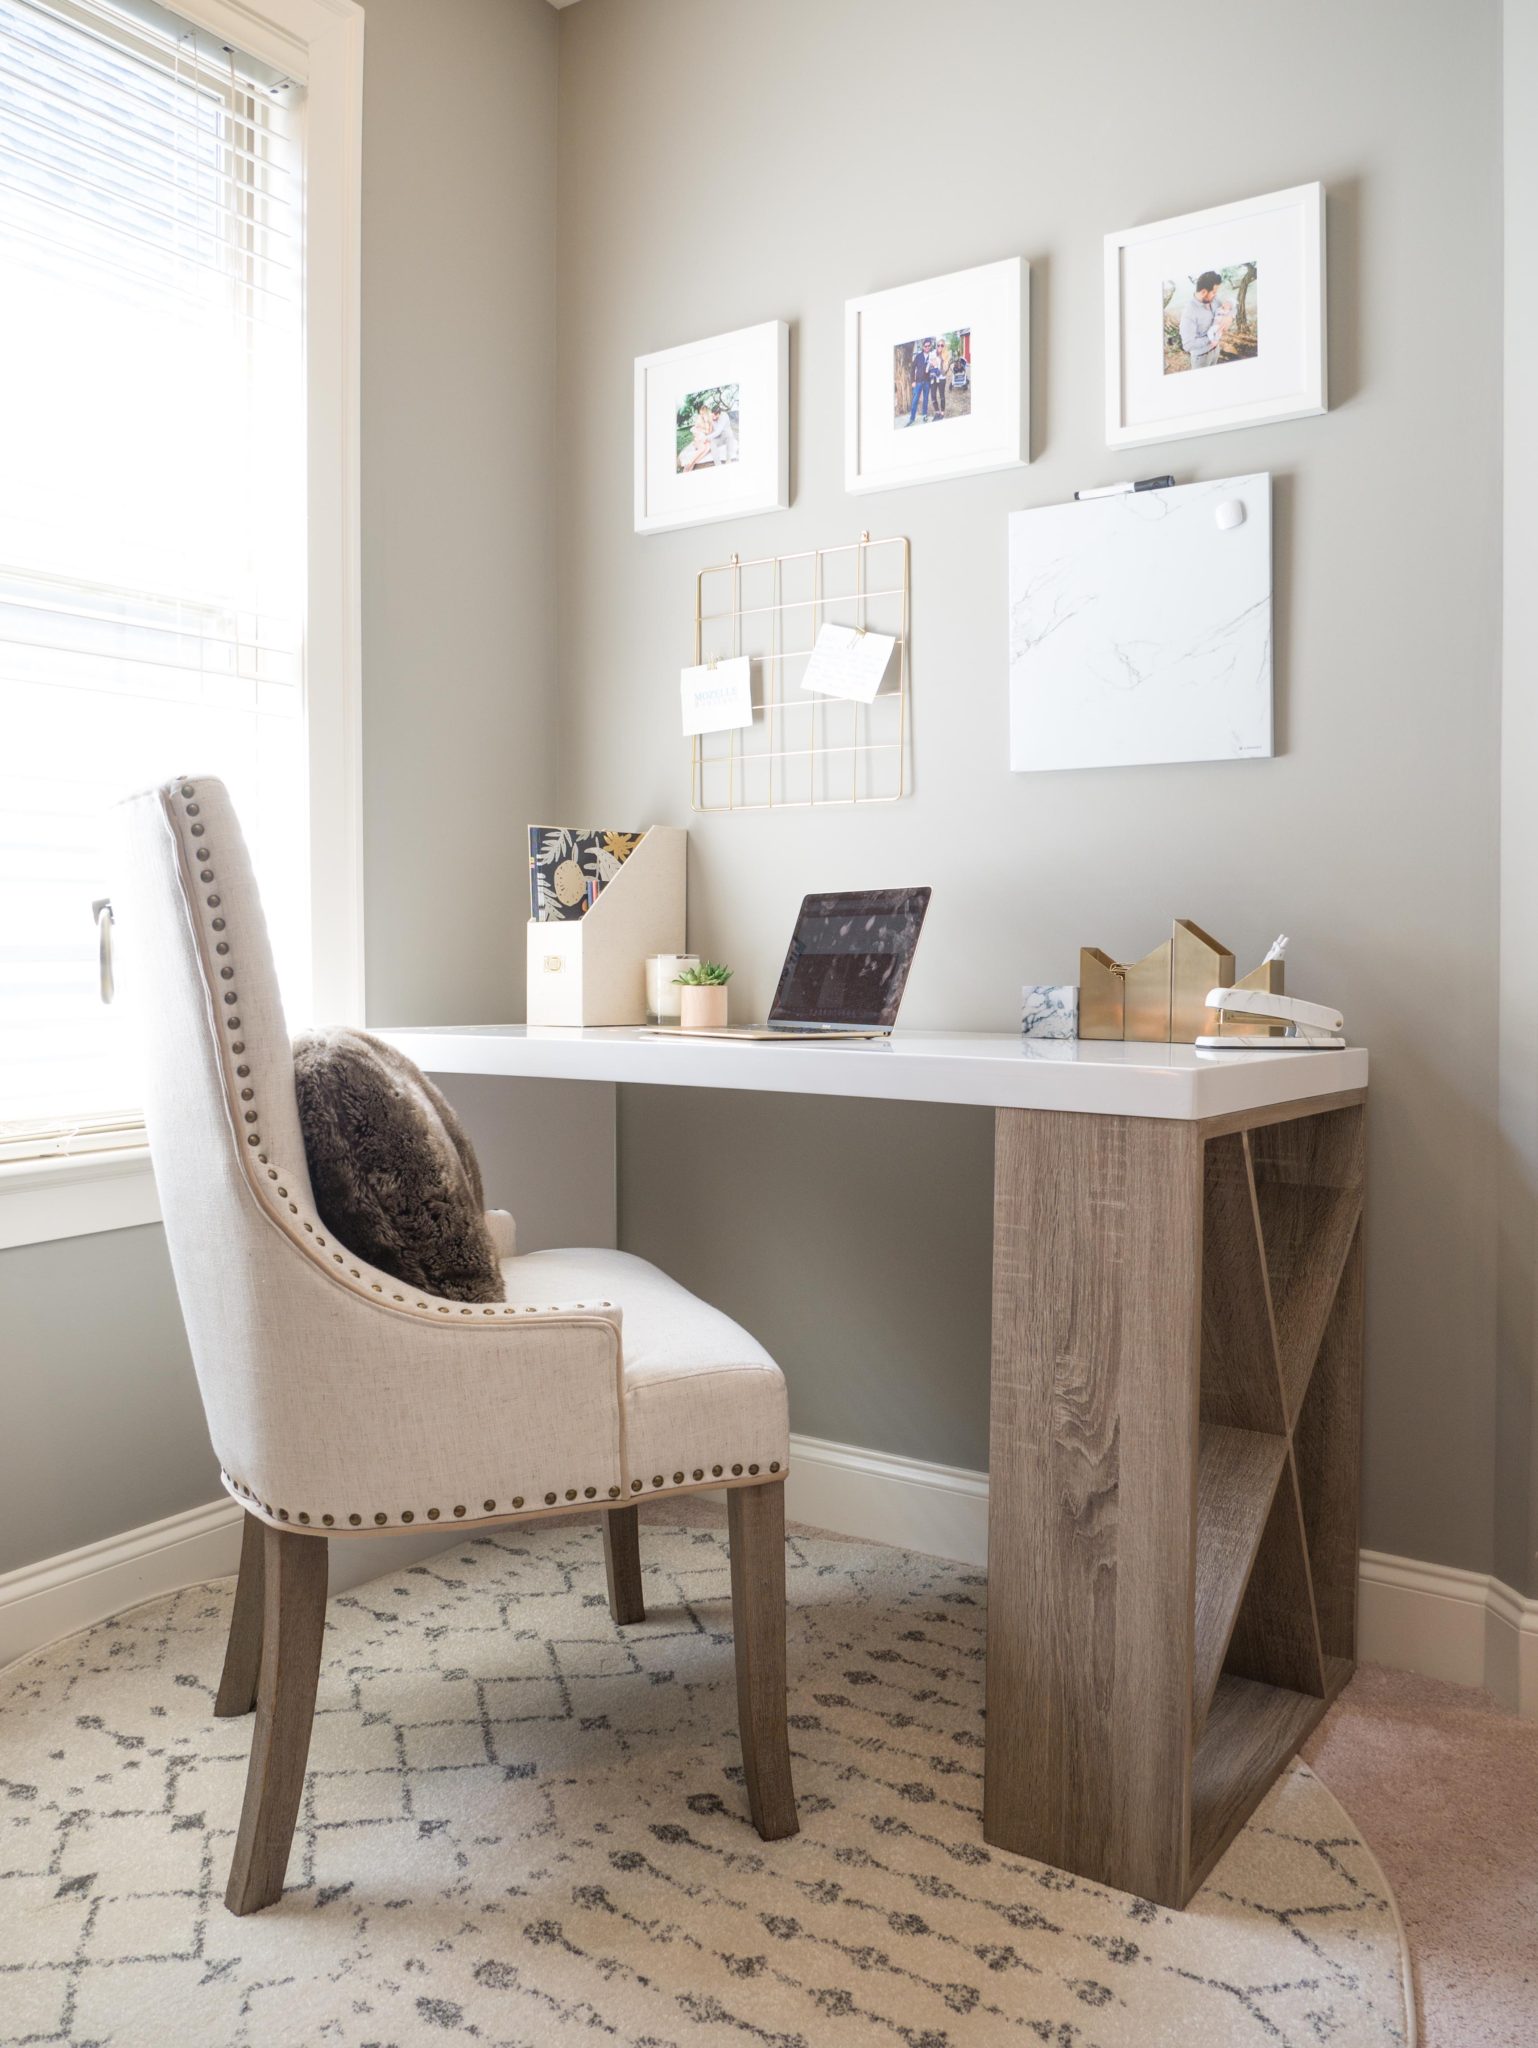
I have been wanting an office since I started the blog, but kept putting it off due to only having a small space to put it in. We are currently on the house hunt, and I would tell myself that once we are in the new house and have a whole extra room for an office, then I would design one. BUT, why wait?! My back was starting to kill from working at our bar with a backless bar stool, and I was keeping my files in the laundry room. It just wasn’t productive at all. SO I made the most of a small space we already have at the landing of our stairs and I’m so glad I did.
You can virtually put an office anywhere. In a guest bedroom, the landing of a stairwell, in a nook, in a sunroom, the possibilities are endless.
5 Tips for a Small Space Office:
1. I think finding a good rug that helps defines the space is key. I went with this round rug, because it was a great fit for the small space that I had. Nuloom rugs have so many great rug choices, and I knew they had great quality. It’s also under $100, and since we are moving soon I looked for something with a neutral print that I know will work in the new space as well.
2. Find a small desk that still packs a punch. I couldn’t decide if I wanted the sleek all white desk or something a little more rustic and this one was the best of both worlds! Just because you don’t have much room, does not mean that you have to skip on style. I really like how sturdy this one is, and clean looking.
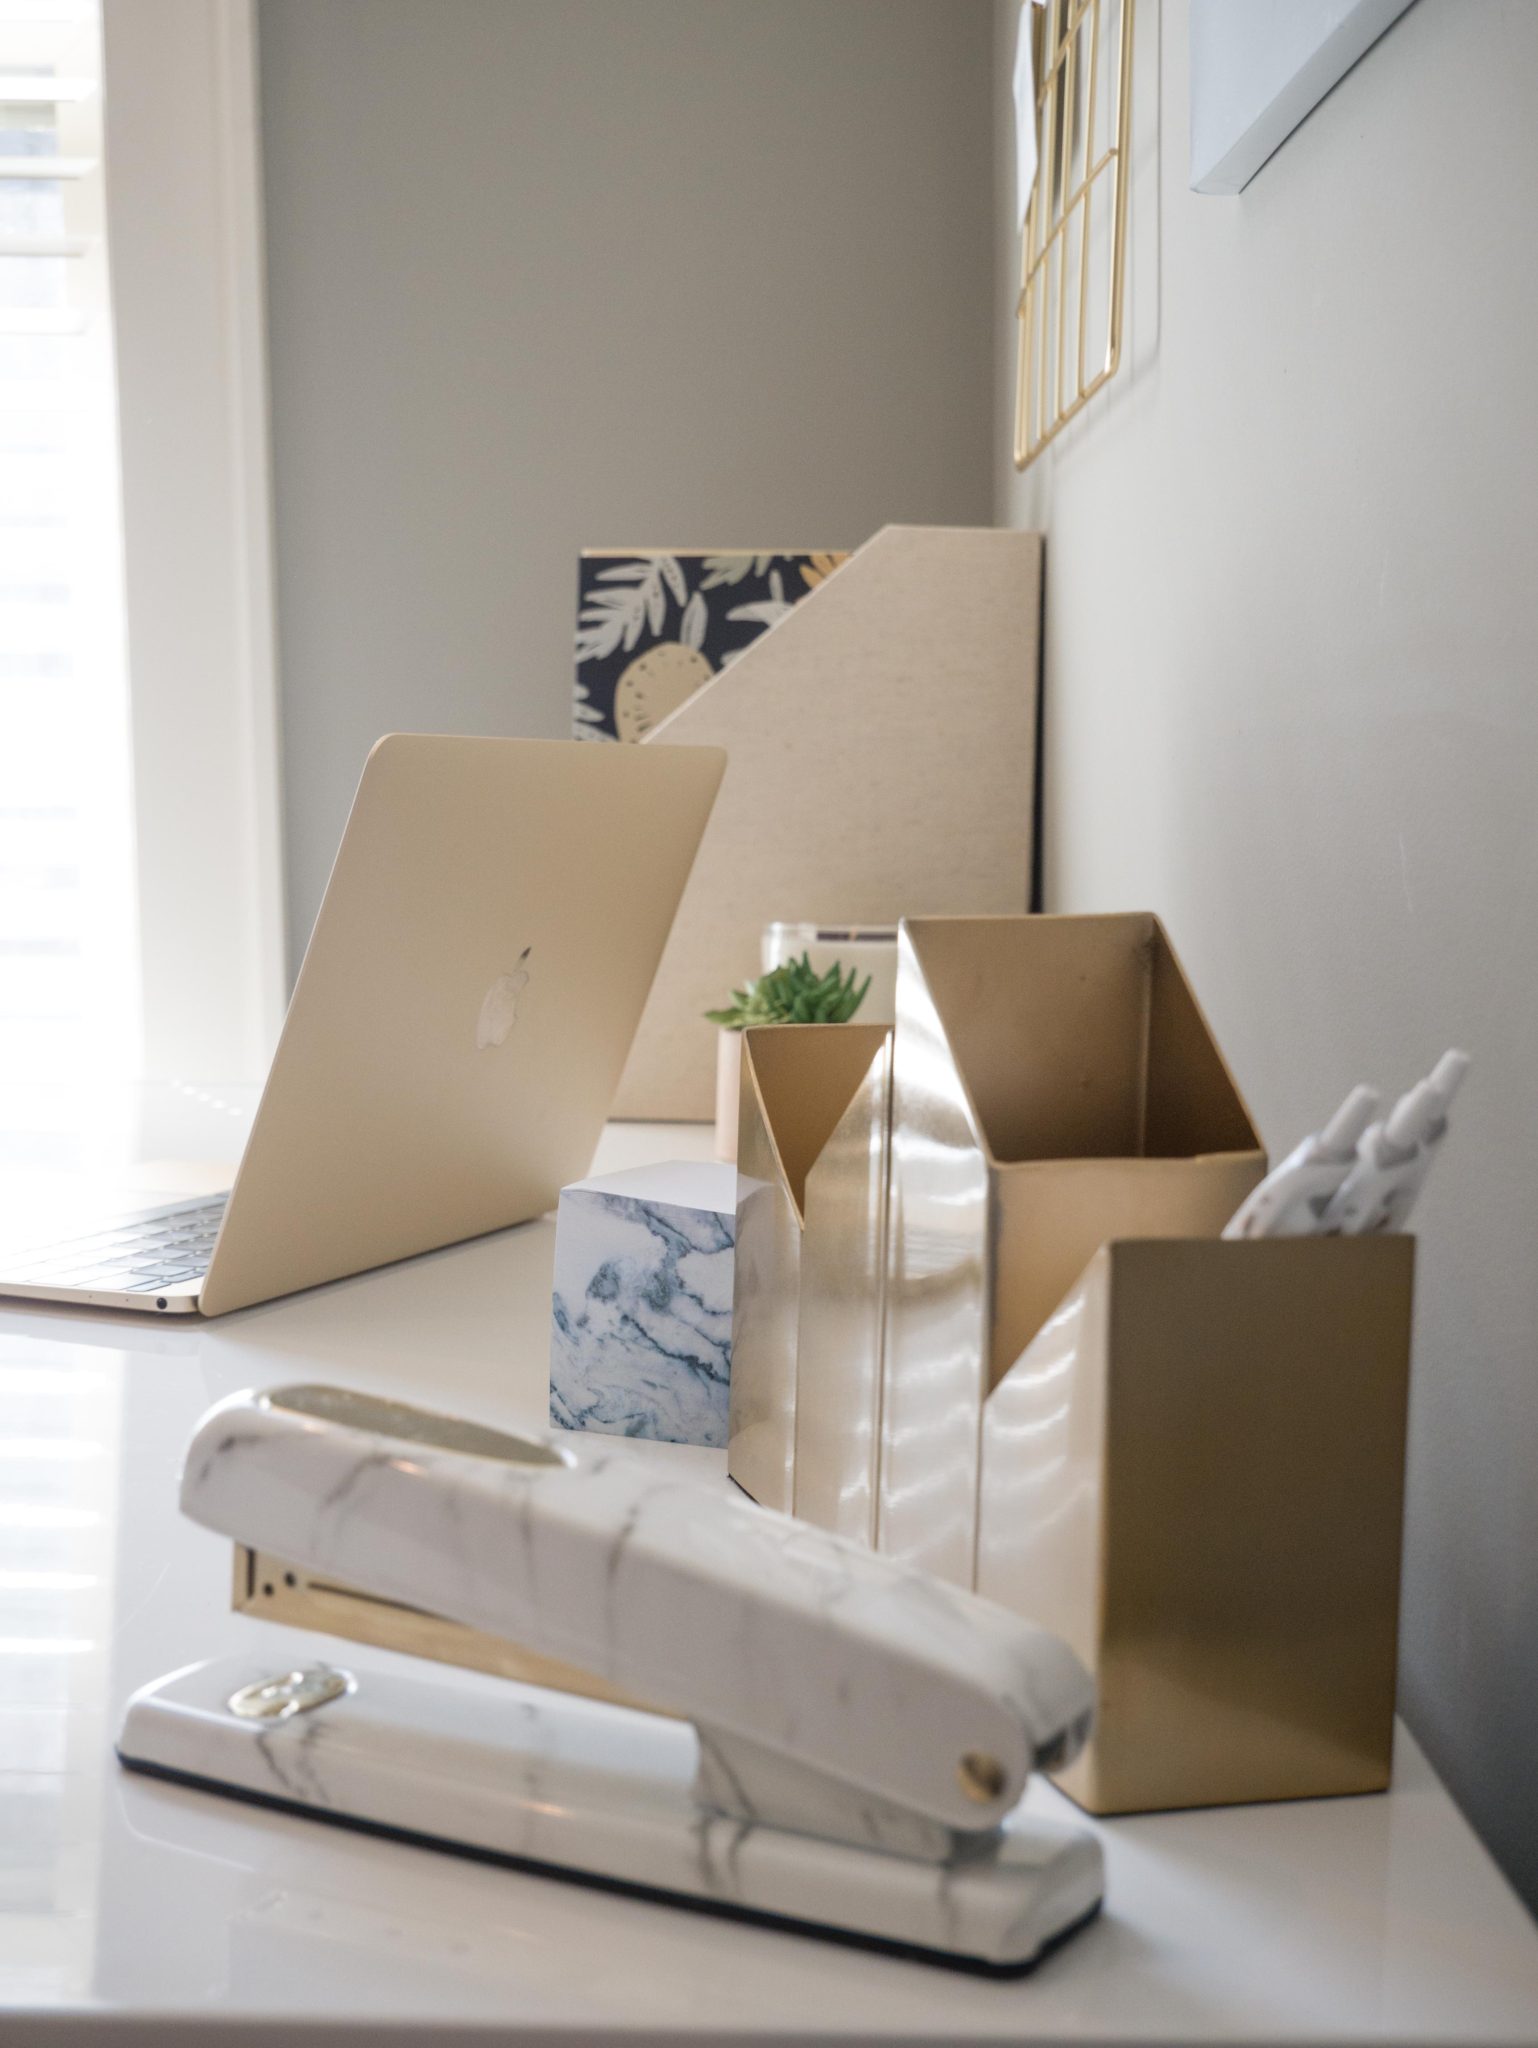
3. Find yourself a comfortable chair. Now that I have really been focusing an extra free time I have on the blog, I spend a LOT of time at my desk. You really want to be comfortable there. In my opinion, comfortability leads to productivity. It’s highly unlikely I will sit somewhere and really be able to focus and cross things off the to-list if I’m uncomfortable. For me I was looking for something with a tall back and a little bit of an arm rest. I loved that this one had the gold handle detailing on the back and the nail heads to add some style.
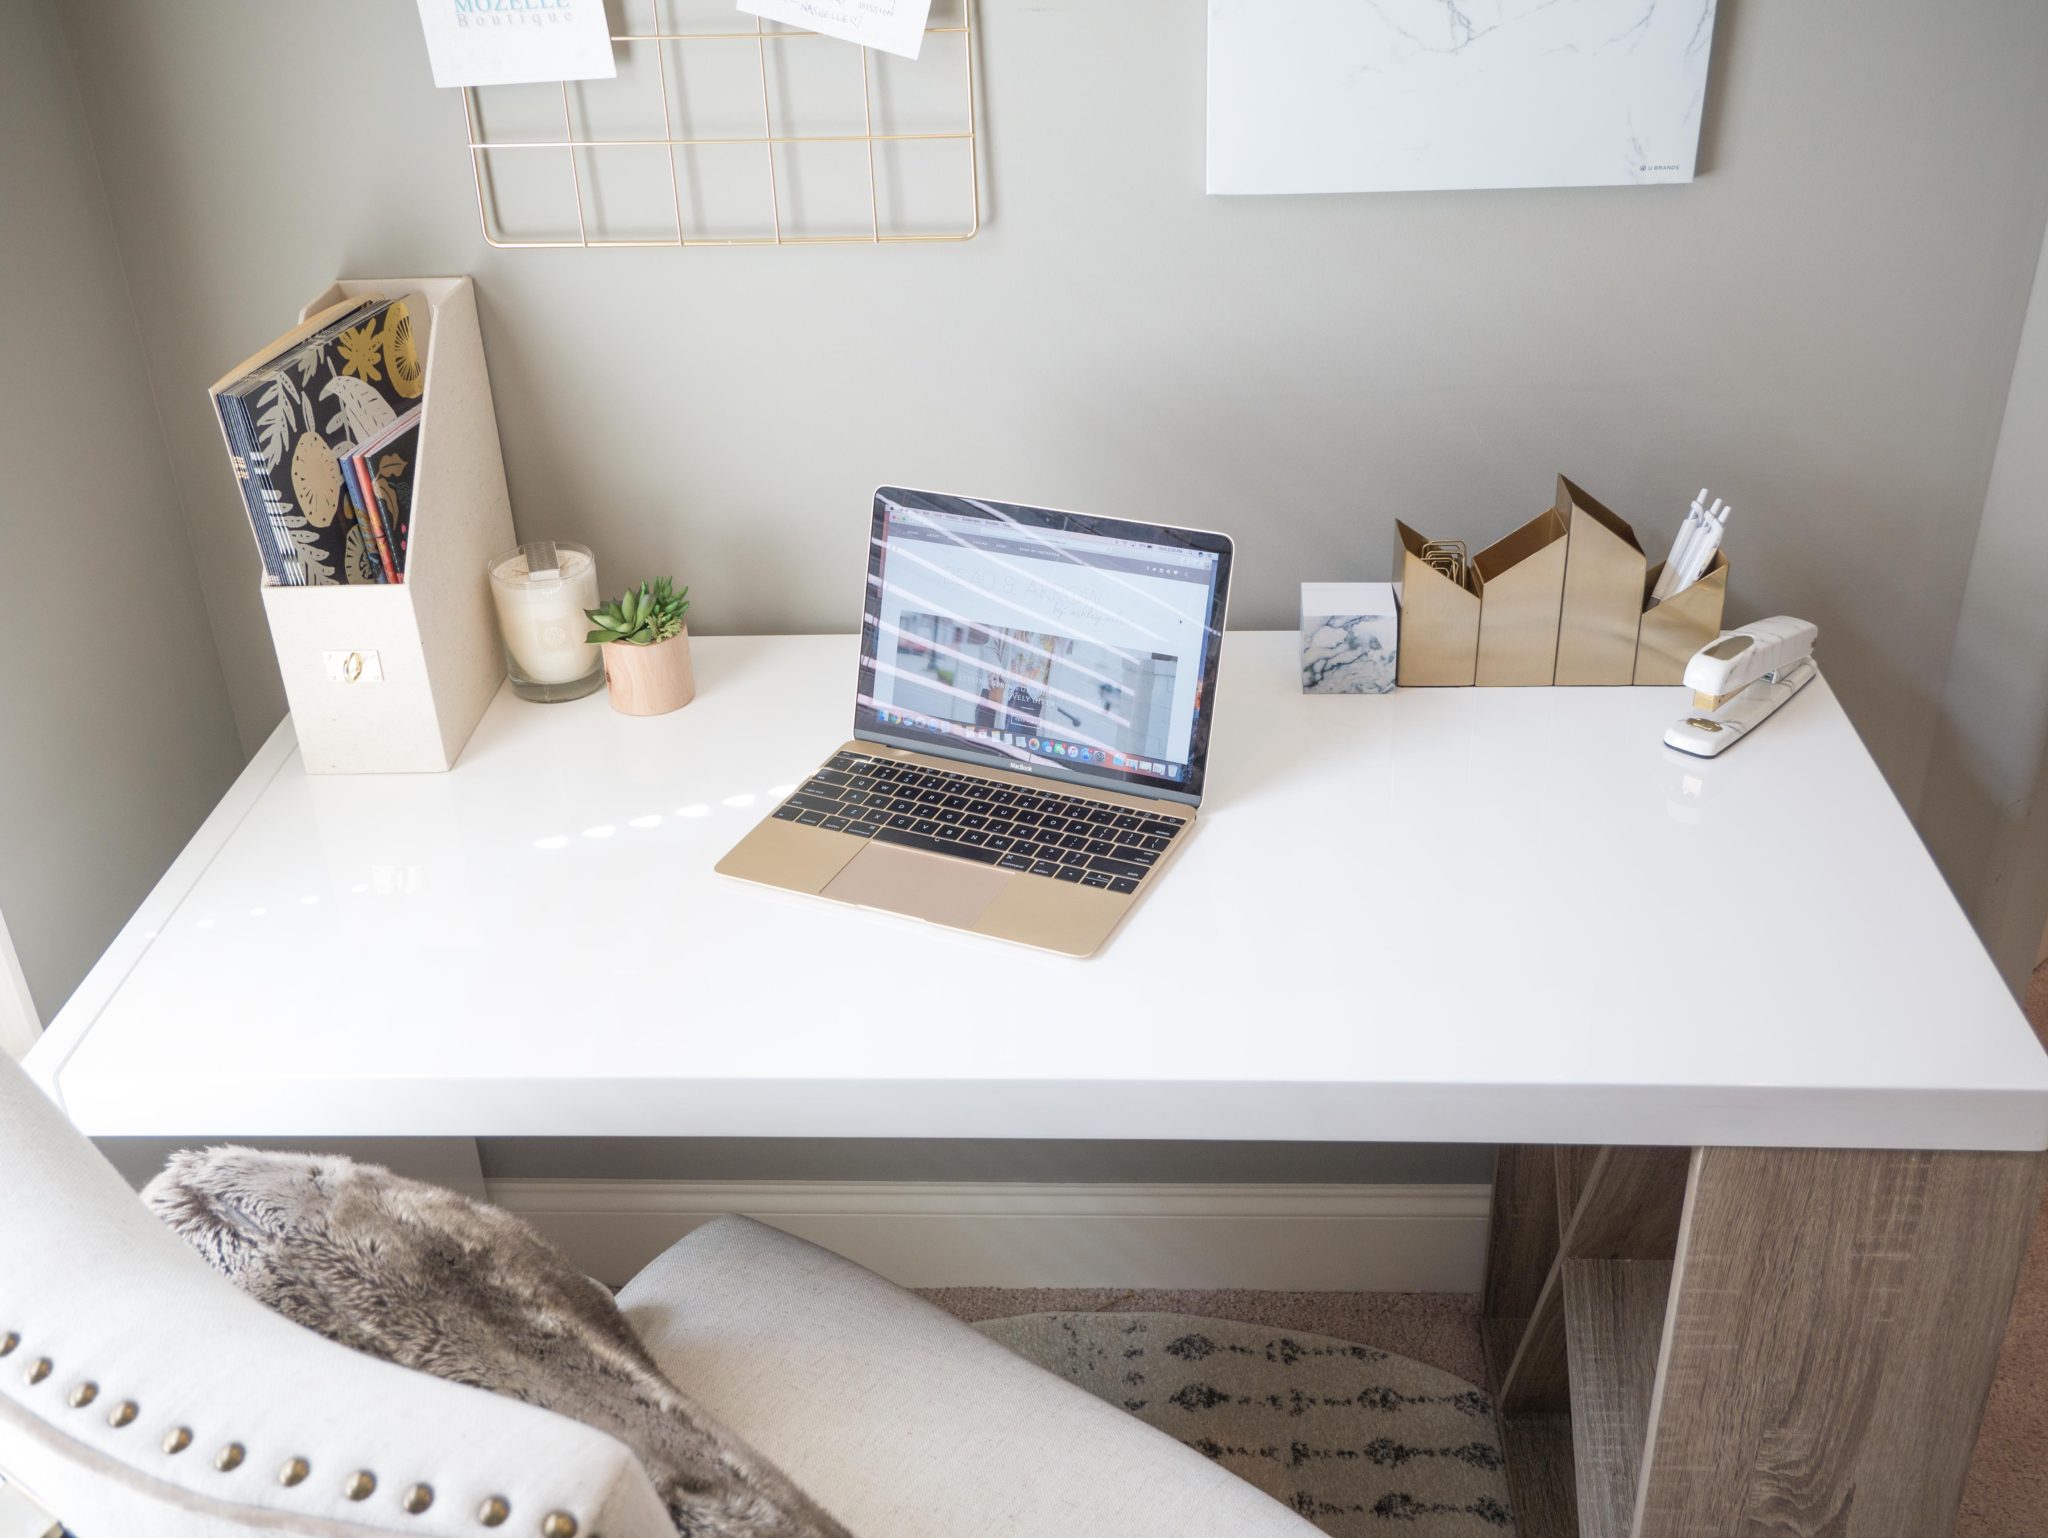
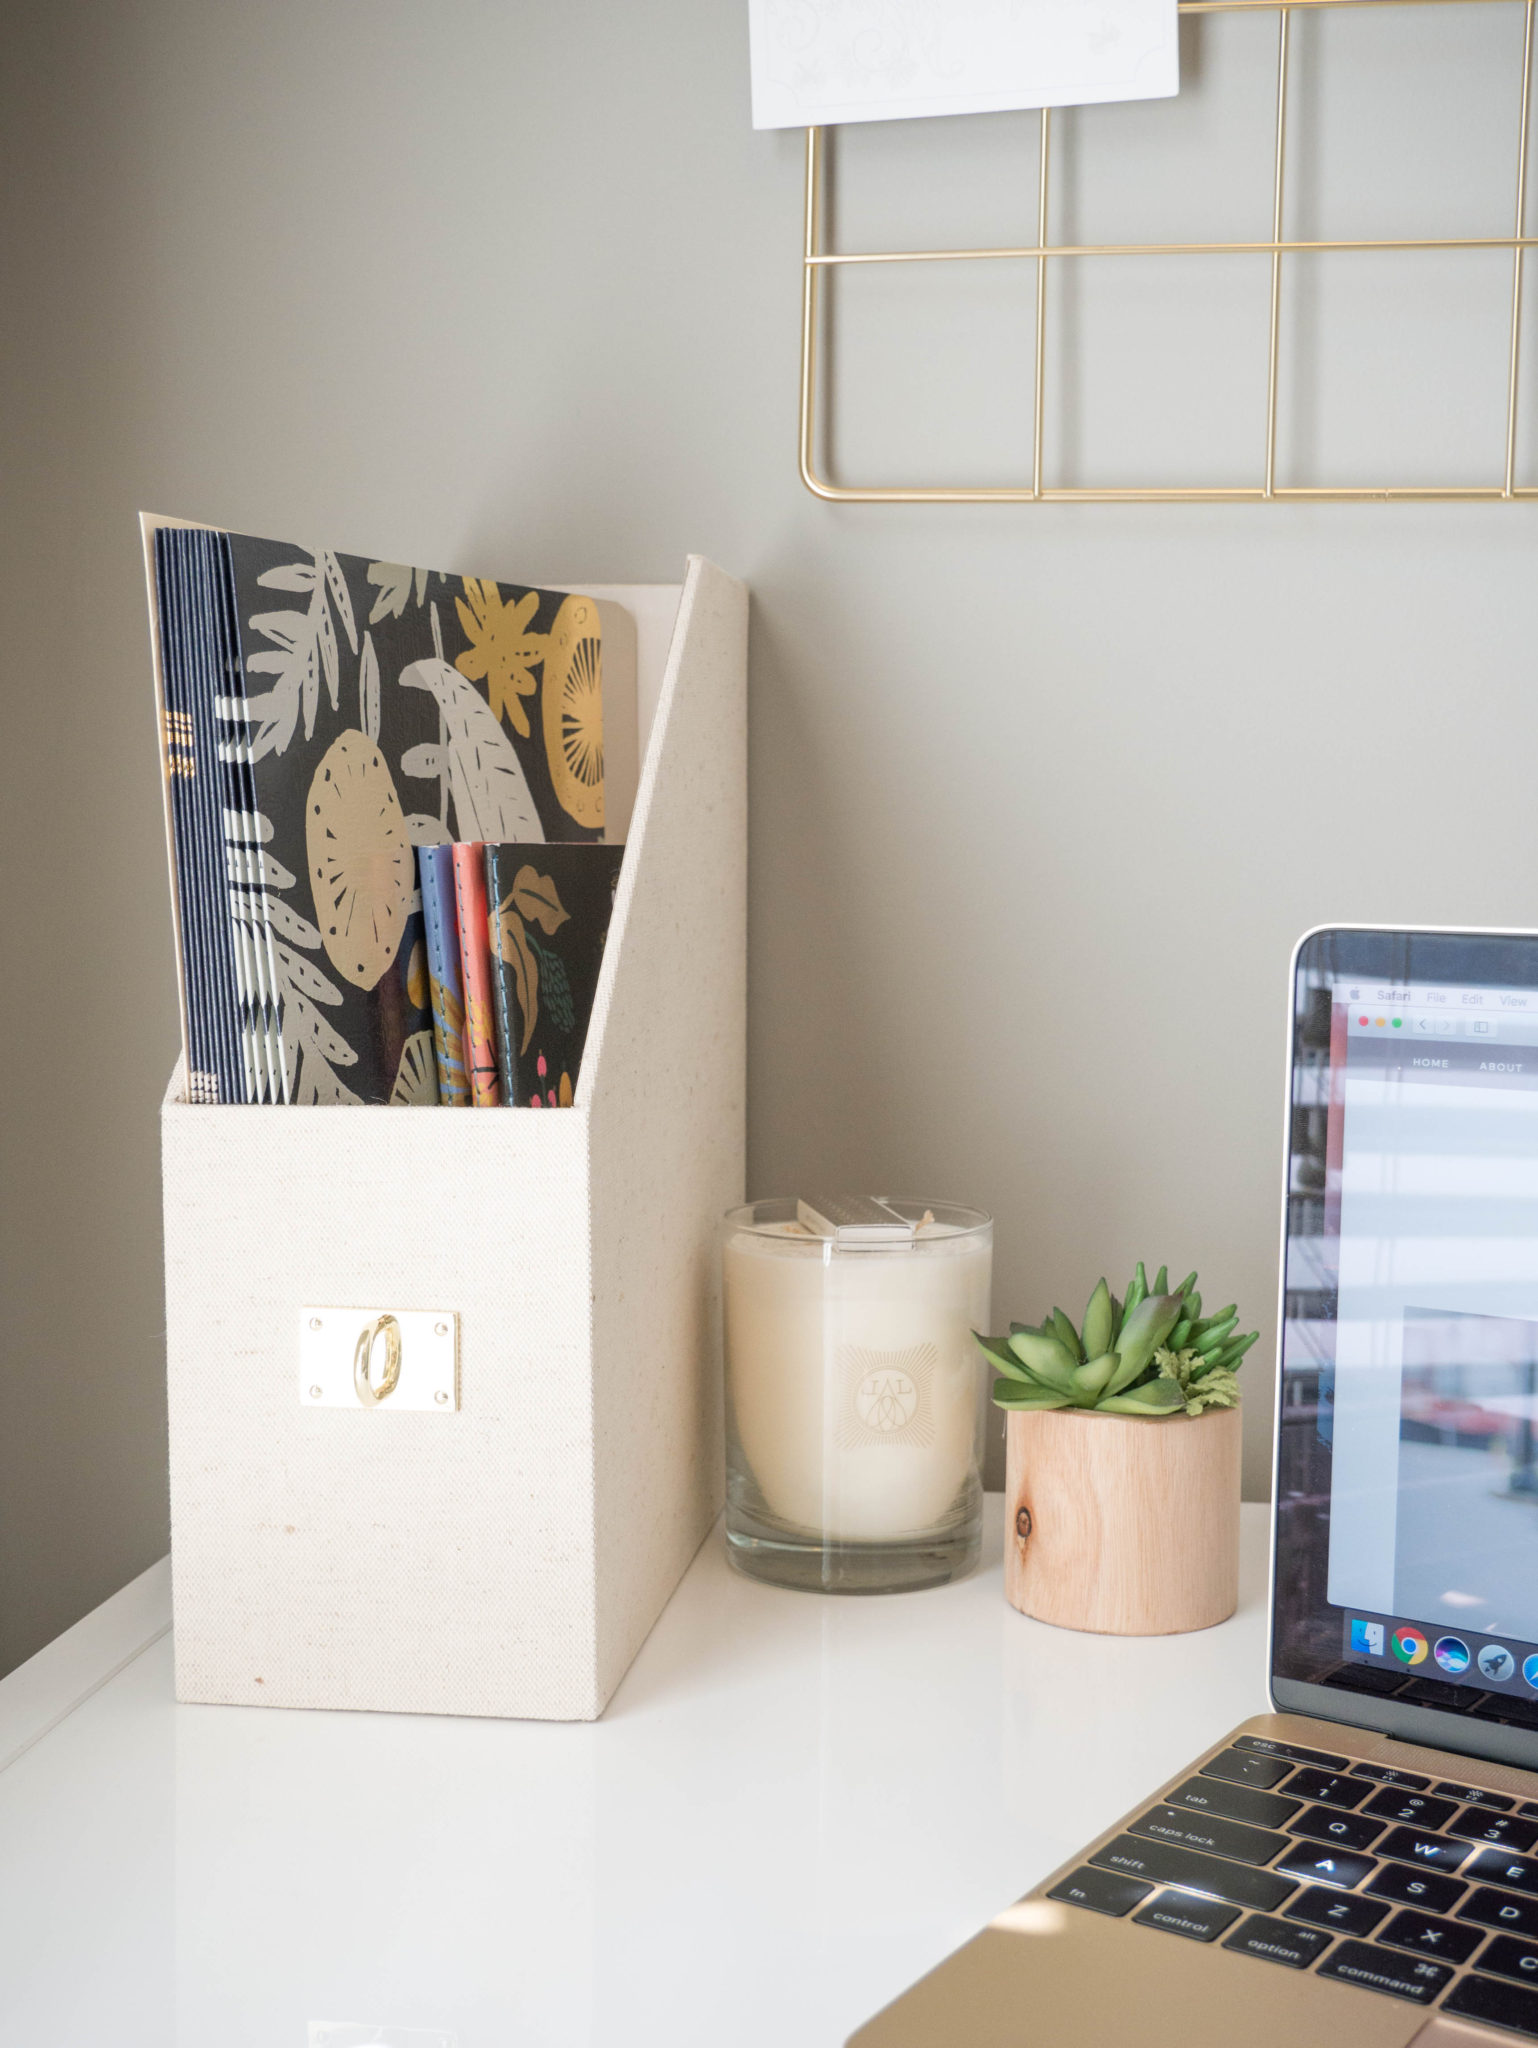
4. Organization! One of the main points of me getting a work space was so that my folders, binders, calendars, etc were no longer in the living room. I went with a neutral file folder holder with some gold detailing. I actually need to go back and get two or three more. The great thing about these is that you can get as many as you need and stack them together. I also found a gold pencil holder that had plenty of space for scissors, pens, paper clips, and any other odd and end office supply that I might need. When everything is neatly organized and within an arms reach it makes everything a little easier.
5. Have some wall space. If you are working with a small space, it’s best if you do have some wall space that you can hang what you need above your desk. I have pictures above mine from now from Framebridge, and this marble dry erase board and a hanging gold catch all board. You could also put more file folder space, a hanging calendar, or any other organizational tool in that area. It takes up far less room than file cabinets or bookshelves.
I’m so excited to final have a happy little workspace in my home and it’s inspiring me to really work hard and create lots of new content. Stay tuned for so many upcoming fun projects!